81
Chapter 15
Manage the Router
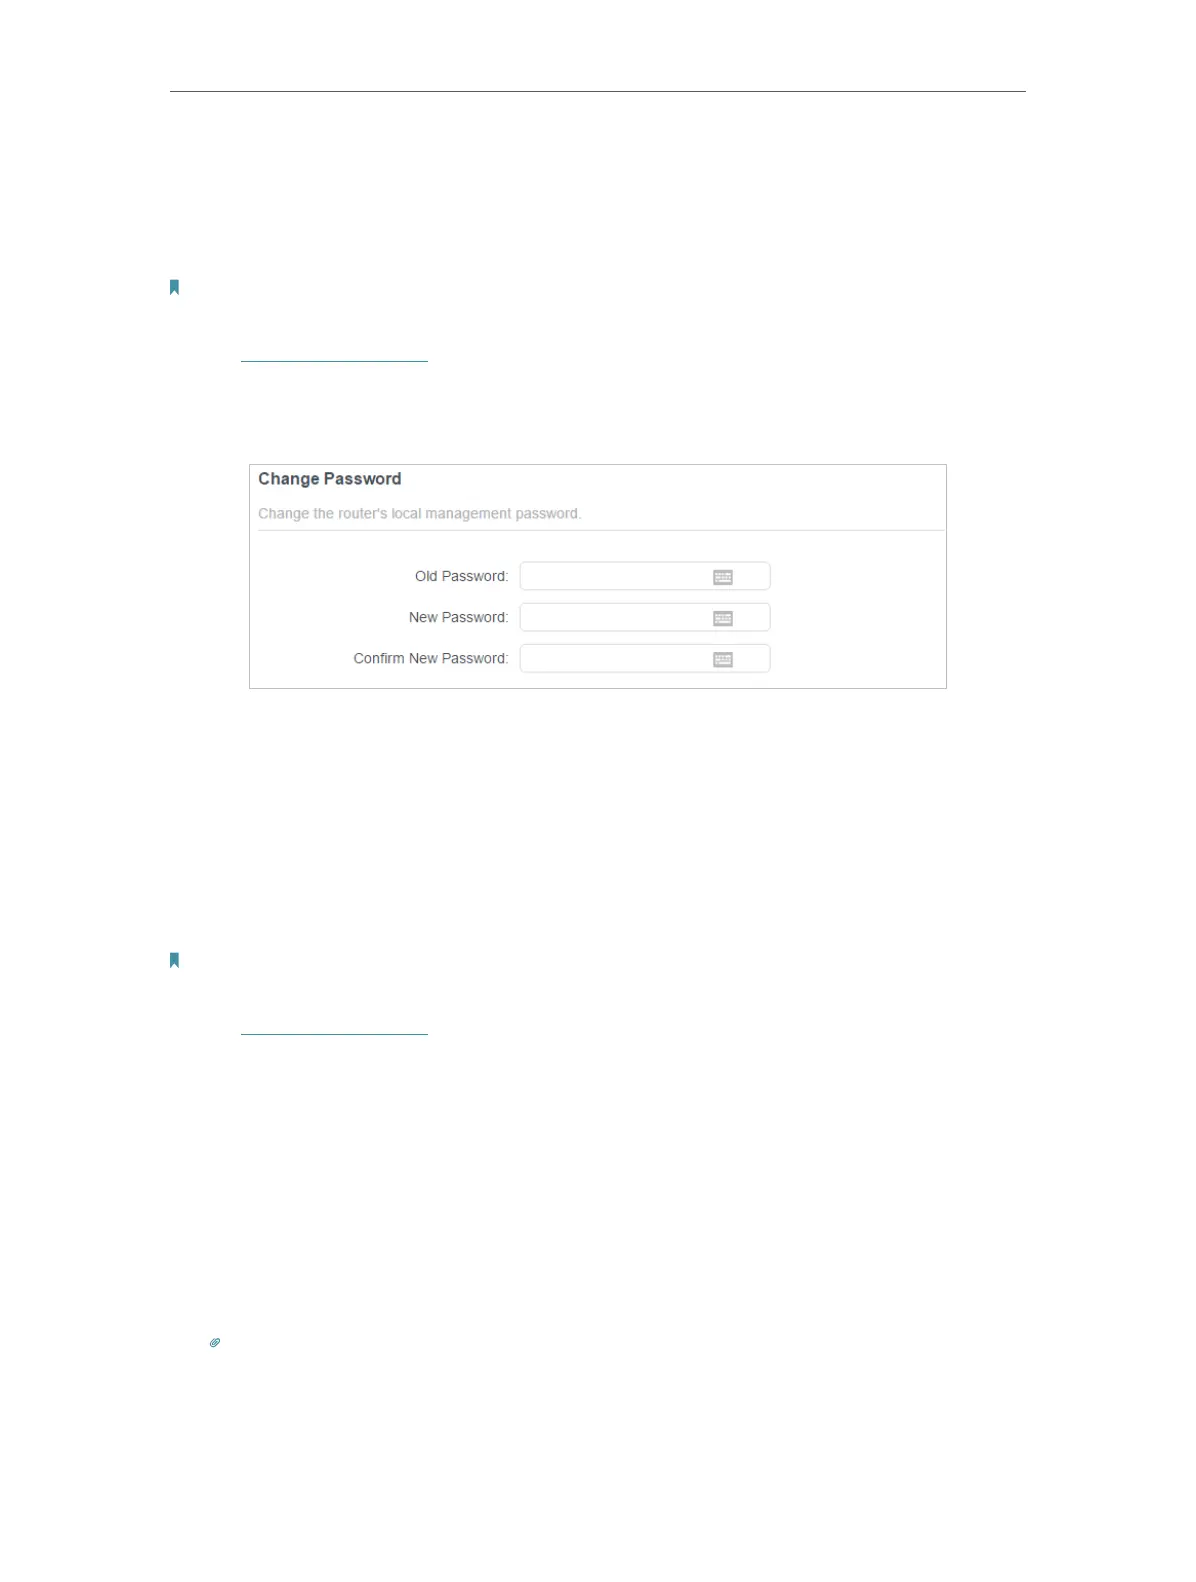
15. 3. Change the Login Password
The account management feature allows you to change your login password of the web
management page.
Note: If you are using a TP-Link ID to log in to the web management page, the account management feature will be
disabled. To manage the TP-Link ID, go to Advanced > TP-Link ID.
1. Visit http://tplinkwifi.net, and log in with the password you set for the router.
2. Go to Advanced > System > Administration and focus on the Change Password
section.
3. Enter the old password, then a new password twice (both case-sensitive). Click SAVE .
4. Use the new password for future logins.
15. 4. Password Recovery
This feature allows you to recover the login password you set for you router in case you
forget it.
Note: If you are using a TP-Link ID to log in to the web management page, the Password Recovery feature will be
disabled. To manage the TP-Link ID, go to Advanced > TP-Link ID.
1. Visit http://tplinkwifi.net, and log in with the password you set for the router.
2. Go to Advanced > System > Administration and focus on the Password Recovery
section.
3. Tick the Enable box of Password Recovery.
4. Specify a mailbox (From) for sending the recovery letter and enter its SMTP Server
address. Specify a mailbox (To) for receiving the recovery letter. If the mailbox (From)
to send the recovery letter requires encryption, Tick the Enable box of Authentication
and enter its username and password.
Tips:
• SMTP server is available for users in most webmail systems. For example, the SMTP server address of Gmail
is smtp.gmail.com.
• Generally, Authentication should be enabled if the login of the mailbox requires username and password.