Omada VPN Gateway
17 Software Conguration
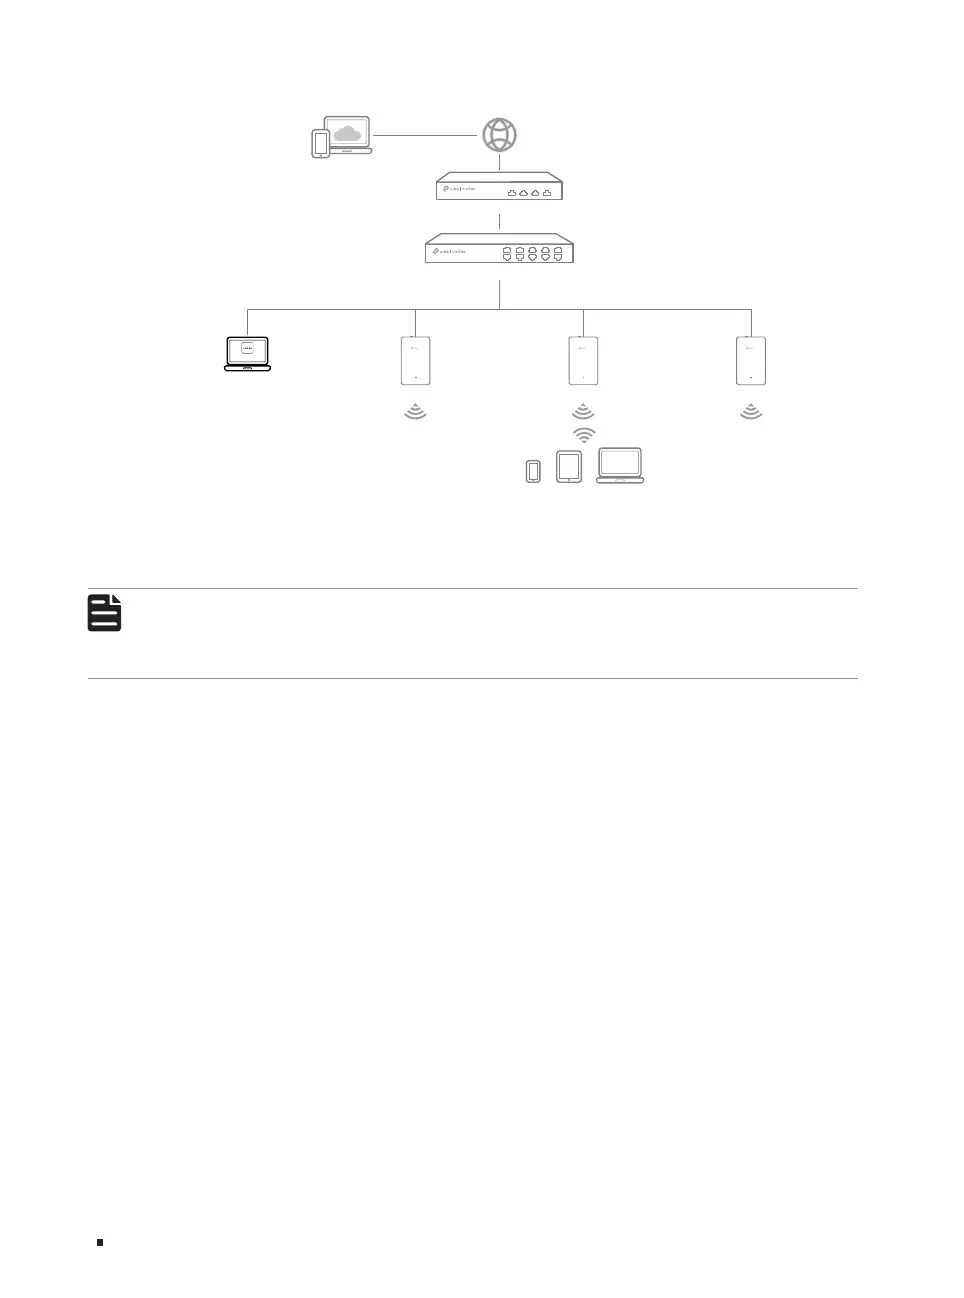
Figure 4-3 Manage the network via Omada Software Controller
Switch
EAP EAP EAP
Controller
Omada Software Controller
running on the Host PC
Gateway
1. On a PC with Windows OS or Linux OS, download the Omada Software Controller installation file
from https://www.tp-link.com/support/download/omada-software-controller/.
Note:
To download Omada Software Controller successfully, it is recommended to configure
the gateway’s network to access the internet. Refer to Standalone Mode to launch the
management page and go to Network > WAN to complete the configuration.
2. Run the file and follow the wizard to install the Omada Software Controller.
3. Launch the Omada Software Controller and follow the step-by-step instructions to complete the
quick setup.
4. After the quick setup, the login page appears. Enter the username and password you created and
click Log in. Then you can further configure the network.
■
More Management Methods
*
Via Omada Cloud Portal
After installing Omada Software Controller, you can remotely access the controller through Omada
Cloud Portal. Follow the steps below.
a. Enable Cloud Access on the setting page on the controller and bind a TP-Link ID to your
controller. If you have configured this in the setup wizard, skip the step.
b. Launch a web browser and enter https://omada.tplinkcloud.com in the address bar.
c. Enter your TP-Link ID and password to log in. A list of controllers that have been bound with your
TP-Link ID will appear. Then you can click Launch to further configure the controller.
For the detailed configurations, refer to the User Guide of the controller. The guide can be found on
the download center of our official website: https://www.tp-link.com/support/download/.