50
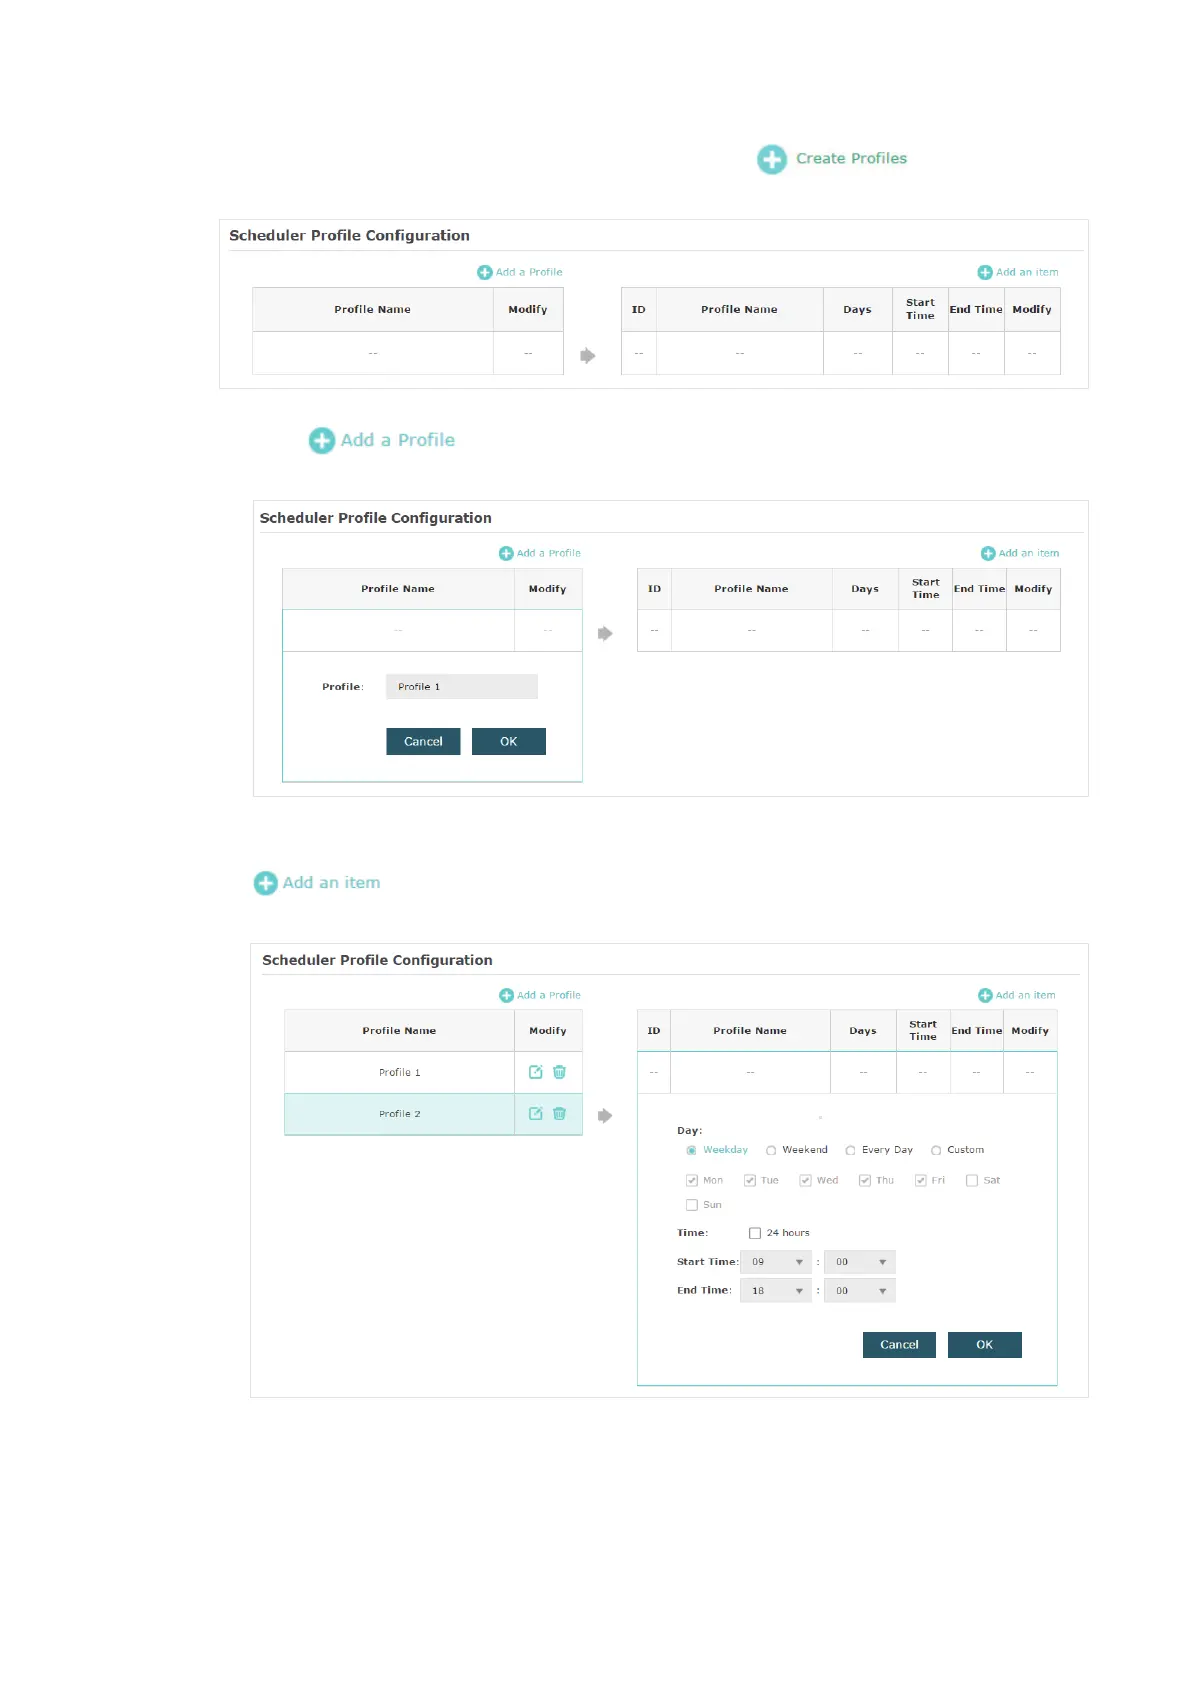
2. In the Scheduler Profile Configuration section, click and the following
page will appear.
1 ) Click and specify a name for the prole to be created. Click OK. You
can create up to eight proles.
2 ) Select a profile in the list (the color of the selected one will change to blue). Click
to add time range items to the prole. Specify the Day, Start Time and
End Time of the time range, and click OK.
Tips:
You can add up to eight time range items for one profile. If there are several time range items in one
profile, the time range of this profile is the sum of all of these time ranges.