4
Install Jumper Wire for Your Existing Chime
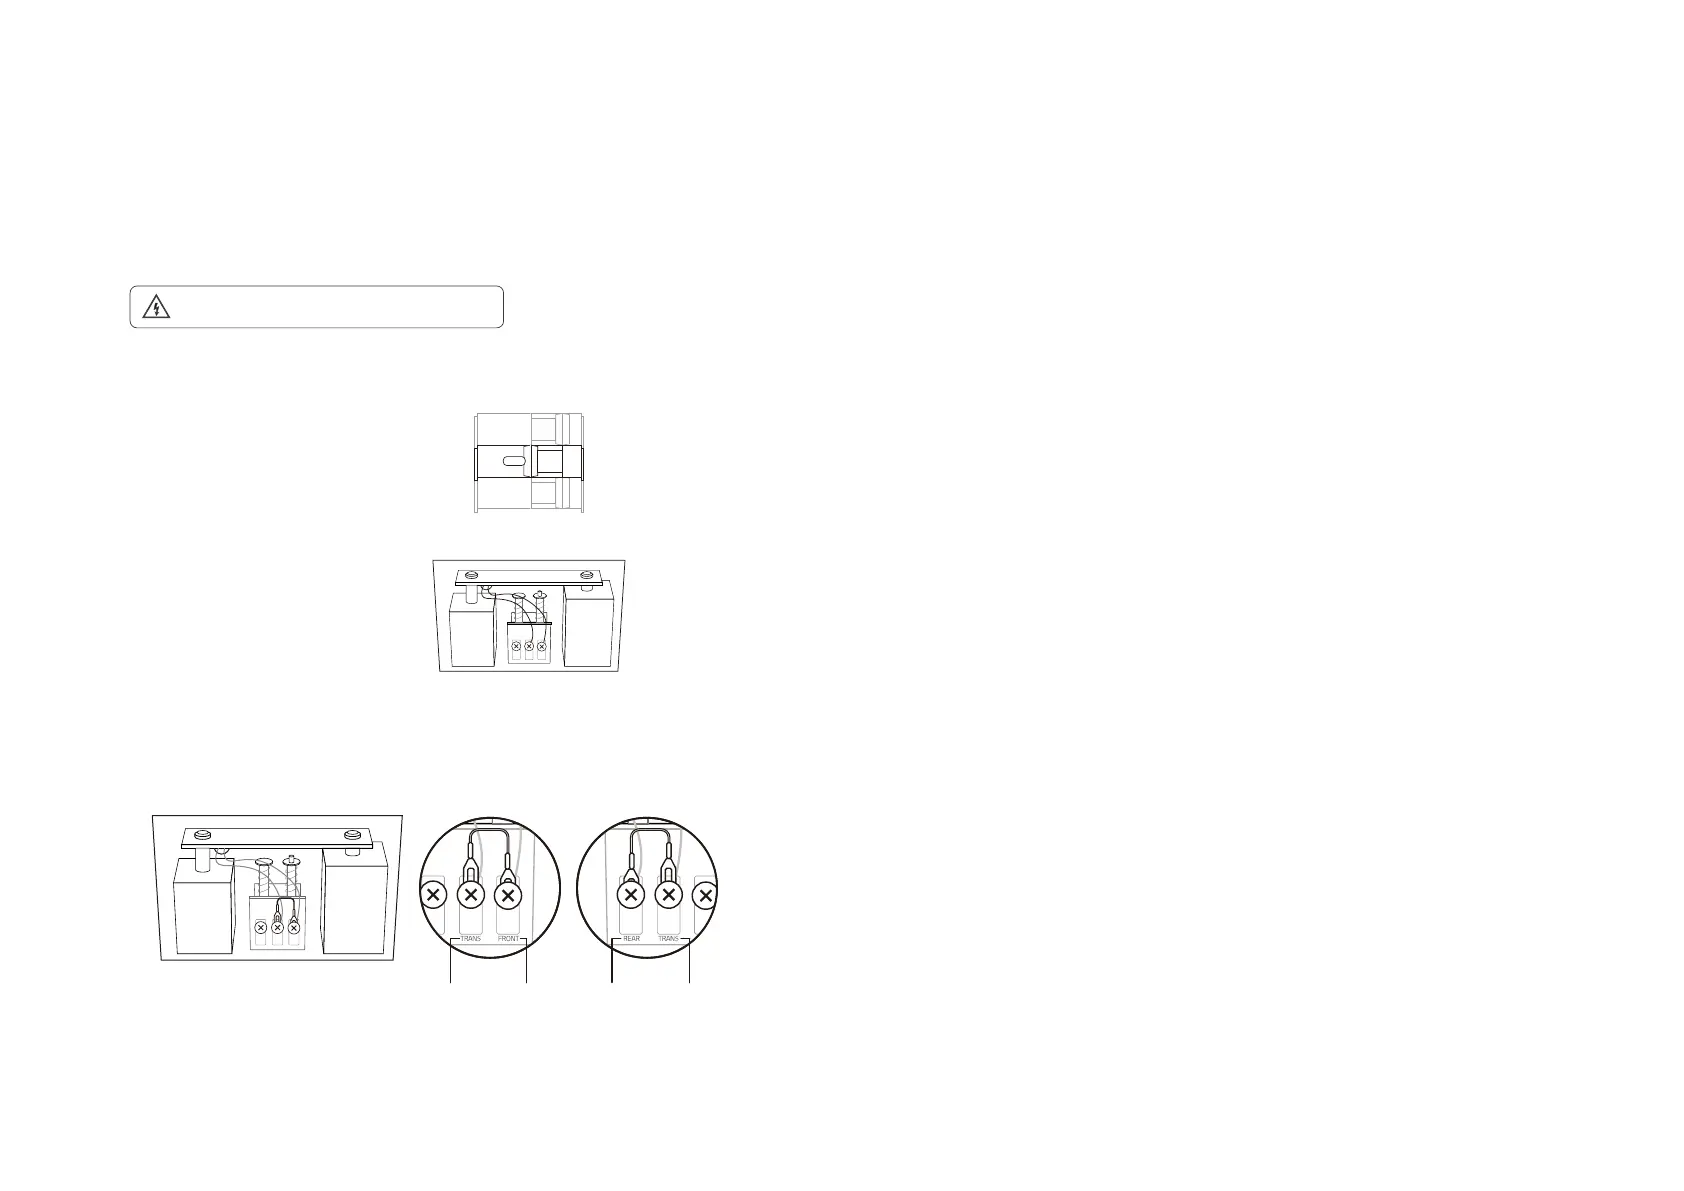
Install the jumper wire to bypass the existing chime on the circuit so that the Tapo doorbell can get sucient power to operate stably. This is only
necessary when you want to hardwire the doorbell and enable Always-On Mode.
1. Turn o the circuit breaker. Make sure the power is o by ringing your doorbell a few times.
OFF
Take care to avoid electric shocks.
2. Remove the chime cover and take a photo of the wiring in case you want to reconnect it.
4. Tighten the screws and replace the chime cover.
Note: If your doorbell chime has dierent markings, refer to instructions in the Tapo app or consult a licensed electrician.
3. Slightly loosen the screws for the Front and Trans of your front doorbell or the Rear and
Trans of your rear doorbell, then insert the jumper wire.
Front Doorbell
TRANS TRANSREARFRONT
Rear Doorbell