Do you have a question about the TP-Link Tapo L900 and is the answer not in the manual?
Explains the conventions used within the guide, such as color coding and hyperlinks.
Offers links to specifications, technical support, and community forums for further assistance.
Describes the functions of the control button for soft and factory resets.
Explains the meaning of different LED light patterns for setup and connectivity.
Instructions on downloading the Tapo application from app stores or via QR code.
Steps for logging into or creating a TP-Link ID within the Tapo app.
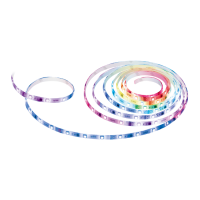
Procedure for adding the Tapo Smart Light Strip device within the Tapo app.
Instructions for physically connecting the power adapter, controller, and light strip.
Guidance on powering up the light strip and checking initial light status.
Steps for connecting the light strip to the home Wi-Fi network via the app.
Details on where to cut the light strip for custom lengths to avoid damage.
Advises against bending the light strip directly on the LED components.
Tips on making gentle bends for light strips to prevent damage.
Guidance on selecting a suitable dry, clean, and smooth surface for installation.
Instructions for peeling the adhesive backing and attaching the light strip.
Details on pressing the light strip firmly and securing the controller.
Final step to power on the light strip after physical installation.
Describes the main app screen for viewing and turning devices on/off.
Details controls for brightness, colors, effects, schedules, and more.
Covers editing device information, default state, and firmware updates.
Enables quick control of the light strip with a single tap in the app.
Allows dimming the light strip from 1% to 100% using a slider.
Enables selecting colors and applying various lighting effects.
Allows quick application of favorite colors or lighting effects.
Explains how to edit existing presets or create new ones for color and effects.
Guides on creating custom lighting effects to suit different moods or scenarios.
Enables selecting a single color from a wide palette for the light strip.
Allows choosing from various pre-made lighting effects for different occasions.
Steps for creating custom lighting effects by naming, selecting colors, and adjusting speed.
Allows scheduling the light strip to turn on/off automatically at specific times.
Enables setting a period for random on/off operation to simulate occupancy.
Allows setting a countdown timer for the light strip to turn on or off.
Provides data on the light strip's operational hours and power consumption.
Enables inviting family members to manage the light strip via their TP-Link ID.
Configures the light strip to return to its last active state upon powering on.
Enables setting a specific custom state for the light strip each time it's turned on.
Guides on modifying pre-defined shortcuts or automations.
Instructions for creating custom smart actions with conditions and tasks.
Resets Wi-Fi settings only, keeping other configurations intact.
Restores the light strip to its original factory default settings.
| Brand | TP-Link |
|---|---|
| Model | Tapo L900 |
| Category | Lighting Equipment |
| Language | English |