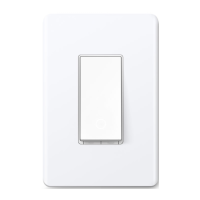
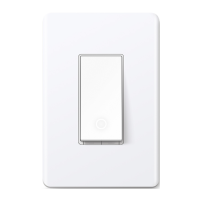
EasyManua.ls Logo

TP-Link Tapo S500D - User Manual

TP-Link Tapo S500D
12 pages
Print Icon
To Next Page IconTo Next Page
Loading...
Button Explanations
Smart Wi-Fi Dimmer Switch
Quick Start Guide
©2022 TP-Link 7106509851 REV1.0.0
Specications
Rating: 120 V~ 60 Hz
Load: 300 W Incandescent, 150 W LED
Operation temperature: 0~40
Method of mounting included: Independently mounted
(Vertically position only);
Operating control, Type 1 action
Pollution Degree 2, Rated Impulse Voltage 2500 V
Software Class A, NEMA Type 1.Y
*Images may dier from your actual product.
Restart
Reset
Press and hold for about 5s to reset
Wi-Fi while keeping other settings.
Press to restart your switch.
Decrease or increase the brightness.
Press and hold for about 10s to restore
your switch to factory default settings.
/
Set Up Your Switch Appearance
STEP 2
SET UP
Tap the button in the app. Select Switches
and then your model. Follow the step-by-step
app instructions to set up your smart switch.
DOWNLOAD APP
Get the Tapo app from the App Store or
Google Play.
STEP 1
Before installing, servicing or removing the switch, read and follow all safety
precautions including the following:
CAUTION Risk of Electric Shock More than one disconnect switch may
be required to de-energize the equipment before servicing. A circuit
breaker which disconnects the Line and Neutral conductor simultaneously
is suitable. Ensure power is o at the circuit breaker before removing or
installing any switch. Use a non-contact voltage tester to ensure the power
is o.
The Smart Switch must be installed and used in accordance with the
National Electric Code (NEC) or your local electrical code. If you are
unfamiliar with these codes and requirements, or are uncomfortable
performing the installation, consult a qualied electrician.
Do not install the Smart Switch with wet hands or when standing on wet or
damp surfaces.
Install only in a suitable UL Listed outlet box (suitable dimensions: H > 2.95
in./75 mm, W > 1.81 in./46 mm, D > 2 in./51 mm).
Tighten terminal screws to 13 lbf-in.
On/O
Button
Decrease/Increase
Brightness
Restart
LED
Reset
Brightness
Indicators
Need some help?
?
Visit www.tp-link.com/support
for technical support, user guides, FAQs,
warranty and more information.
Safety Notice
OR
Haute tension. Débrancher l'alimentation électrique avant
d'utiliser
High Voltage-Disconnect power supply before servicing
CAUTION
MISE EN GARDE
LED Status
Starting up; disconnected
from cloud.
Solid amber
Blinking amber
Blinking green
White
Solid red
Stay green for 30s
Blinking amber & green
Connecting to Wi-Fi.
Ready for setup.
Device resetting.
Light fixture is off.
Disconnected from Wi-Fi.
Connected to Wi-Fi.
Blinking green slowly
Firmware upgrading.
Question and Answer IconNeed help?

Do you have a question about the TP-Link Tapo S500D and is the answer not in the manual?

Overview

This document is a Quick Start Guide for a Smart Wi-Fi Dimmer Switch from TP-Link Tapo.

Function Description:

The Tapo smart dimmer switch is designed to automatically turn on and dim lights, aiming to save effort and reduce electricity bills. It allows for remote control and scheduling of lighting through the Tapo app. The switch integrates into a home's electrical system, replacing a standard wall switch, and connects to a Wi-Fi network for smart functionalities.

Important Technical Specifications:

  • Rating: 120 V~ 60 Hz
  • Load: 300 W Incandescent, 150 W LED
  • Operation Temperature: 0~40 °C
  • Method of Mounting: Independently mounted (Vertically position only)
  • Operating Control: Type 1 action
  • Pollution Degree: 2
  • Rated Impulse Voltage: 2500 V
  • Software Class: A
  • NEMA Type: 1.Y
  • Suitable Outlet Box Dimensions: H > 2.95 in./75 mm, W > 1.81 in./46 mm, D > 2 in./51 mm
  • Terminal Screw Tightening Torque: 13 lbf-in.

Usage Features:

The smart dimmer switch features an intuitive interface with several buttons and indicators:

  • Brightness Indicators: A series of LEDs at the top of the switch that likely show the current dimming level.
  • Decrease/Increase Brightness Buttons: Two buttons (represented by a sun icon with a minus and a sun icon with a plus) to adjust the light intensity.
  • On/Off Button: A central button to toggle the light on or off.
  • LED: An indicator light, possibly for status or power.
  • Reset Button: A small button labeled "Reset" that serves two functions:
    • Press and hold for about 5 seconds to reset Wi-Fi settings while keeping other configurations.
    • Press and hold for about 10 seconds to restore the switch to factory default settings.
  • Restart Button: A small button labeled "Restart" to restart the switch.

LED Status Indicators:

The LED on the switch provides visual feedback on its current status:

  • Solid amber: Indicates the device is starting up or disconnected from the cloud.
  • Blinking amber & green: Indicates the device is ready for setup.
  • Blinking green: Indicates the device is connecting to Wi-Fi.
  • Stay green for 30s: Indicates the device is connected to Wi-Fi.
  • Solid red: Indicates the device is disconnected from Wi-Fi.
  • Blinking amber: Indicates the device is resetting.
  • White: Indicates the light fixture is off.
  • Blinking green slowly: Indicates firmware upgrading is in progress.

Installation and Setup:

  1. Safety First: Turn off the circuit breaker before starting any wiring.
  2. Remove Old Switch: Remove the old wallplate and label the Ground and Neutral wires.
    • Ground: Usually green or copper.
    • Neutral: Usually white and not connected to the dumb switch.
    • Line: Usually black, coming from the circuit breaker.
    • Load: Usually black, one end connected to the light.
    • Consult a qualified electrician if unsure.
  3. Disconnect Wires: Disconnect wires from the old switch.
  4. Identify Line and Load Wires:
    • Turn on the circuit breaker and use a voltage detector to identify the energized wire (Line wire).
    • Caution: Take care to avoid electric shocks.
    • Turn off the circuit breaker and label the Line and Load wires.
  5. Connect Wires to Smart Switch: Connect the Ground, Neutral, Line, and Load wires to the corresponding terminals on the smart dimmer switch.
  6. Mount Switch: Line up the switch with the mounting holes and secure it with screws.
  7. Attach Wallplate: Attach the wallplate and turn on the circuit breaker.
  8. App Setup:
    • Download the Tapo app from the App Store or Google Play.
    • Tap the "+" button in the app, select "Switches," and then choose your model.
    • Follow the in-app instructions to complete the setup.

Maintenance Features:

  • Reset Wi-Fi: The reset button allows for resetting Wi-Fi settings without losing other configurations, useful for network changes.
  • Factory Reset: The reset button also provides an option for a full factory reset, which can be useful for troubleshooting or re-purposing the device.
  • Restart: A dedicated restart button allows for a quick reboot of the switch.
  • Firmware Upgrading: The device supports firmware upgrades, indicated by a slowly blinking green LED, ensuring it stays up-to-date with the latest features and security patches.

Safety Notices:

  • CAUTION – Risk of Electric Shock: Always disconnect power at the circuit breaker before installing, servicing, or removing the switch. Use a non-contact voltage tester to ensure power is off.
  • Qualified Electrician: If unfamiliar with electrical codes or installation procedures, consult a qualified electrician.
  • Installation Environment: Do not install with wet hands or on wet/damp surfaces.
  • Proper Outlet Box: Install only in a suitable UL Listed outlet box with specified dimensions.
  • Terminal Tightening: Ensure terminal screws are tightened to 13 lbf-in.

TP-Link Tapo S500D Specifications

General IconGeneral
BrandTP-Link
ModelTapo S500D
CategorySwitch
LanguageEnglish

Related product manuals