-68-
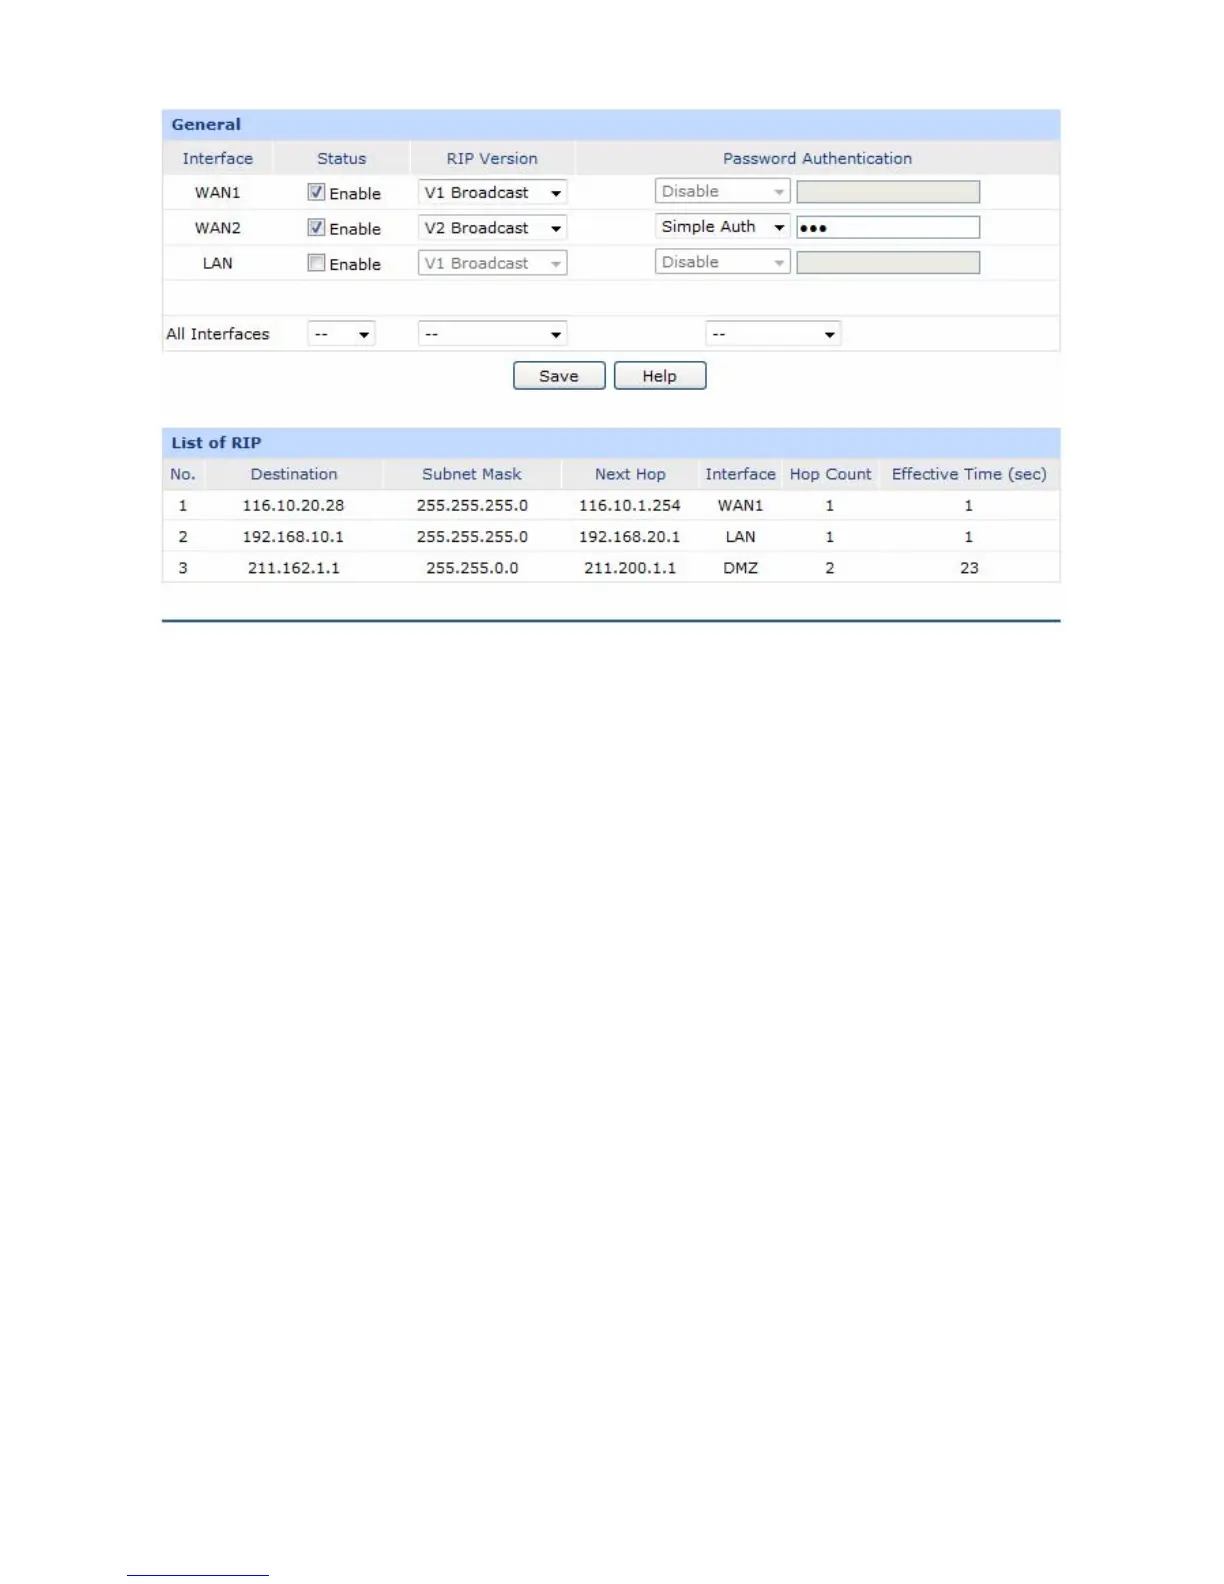
Figure 3-45 RIP
The following items are displayed on this screen:
¾ General
Interface:
Displays the interfaces which has been physically connected or assigned
static IP.
Status:
Enable or disable RIP protocol.
RIP Version:
Select RIPv1 or RIPv2. RIPv2 supports multicast and broadcast.
Password
Authentication:
If RIPv2 is enabled, set the Password Authentication according to the actual
network situation, and the password should not be more than 15 characters.
All Interfaces:
Here you can operate all the interfaces in bulk. All the interfaces will not apply
RIP if “Disable” option for All Interfaces is selected.
¾ List of RIP
After RIP is enabled, the information of RIP forwarding the packets received by the router will be
displayed in the list.
The first entry in Figure 3-45 indicates: when receiving packets with destination IP is 116.10.20.28, the
router will select WAN1 which is in the same network with the destination IP as next hop and forward
 Loading...