Channel - This field determines which operating frequency will be used. The default
channel is set to Auto, so the router will choose the best channel automatically. It is not
necessary to change the wireless channel unless you notice interference problems with
another nearby access point.
Enable Wireless Radio - The wireless radio of the AP can be enabled or disabled to allow
or deny wireless stations to access. If enabled, the wireless stations will be able to access
the AP, otherwise, wireless stations will not be able to access the AP.
5.3.3.2. WPS
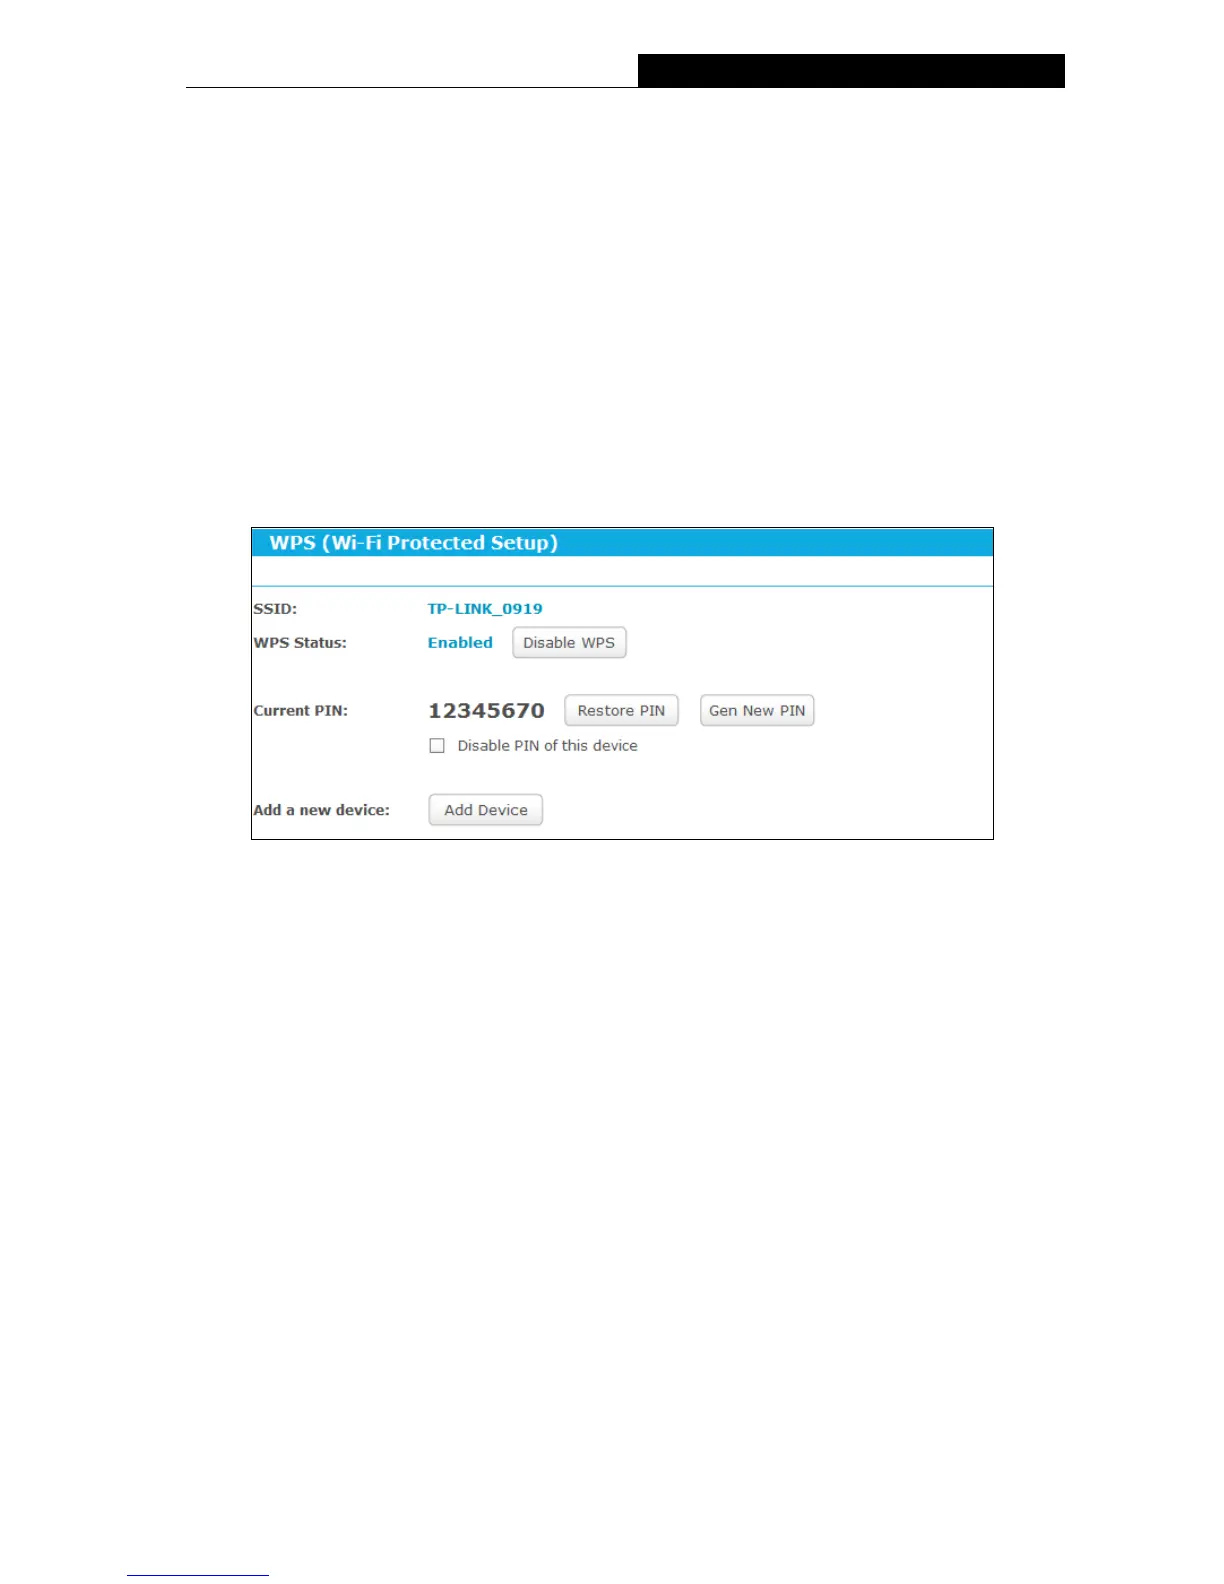
Go to “Setting→Wireless→WPS”, you can see the screen as shown below. This section will
guide you to add a new wireless device to an existing network quickly by WPS (Wi-Fi Protected
Setup) function.
WPS Status - Enable or disable the WPS function here.
Current PIN - Displays the current value of the router's PIN. The default PIN of the router
can be found in the label or User Guide.
Restore PIN - Restore the PIN of the router to its default value.
Gen New PIN - Click this button, and then you can get a new random value for the router's
PIN. You can ensure the network security by generating a new PIN.
Disable PIN of this device - WPS external registrar of entering this device's PIN can be
disabled or enabled manually. If this device receives multiple failed attempts to
authenticate an external registrar, this function will be disabled automatically.
Add device - You can add a new device to the existing network manually by clicking this
button.
If the wireless adapter supports Wi-Fi Protected Setup (WPS), you can establish a wireless
connection between wireless adapter and the router using either Push Button Configuration
(PBC) method or PIN method.
IV. Use the Wi-Fi Protected Setup Button
Use this method if your client device has a WPS button.
 Loading...