http://tplinkwi.net
Method TWO: Via a Web Browser
2. Launch a web browser and enter http://tplinkwifi.net or http://192.168.0.1 in the
address bar. Create a password to log in.
3. Follow the step-by-step instructions to set up the internet
connection and register for the TP-Link Cloud service.
Note: If the login window does not appear, please refer to Q2 of Need Help in this guide.
Method ONE: Via the TP-Link Tether App
1. Download the Tether app.
Scan for Tether Tether
or
2. Open the Tether app and log in with your TP-Link ID.
3. Tap the button in the Tether app and select Wireless Router > Archer
BE800. Follow the steps to complete the setup and connect to the
internet.
Note: If you don’t have an account, create one first.
The default wireless network names (SSIDs) and password are printed on the
label at the back of the router.
Model: Archer AX3000
AX3000 Gigabit Wi-Fi Router
Wireless Password/PIN:XXXXXXXX
SSID:TP-Link_XXXX
SSID:TP-Link_XXXX_5G
SSID:TP-Link_XXXX_6G
2
Choose Your Device Type
Gaming Router
Range Extender
Wireless Router
Button Explanation
Press the WPS button, and immediately press the WPS
button on your client device to start the WPS process. A √
will appear on the LED screen, indicating a successful WPS
connection.
Press the LED button to turn on or off the LED of your router.
Press and hold this button for about 2 seconds to turn on or
off the wireless function of your router.
Three physical buttons are located on the front of the router.
LED ButtonWi-Fi ButtonWPS Button
To enjoy a more complete service from TP-Link,
bind your TP-Link ID to the router.
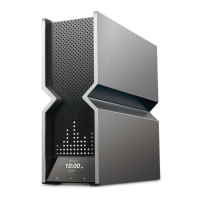
LED Screen
Commonly used functions and information can be visually displayed:
weather, graphics, time, and more.
Pulsing LEDs. The router is starting up or being reset.
Cycling graphics. The router is ready for setup.
Establishing a WPS connection. If successful, a √ will appear, if
failed, an × will appear.
The router is being upgraded.
LEDs at the top are pulsing in a line, indicating Wi-Fi is off.
The router is disconnected from the internet.
Display the information set in Tether, and cycle through the emoji by
default. The router works fine and can access the internet.
1
Connect the Hardware
• Keep the router vertical while working. Refer to Q5 of Need Help to place the router for optimal Wi-Fi performance.
• The combo port pairs an RJ45 port with an SFP+ port. Only one port in the pair can be used at a time.
*Images may dier from your actual products.
Connect the router’s 10 Gbps Combo port to the
internet via Ethernet or fiber network.
Note: If you want to change the WAN port for internet service,
refer to Q1 of Need Help in this guide.
Connect the power adapter to the router and
press the Power button to turn it on.
Wait until the LED screen cycles through graphics
before moving on.
Internet
Fiber-Optic Cable
PON Stick
Connect via ber
a. Connect to your PON
stick (sold separately).
b. Connect to the router’s SFP+ Port 2.
c. Turn on your modem, and wait
about 2 minutes for it to restart.
Internet
Ethernet Cable
b. Connect to the router’s
WAN Port 1 (recommended)
or WAN Port 3.
a. Turn off your modem, and
remove the backup battery if any.
Note: If your internet comes from an Ethernet outlet
instead of a modem, simply connect the router’s 10 Gbps
RJ45 port to it.
Connect via Ethernet
OR
Keep the router vertical
 Loading...