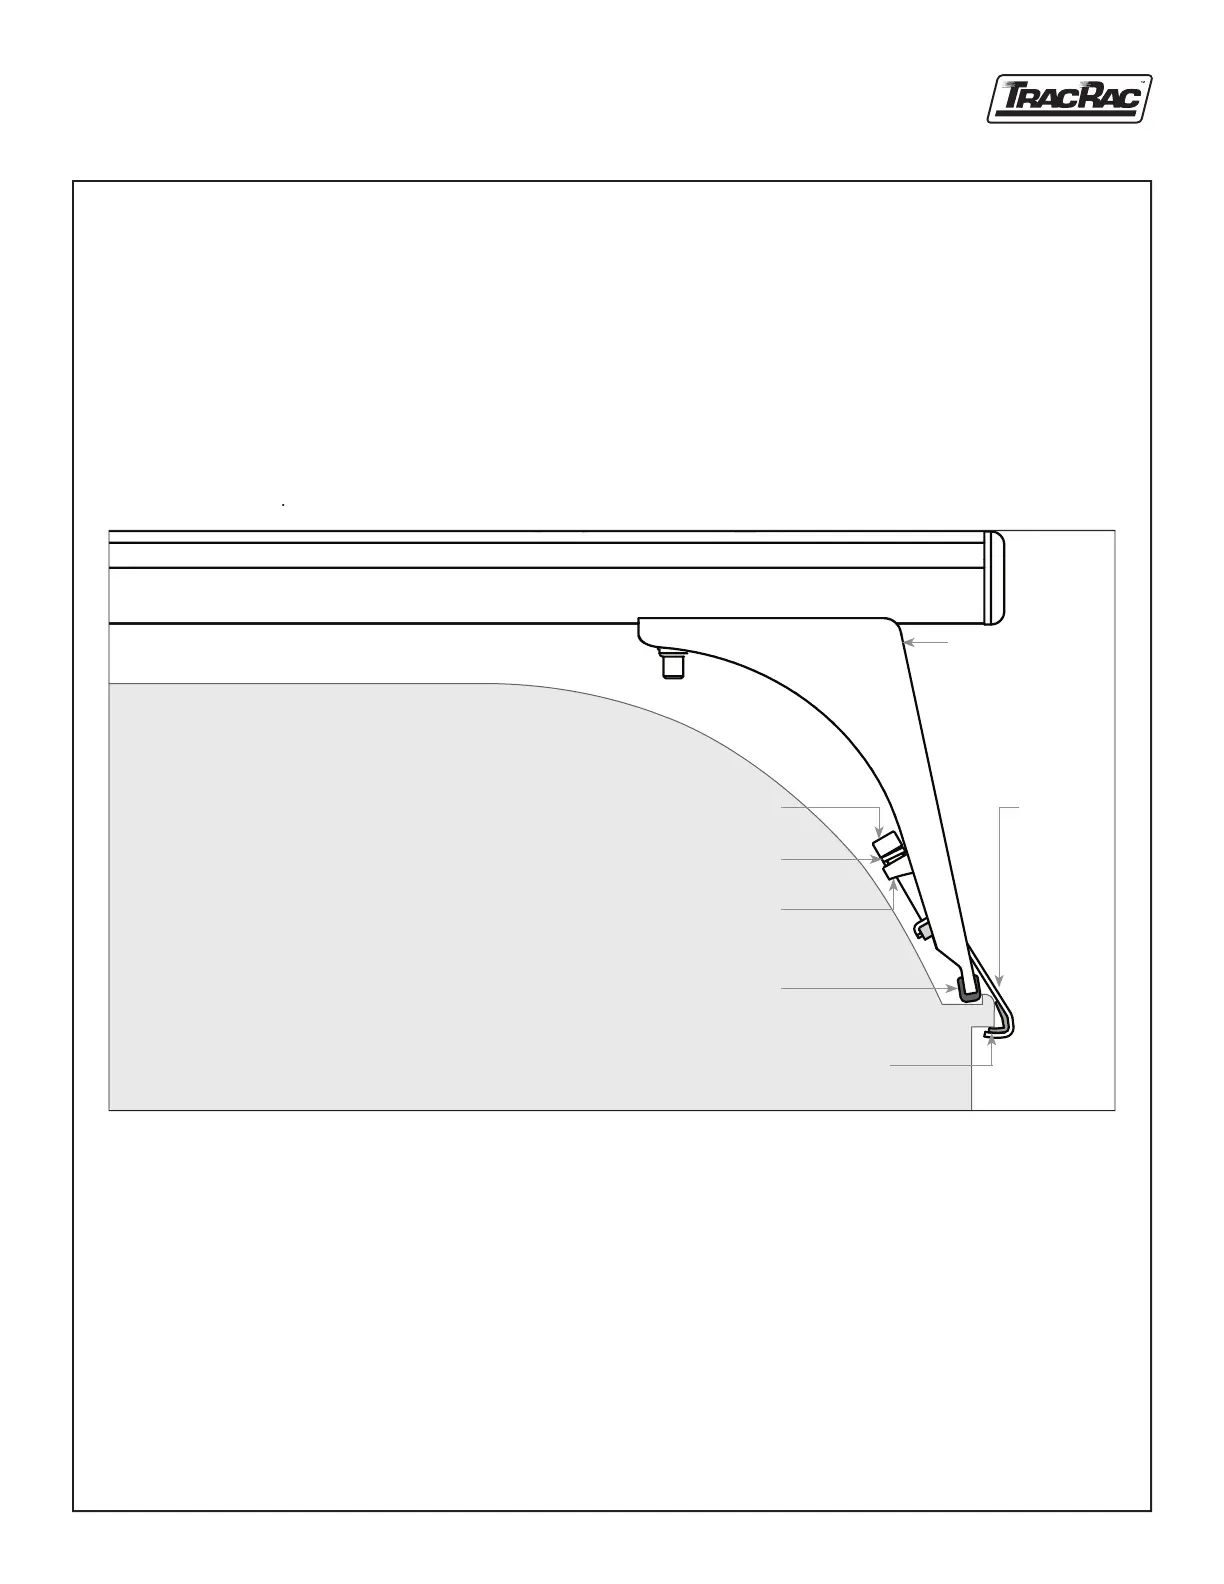
Roof Installation A:
9.
The lower edge of each Corner Bracket fits snugly into
th
e top corner of the van’s rain gutter. Place the J-Hooks
wi
th Neoprene Strips around the outside edge of rain
Re
-torque all fasteners after first 100 miles to
adj
ust for settling. Recheck all torques every 3000 miles. Pro-
lo
nged driving, vibrations may cause the fasteners to loosen.
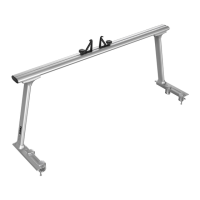
• Roof Installation A: Normal Installation
• Roof Installation B: Gutter Span Installation
10
. Center the Crossbars by measuring from the end of each
Co
rner Bracket, to the Crossbar ends, left and right.
11
. Tighten the T-Bolts on the underside of the Crossbar to
24
0 in/lbs. (20 ft/lbs.) to secure the Corner Brackets to
12
. Now tighten all Socket Head Cap Screws to 120 in/lbs.
(1
0 ft/lbs.) with the supplied Allen Wrench.
13.
Reposition the Crossbar Tiedowns where desired. Now
Ca
pacity – The TracVan System is rated for a capacity of
50
0 lbs., evenly distributed over all racks, assuming normal
dr
iving conditions and loading.
Do n
ot exceed the racks’ rated capacity, as you could dam-
ag
e the van’s rain gutter.
Se
cure loads carefully and exercise caution at all times.
• W
e recommend using transverse ratchet straps to securely
• R
un additional ratchet straps around the front & rear of
lo
ads, attaching them to the Crossbars to prevent any load
sh
ifting during acceleration and stopping.
 Loading...