LOADING FASTENERS INTO THE NAILER
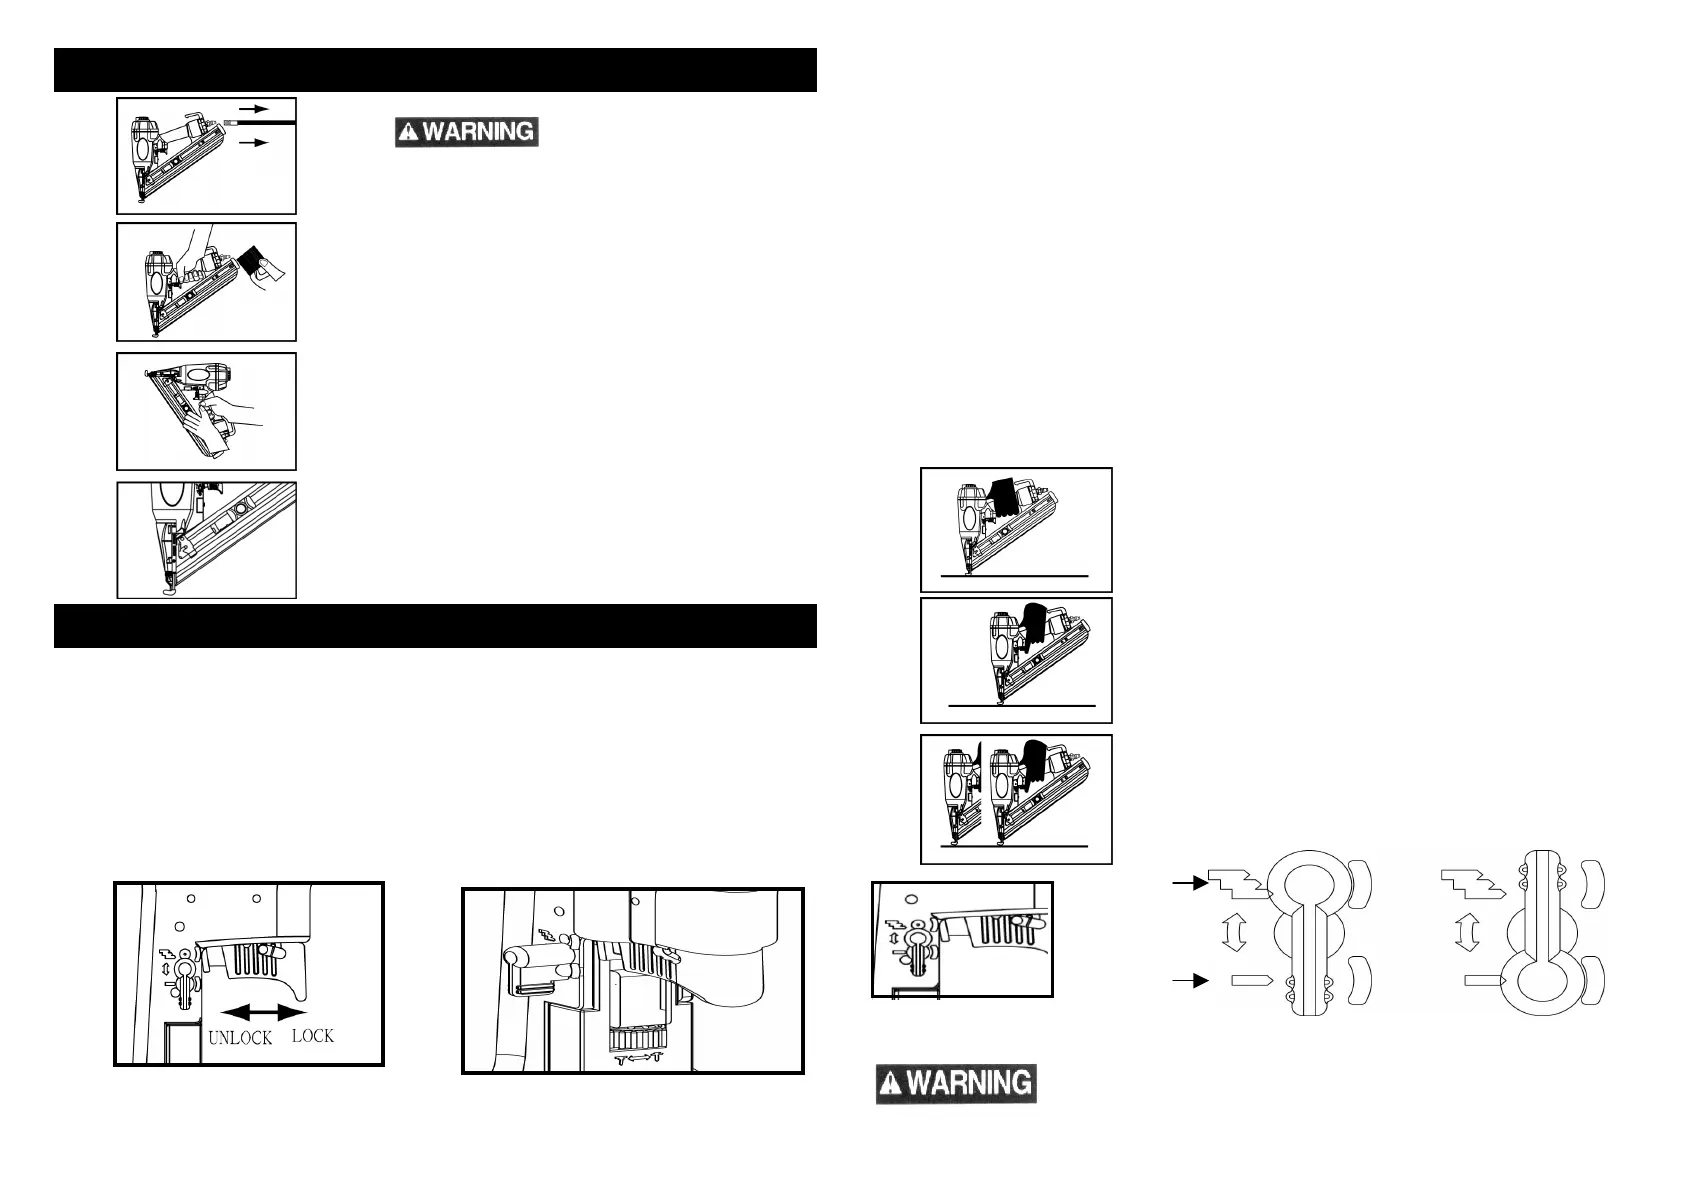
Never point any operational fastener driving tool at
yourself or at any other person.
1. Disconnect the air hose.
2. Insert a stick of fasteners into the opening at the
rear of the magazine. Make sure the point ends of
the fasteners are resting on the bottom edge of
the magazine.
3. Slide the magazine fastener slide towards the
rear of the tool until it locks the fasteners into
position.
UNLOADING THE TOOL
1. Slide the magazine fastener towards the rear of
the tool by pressing on the slides’ center button,
then releasing the latch.
2. Remove fasteners from the opening at the rear
of the magazine.
FEATURES AND OPERATION
FEATURES
Large capacity magazine with a quick action latch makes loading easy.
The safety lock on the nosepiece must be placed firmly onto the work surface to prevent
accidental firings.
A tapered nosepiece allows greater visibility for precise fastener placement.
A safety switch (Fig. A) that prevents accidental operation of the tool. The switch is located
inside the trigger. To lock the trigger, pull the cover of trigger towards the rear of the unit. To
unlock tool, release (push forward) the cover of trigger. A key lock or tie strip can be place
into the slot for safety storage of unit.
FASTENER DEPTH ADJUSTMENT
The contact trip (Fig. B) may be adjusted up or down to vary the depth of the fastener in the
workpiece. To adjust, rotate the depth adjustment until the desired setting is achieved
.
The tool is designed to operate between 70-120 PSI. Lower pressure (below 70 PSI) will
reduce performance of the tool while higher air pressure (over 120 PSI) raises the performance
of the tool beyond its rated capacity and could cause serious damage to the tool and the user.
Most applications will only require the minimum air pressure. However, larger fasteners and
harder woods may require air pressure in the upper range.
TESTING THE CYCLE OF THE TOOL
NOTE:
THE AIR SUPPLY SHOULD BE CLEAN AND DRY. FOR BEST RESULTS, DRAIN
THE MOISTURE FROM YOUR COMPRESSOR DAILY. CHECK AND REPLACE ANY
DAMAGED OR WORN COMPONENTS ON THE TOOL. THE SAFETY WARNING LABELS
ON THE TOOL MUST ALSO BE REPLACED IF THEY ARE NOT LEGIBLE. IN CASE THE
AIR TOOL IS UNABLE TO DRIVE THE NAIL INTO THE WORKPIECE COMPLETELY,
PLEASE ADJUST THE PRESSURE OF THE AIR COMPRESSOR TO AN APPPROPRIATE
PRESSURE.
Depress the contact safety trip mechanism
against the workpiece without pulling the trigger.
The tool must not cycle. Never use the tool if a
cycle occurs.
Hold the tool clear of the workpiece. The contact
safety trip mechanism should return to its original
down position. Pull the trigger. The tool must not
cycle. Do not use the tool if a cycle occurs.
Then depress the contact safety mechanism
against the workpiece and pull the trigger, the tool
must then cycle.
The air tool is equipped with a rotating switch (Fig. C)
that can be set to rapid-fire or single-fire mode.
Fig. A
Fig. C
SINGLE-FIRE RAPID-FIRE
Rapid-Fire
Single-Fire
Fig. B



 To Next Page
 Loading...