SECTION ONE: ASSEMBLY INSTRUCTIONS
MOUNTING THE LEGS:
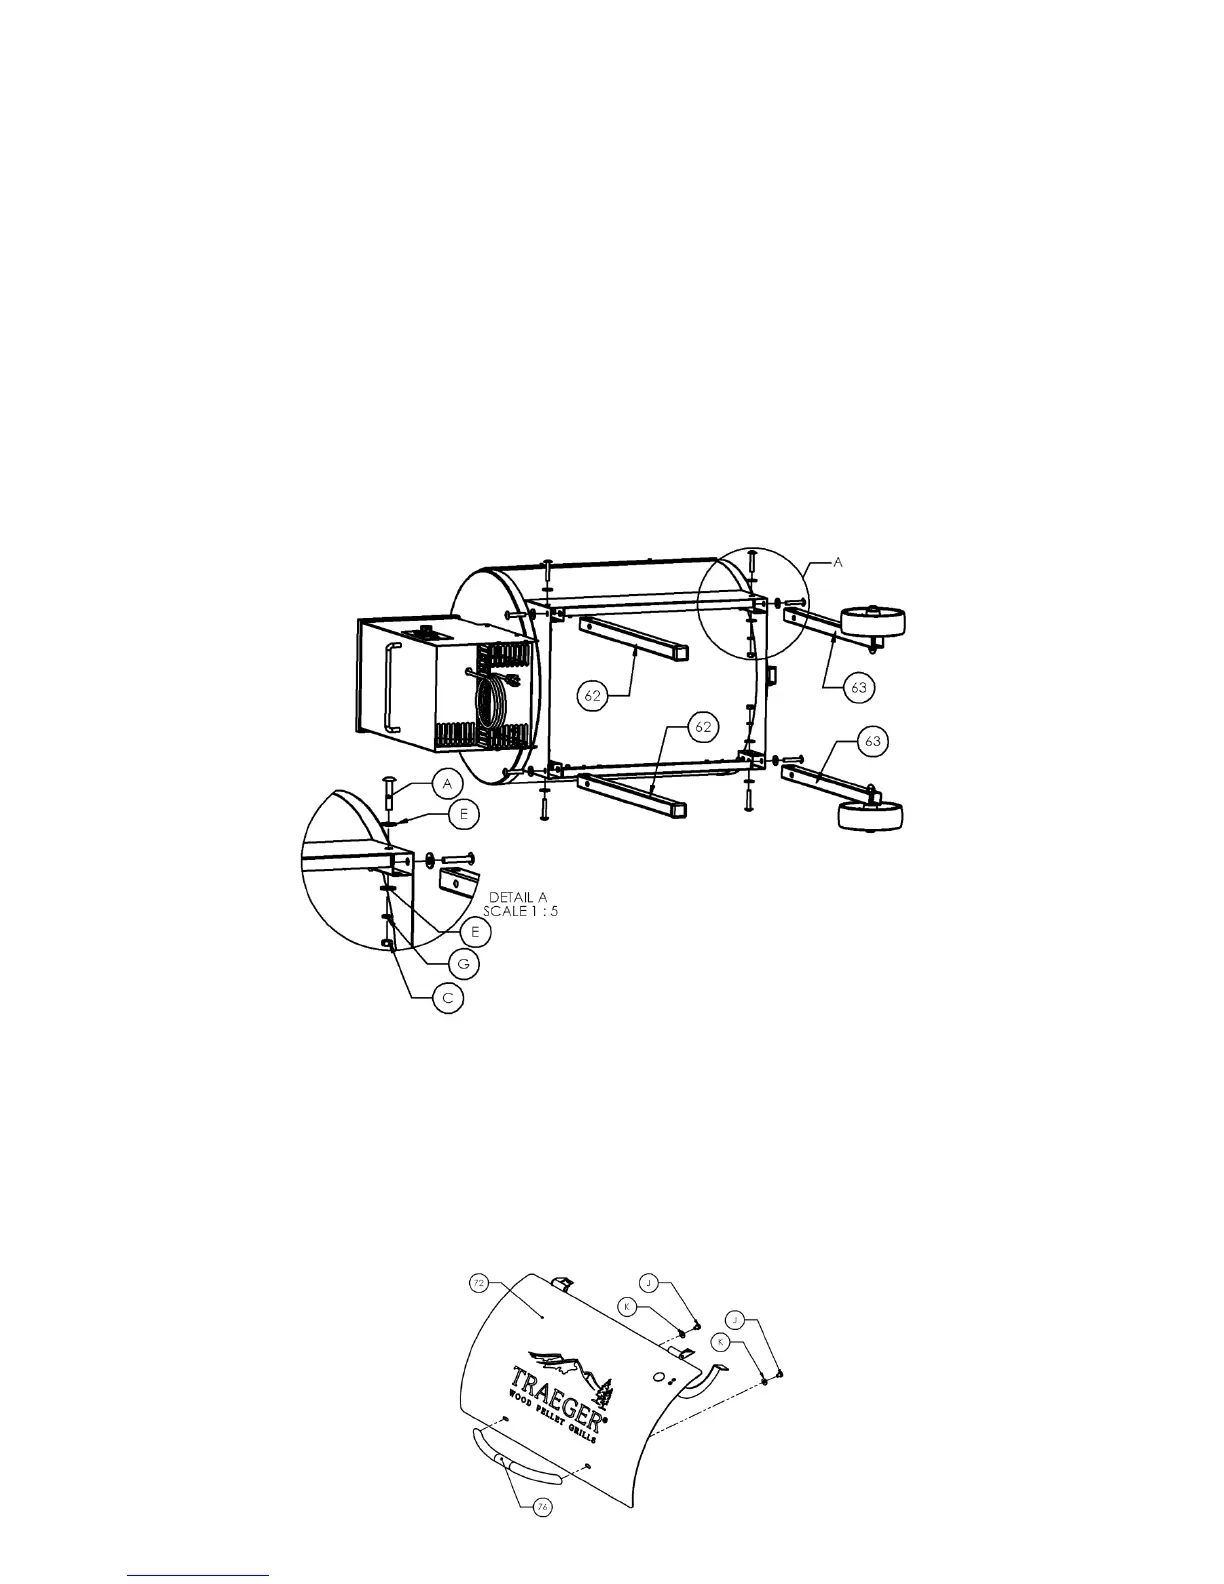
1) Carefully lay the Grill on its back on a non-abrasive surface. Note: The Hopper /
Burner Assembly (51) will be mounted to the Grill, but is not shown in the diagram
below for clarity.
2) Use the Black Bolts (A), Washers (E, G) and Nuts (C) supplied in the Hardware Kit
to install the Legs (62) on the left end of the Grill and the Wheel Legs (63) on the
right end as shown in the diagram below. The wheel on the Wheel Legs (63) should
go toward the outside of the Grill. Leave the Nuts loose during this step.
3) Set the Grill upright to level and then tighten all Nuts.
ATTACHING THE CHROME DOOR HANDLE:
1) Insert flat washer (K) onto 1/4-20 x .310 hex bolt (J) and insert into slot in the door
(72) from the inside.
2) Place chrome handle (76) onto door and align with hex bolt (J) and thread into the
handle. Repeat the process on the other side of the door. Then tighten the bolts. Do
not over tighten the bolts.
 Loading...