SECTION ONE: ASSEMBLY INSTRUCTIONS
Steps 1 through 7 below do not apply if you intend to use your Grill in a built-in
application.
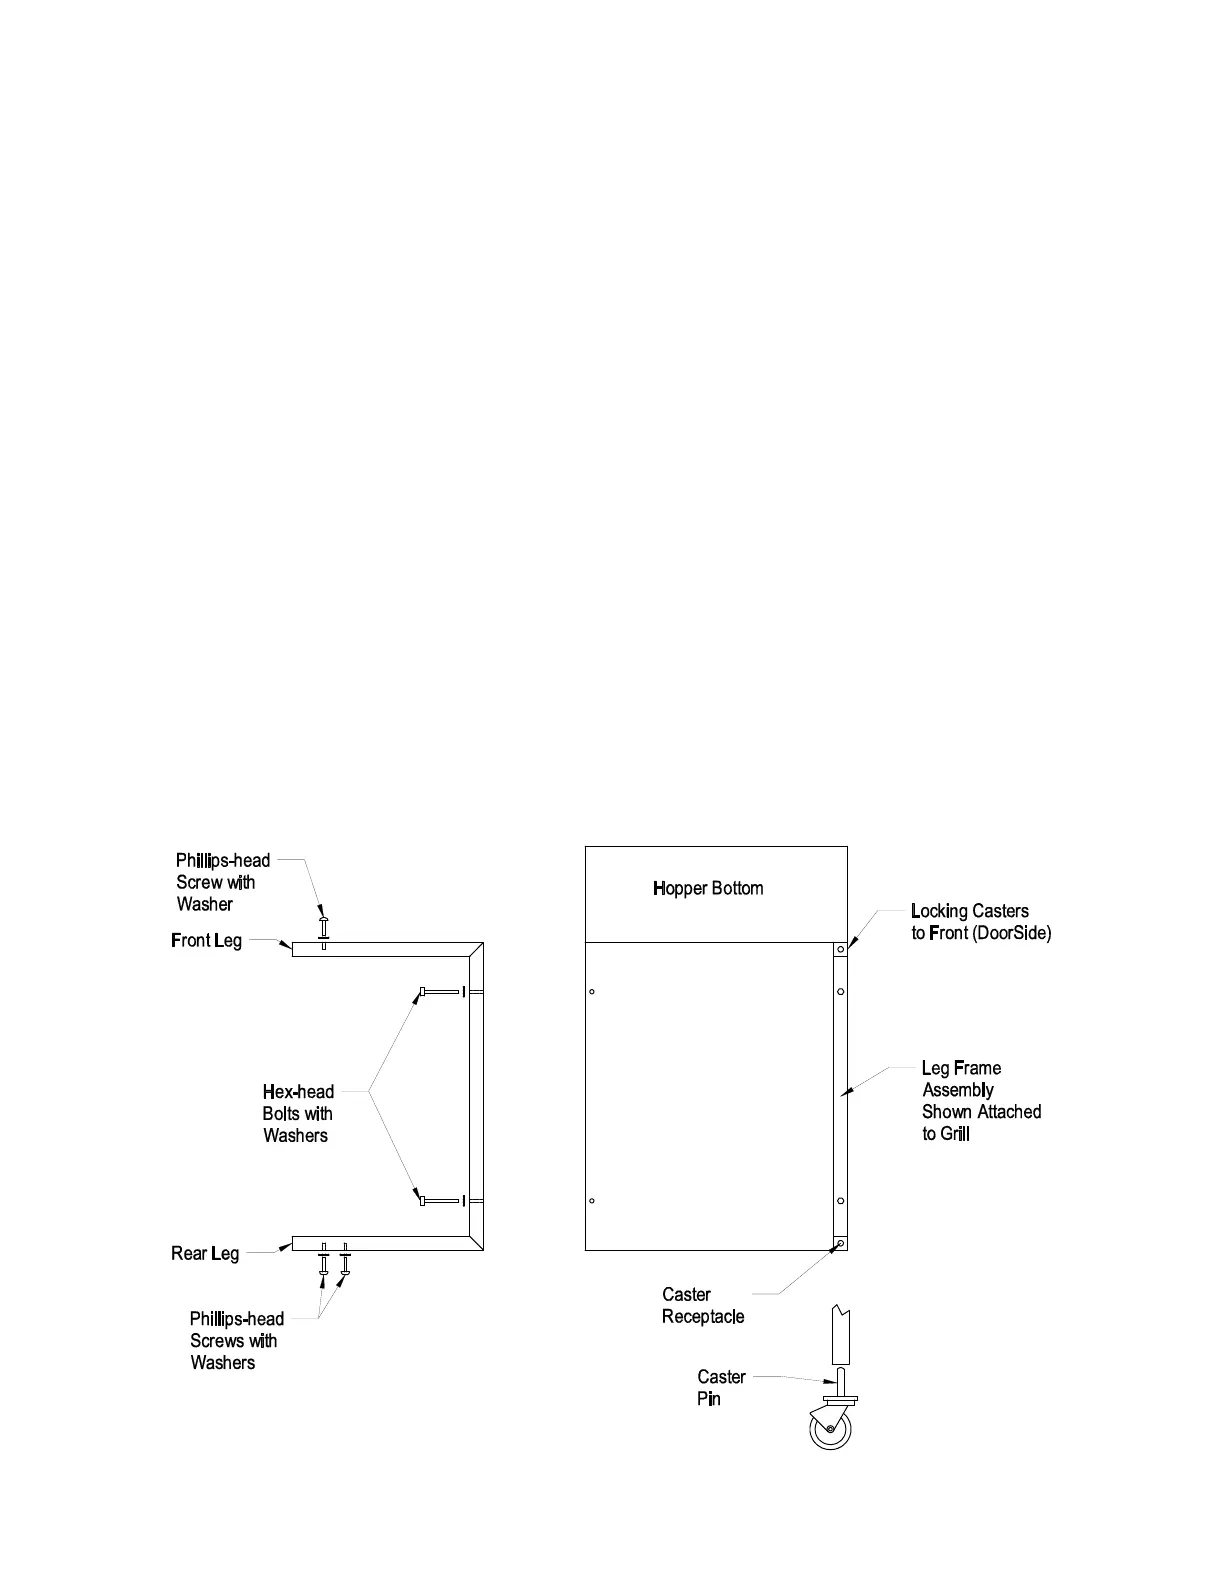
MOUNTING THE LEG FRAME ASSEMBLIES AND CASTERS
The assembly process will be much easier and safer if you have another person to help.
1) Carefully lay the Grill on its back on a non-abrasive surface,
2) The 2 Leg Frames (180) will mount on each side of the Grill, running front to back.
The Legs with one hole go to the front of the Grill (Door side).
3) Using the 7/16 Wrench, attach the Leg Frames (180) to the Grill. 2 Hex Head Bolts
and 2 Washers are needed for each Leg Frame (180). Do not over tighten.
4) Attach the Front Leg Brace (187) to the Front Legs. The Front Leg Brace (187) has
one hole on each end. Use 2 Phillips-head Screws and 2 Washers. Do not over
tighten.
5) Install the Casters (211,212). The Locking Casters (212) are to be located on the
front of the Grill (Door Side). Firmly seat each caster pin in the receptacle located in
the bottom of each Leg.
6) With your helper, stand the Grill upright.
7) Install the Rear Leg Brace (199). Use 4 Phillips-head Screws and 4 Washers. Do
not over tighten.