POWER AND TACH SENSORS
INSTALLS
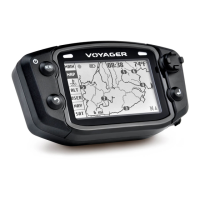
POWER CONNECTION:
FOR USE ON 12V DC SYSTEMS ONLY!
Use a volt meter to confirm nominal 12V DC.
Connecting to AC power will damage Voyager Pro and void the warranty.
Vehicles with DC Power: Voyager Pro requires DC power. Vehicles with a battery or
capacitor and regulator/rectifier produce DC power. Connect the power wire directly to the
vehicle’s 12V battery. Connect the red wire to the positive(+) battery terminal and the black
wire to the negative(-) battery terminal.
Vehicles with AC Power: Use the Voyager Pro AC wall charger, or upgrade to a
DC electrical system. Most carburated MX bikes put out AC power, but Voyager Pro
requires DC power.
Fuse: Introducing a fuse into the circuit before electronics is always a good idea. Use a 2 amp fuse with Voyager Pro (not provided.)
Power Wire
SENSORS:
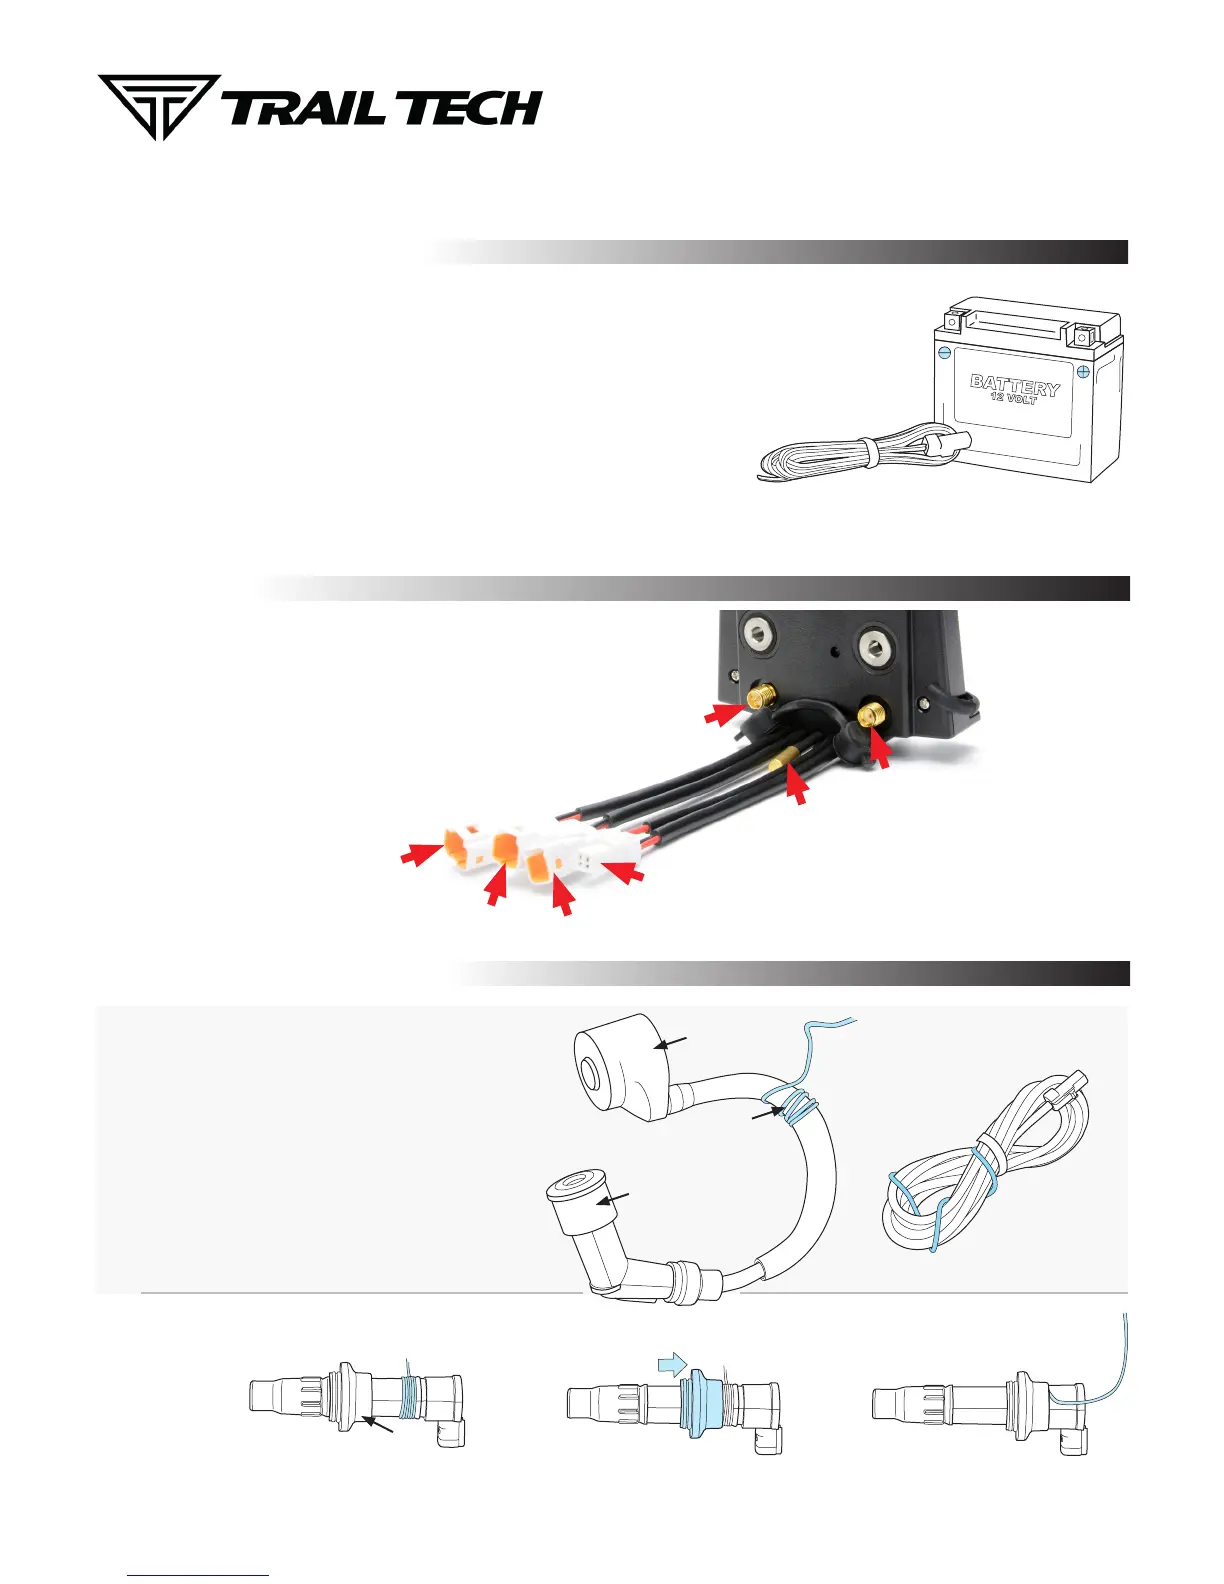
Step 1:
Pull water-seal
down. Wrap
ignition sensor
around spark
plug.
Step 2:
Replace
water-seal.
Step 3:
Reinstall
spark plug
into motor.
OPTION 2:
If the coil is attached to the spark plug, then wrap the sensor like this:
Water
Seal
TACH IGNITION SENSOR:
Ignition
Sensor
Ignition
Sensor
Wrap
Coil
Spark Plug
The Voyager Pro vehicle sensors
fasten securely to the dock using
waterproof JST connectors.
The connectors are all different shapes
(you cannot plug a sensor into the
wrong connector.)
The ignition sensor enables tachometer readings and the
animated bar graph on the tach screen of Voyager Pro.
OPTION 1: (Preferred option for most vehicles.)
Capacitive coupling to spark plug wire:
1.
If required, you may shorten the length of the ignition
sensor. Be very careful when stripping back the black
casing to avoid damaging the inner red wire.
To install ignition sensor wire, wrap the
red part of the sensor wire around the
spark plug wire 5 times.
V2V Antenna
Voyager Pro
Vehicle Dock
GPS Antenna
Ambient Temperature Sensor
Tach Ignition Sensor
Engine Temperature Sensor
Power Wire
Wheel Sensor

 Loading...