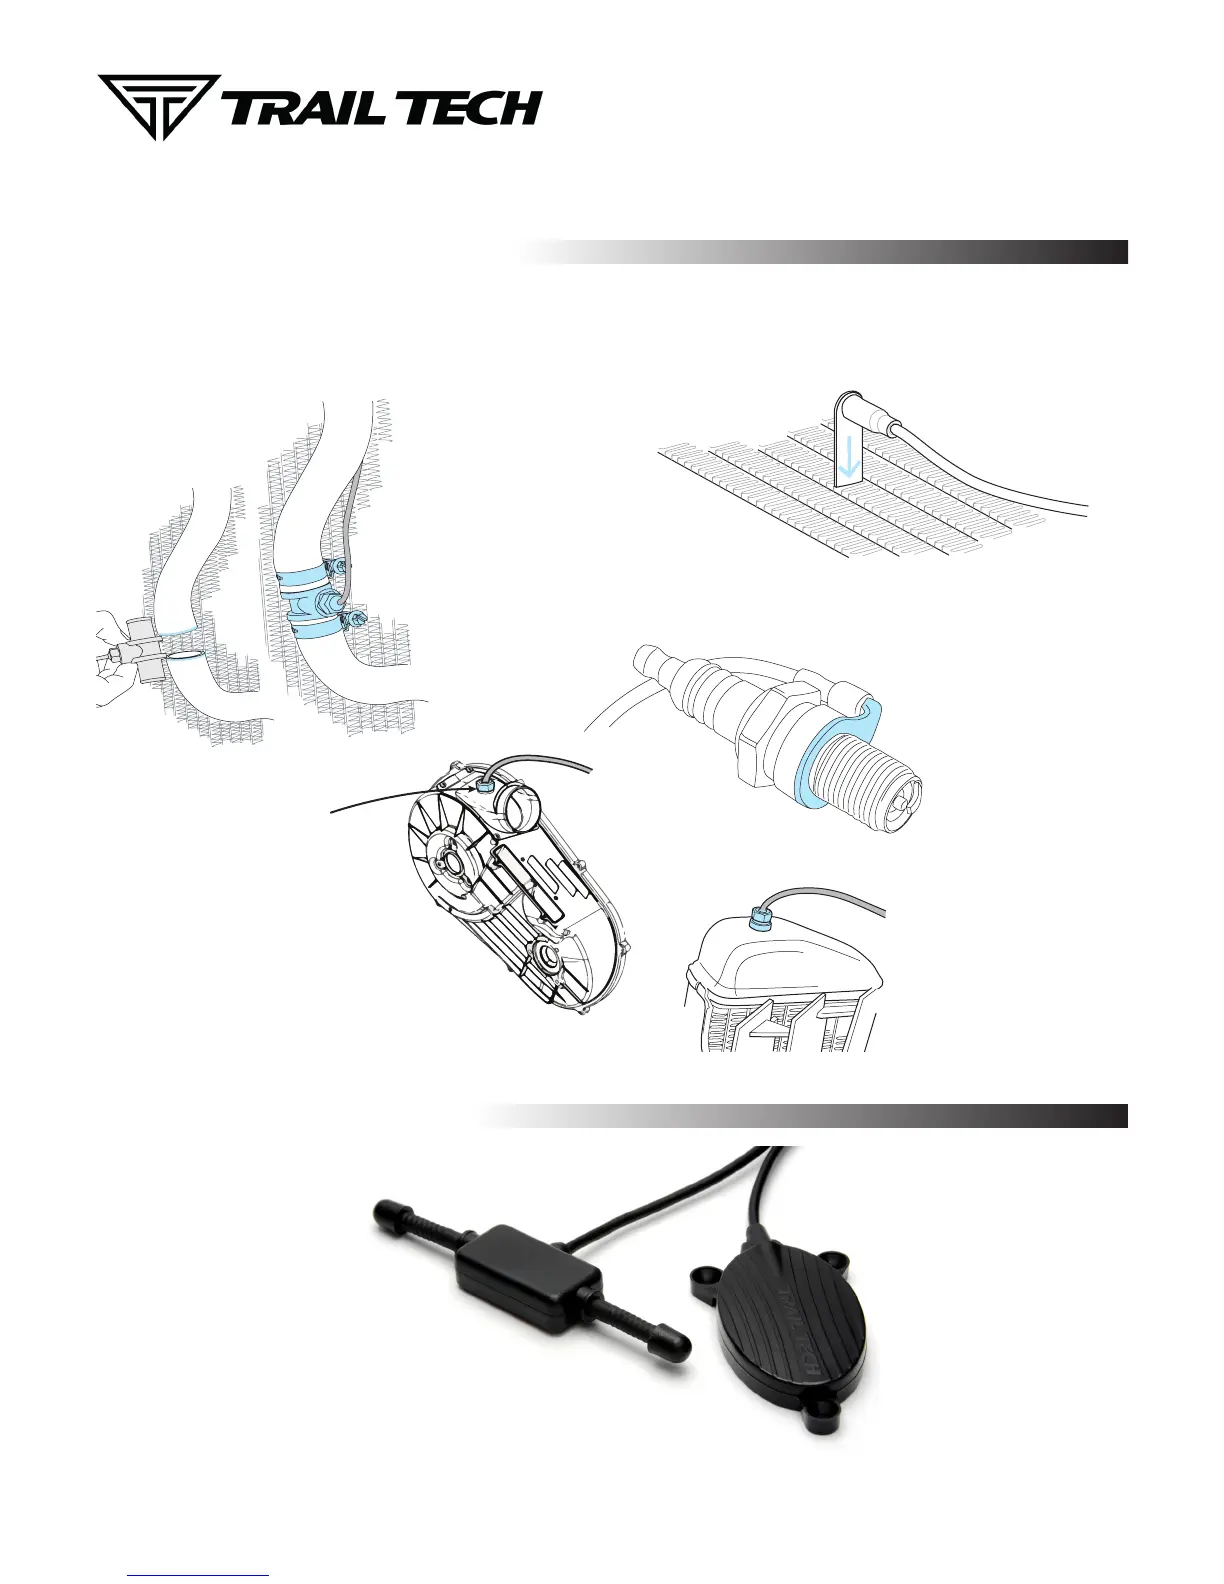
V2V Antenna
Required for
Buddy Tracking
GPS Antenna
TEMPERATURE SENSORS AND ANTENNAS
INSTALLS
TEMPERATURE SENSORS:
V2V AND GPS ANTENNAS:
Most Voyager Pro kits contain a model-specific temperature sensor. Installing the temperature sensor
enables temperature readouts on Voyager Pro’s gauge screens. Alternative sensors are available.
Vehicles cooled with water use sensors to measure the fluid temperature, while air-cooled machines take
the cylinder head’s temperature at the spark plug. The radiator fin sensor is the easiest installation.
V2V Antenna:
The vehicle-to-vehicle antenna
sends radio signals between your
vehicle and other vehicles with
Voyager Pro. It works well and is
included in most Voyager Pro kits.
The plastic V2V antenna is
designed to be mounted to a
non-metallic surface like a number
plate or shroud, with the ears aimed
vertically, up and down. Higher
up on the vehicle is better, as the
engine and metal panels can block
reception.
GPS Antenna:
The internal GPS antenna is
adequate for normal use. If
there is excessive metal around
the Voyager Pro mounting
location, the reception may be
affected.
An external GPS antenna can
be installed into the dock’s
GPS anternna port to achieve
a better antenna mounting
position. The external GPS
antenna available from Trail
Tech should be mounted flat,
on a non-metallic surface.
CVT Sensor Install:
(Continuously Variable Transmission)
200ºF+ Warning: CVT Belt wear occurs
more rapidly at high temperatures.
Let the belt cool down to increase lifespan.
Drill 13/64” (5mm) hole in
hard plastic CVT exhaust.
Thread sensor into hole.
The sensor threads are M6x10.
Use high temp RTV (silicone
gasket sealer) to seal case cover.
Not included in kit.
1.
2.
3.
Radiator Fin
Sensor Installation:
Conrm correct size.
Apply thermal grease to
maximize heat transfer.
Carefully press sensor
between radiator ns.
1.
2.
3.
Screw
Sensor Installation:
1.
2.
Radiator Hose
Sensor Installation:
Drain uid.
Measure inner diameter
of hose before cutting.
Mark hose.
Cut hose.
Slide on hose clamps.
Install sensor & tighten
hose clamps.
1.
2.
3.
4.
5.
6.
Mark
& Cut
Tighten
CHT Cylinder Head
Spark Plug
Sensor Installation:
Remove crush
washer from
spark plug.
Replace with
temperature
sensor.
Re-install
spark plug.
1.
2.
3.
Sensor replaces
crush washer
If the in sensor is too large,
le it to size rather than
forcing it into the radiator.

 Loading...