Do you have a question about the Trane Technologies 4TTR7 and is the answer not in the manual?
General warnings about qualified installers, R-410A refrigerant, and electrical hazards.
Cautions regarding brazing existing lines and hot compressor domes.
Details unit dimensions (H x D x W) and weight for model 4TTR7048B.
Specifies maximum total and vertical refrigerant line lengths.
Guidelines for unit placement to ensure airflow and avoid noise.
Precautions for installing units in areas with snow and freezing temperatures.
Requirement for Seacoast Kit for installations near salt water.
Steps to check for damage and remove the unit from its pallet.
Criteria for installing the unit on a support pad.
Table detailing line sizes, service valve connections, and max lengths for model 4TTR7048B.
Information on the factory charge for the outdoor unit and connecting lines.
Prompt to determine required refrigerant line length and lift for later use.
Importance of insulating the vapor line and preventing metal-to-metal contact.
Precautions when reusing existing refrigerant lines, emphasizing brazing.
Guidelines for routing refrigerant lines to prevent noise and vibration.
Step-by-step instructions for brazing refrigerant lines, including preparation.
Procedure for pressurizing lines with nitrogen and checking for leaks.
Steps to evacuate the system using a micron gauge to a specific vacuum level.
Steps to open the gas service valve after evacuation.
Steps and warnings for opening the liquid line service valve.
Table showing maximum wire lengths for 24V low voltage wiring based on gauge.
Wiring diagrams for connecting thermostats to air handlers and furnaces.
Warning and guidelines for high voltage power supply connection.
Recommendation for installing a separate disconnect switch for high voltage.
Requirement to ground the outdoor unit according to code.
Step-by-step procedure for starting up the system.
Instructions for checking outdoor and indoor temperatures for charge adjustment.
Method for charging the system in cooling mode above 55°F outdoor temperature.
Recommended method for charging below 55°F outdoor temperature using weigh-in.
List of procedures to check system operation and charge after installation.
System faults and potential causes for refrigerant and electrical issues.
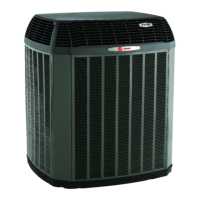
This document is an Installer's Guide for Trane Condensing Units, specifically the 4TTR7 series, with the model 4TTR7048B highlighted. It provides comprehensive instructions for the safe and proper installation, start-up, and servicing of these outdoor air conditioning units.
The Trane 4TTR7 series condensing units are outdoor components of a central air conditioning system. Their primary function is to condense refrigerant, releasing heat to the outdoor environment, as part of the refrigeration cycle to provide cooling for indoor spaces. These units are designed to work in conjunction with an indoor evaporator coil and air handler/furnace to create a complete heating, ventilating, and air-conditioning (HVAC) system.
| Brand | Trane Technologies |
|---|---|
| Model | 4TTR7 |
| Category | Air Conditioner |
| Language | English |