1. When the position of the drain piping has been selected, cut out the corresponding knock-out
from the unit housing.
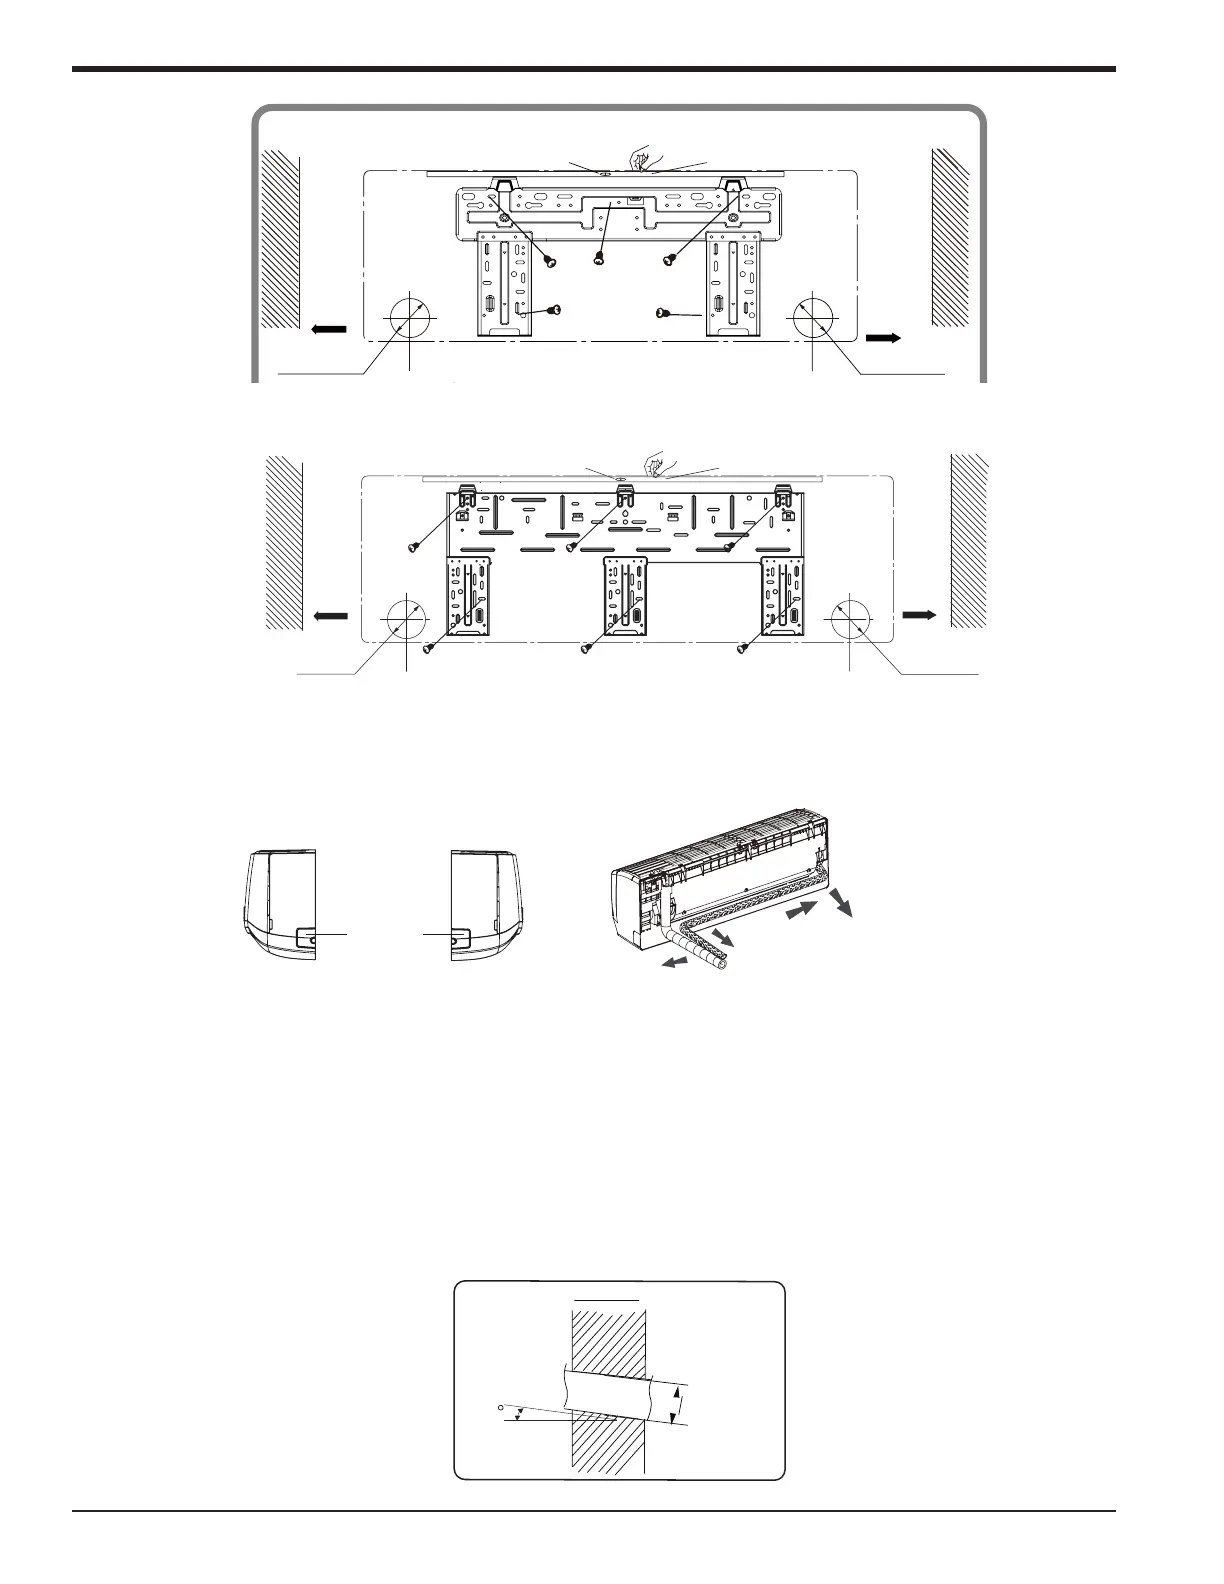
2. Select the position of the piping hole to be drilled according to the direction of the drain pipe
position selected for the application. The position of the piping hole should be slightly lower
than the wall mounted frame.
3. Drill a hole with the correct diameter for the selected outlet pipe position. In order to drain
smoothly, slant the piping hole on the wall slightly downward to the outdoor side with a gradient
of 5-10°. (As shown below)
4. Insert a sleeve into the hole to prevent the connection piping and wiring from being damaged
when passing through the hole.
Drilling the Piping Hole
The piping can be connected in the direction of right, rear right, left or rear left.
Left
Right
Rear right
Cut off
the hole
Left Right
Indoor
5-10
outdoor
Φ2 3/16 (56)
Φ2 3/4 (70)
inch(mm)
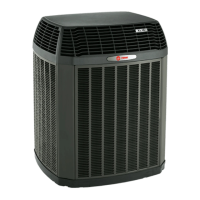
Left
Wall
6
inches
6
inches
Φ2 3/16inch (56mm)
Right
Mark the middle
Level
Wall
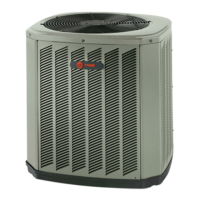
Space
to the
wall
above
Space
to the
wall
above
Φ2 3/16inch (56mm)
Mark the middle
Level
Left
Right
(Rear piping hole)
(Rear piping hole)
Space
to the
wall
6
inches
above
Space
to the
wall
6
inches
above
Ф
2 3/4inch (70mm)
Ф
2 3/4inch (70mm)
9K-12K
18K-24K
14 88-M4MHW23-1A-EN
Installer's Guide

 Loading...