EasyManua.ls Logo

Trane 4TWR3 - User Manual

Trane 4TWR3
24 pages
Print Icon
To Next Page IconTo Next Page
Loading...
18-BC83D1-2
ALL phases of this installation must comply with NATIONAL, STATE AND LOCAL CODES
IMPORTANT — This Document is customer property and is to remain with this unit. Please return to service informa-
tion pack upon completion of work.
Heat Pumps
These instructions do not cover all variations in systems or provide for every possible contingency to be met in connection with
the installation. Should further information be desired or should particular problems arise which are not covered sufficiently for the
purchaser’s purposes, the matter should be referred to your installing dealer or local distributor.
Note: The manufacturer recommends installing only approved matched indoor and outdoor systems. All of the manufacture’s split
systems are AHRI rated only with TXV/EEV indoor systems. Some of the benefits of installing approved matched indoor and out-
door split systems are maximum efficiency, optimum performance and the best overall system reliability.
4TWR3
Installer’s Guide
Table of Contents
Section 1. Safety ..................................................................................... 2
Section 2. Unit Location Considerations.............................................. 3
Section 3. Unit Preparation .................................................................... 5
Section 4. Setting the Unit ..................................................................... 5
Section 5. Refrigerant Line Considerations ......................................... 6
Section 6. Refrigerant Line Routing ..................................................... 7
Section 7. Refrigerant Line Brazing ...................................................... 8
Section 8. Refrigerant Line Leak Check ............................................. 10
Section 9. Evacuation ........................................................................... 11
Section 10. Service Valves ................................................................... 11
Section 11. Electrical - Low Voltage .................................................... 13
Section 12. Electrical - High Voltage ................................................... 16
Section 13. Start Up .............................................................................. 17
Section 14. System Charge Adjustment ............................................. 18
Section 15. Checkout Procedures and Troubleshooting ................... 23

Other manuals for Trane 4TWR3

Question and Answer IconNeed help?

Do you have a question about the Trane 4TWR3 and is the answer not in the manual?

Summary

Safety First: Essential Precautions

Outdoor Unit Placement Guidelines

Unit Dimensions and Weight Specifications

Provides physical dimensions and weight for outdoor units across various models.

Refrigerant Piping Limitations

Defines maximum length and vertical change for refrigerant lines to ensure system performance.

Optimal Location for Reliability

Details optimal outdoor unit placement for airflow, noise reduction, and protection from elements.

Cold Climate Installation Considerations

Advises on elevating units and using snow barriers in cold climates for proper defrost drainage.

Unit Preparation for Installation

Pre-Installation Unit Checks

Covers inspecting the unit for damage and removing it from the pallet safely.

Refrigerant Line System Considerations

Line and Service Valve Sizing

Details vapor and liquid line sizes and service valve connection sizes by model number.

Understanding Factory Refrigerant Charge

Explains factory charge for standard line lengths and the smallest indoor coil match.

Measuring Refrigerant Line Requirements

Prompts measurement of total line length and vertical change for accurate system charging.

Importance of Refrigerant Line Insulation

Emphasizes insulating the vapor line and preventing metal-to-metal contact between lines.

Guidelines for Reusing Existing Lines

Provides specific precautions for reusing existing refrigerant lines and evaporator coils.

Refrigerant Line Routing and Installation

Routing Precautions for Noise and Vibration

Covers preventing noise transmission and proper securing methods to avoid vibration.

Refrigerant Line Brazing Procedure

Steps for Brazing Refrigerant Lines

Details preparation steps like deburring, cleaning, and purging for brazing lines to valves.

Refrigerant Line Leak Detection

Methods for Checking Refrigerant Leaks

Describes pressurizing lines with nitrogen and checking for leaks using a soapy solution.

System Evacuation and Service Valve Operation

Evacuating Refrigerant Lines and Coil

Details the process of achieving and verifying vacuum levels for system evacuation.

Opening the Gas Service Valve

Explains the procedure for safely opening the gas service valve to initiate refrigerant flow.

Opening the Liquid Service Valve

Details the safe operation of the liquid line service valve, emphasizing caution.

Low Voltage Electrical Connections

Maximum Low Voltage Wire Lengths

Specifies maximum wire lengths for low voltage connections based on wire gauge size.

Low Voltage Wiring Diagrams

Provides wiring diagrams for connecting the heat pump to various indoor units and thermostats.

Defrost Control Configuration

Explains defrost termination temperatures and how to adjust control settings for different conditions.

High Voltage Electrical Safety

High Voltage Power Supply Requirements

Covers power supply requirements and adherence to national, state, and local codes.

Installing a High Voltage Disconnect Switch

Mandates the installation of a separate disconnect switch for high voltage connections.

Proper High Voltage Grounding

Stresses the importance of grounding the outdoor unit according to national, state, and local codes.

System Startup Procedure

Step-by-Step System Startup Guide

Outlines the sequence for applying power and starting the system for the first time.

System Refrigerant Charge Adjustment

Measuring Key Temperatures for Charging

Details measuring outdoor and indoor temperatures as prerequisites for accurate system charging.

Subcooling Charging in Cooling Mode (Above 55°F)

Explains the subcooling method for charging in cooling mode when outdoor temp is above 55°F.

Charging in Heating Mode (Below 55°F Outdoor)

Describes weighing the refrigerant charge in heating mode for low outdoor temperatures.

Installation Checkout and Troubleshooting

Operational and Checkout Procedures

Lists essential checks and procedures to ensure proper system installation and operation.

System Faults and Troubleshooting Guide

Provides a guide to system faults with primary and secondary causes for diagnosis.

Overview

This document is an installer's guide for Trane 4TWR3 series heat pumps, providing comprehensive instructions for installation, start-up, and troubleshooting. It emphasizes compliance with national, state, and local codes for all installation phases.

Function Description:

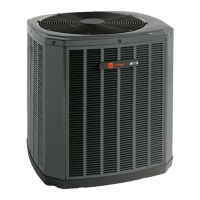
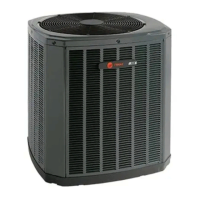
The Trane 4TWR3 heat pump is an outdoor condensing unit designed to work with matched indoor evaporative coils to provide heating and cooling for residential or commercial buildings. It uses R-410A refrigerant and is factory charged for the outdoor unit, 15 feet of connecting line, and the smallest indoor evaporative coil match. Adjustments to the refrigerant charge are necessary for longer line lengths or larger indoor coils.

Important Technical Specifications:

  • Refrigerant: R-410A. This refrigerant operates at 50-70% higher pressures than R-22 and requires R-410A approved service equipment. It uses POE oil, which is hygroscopic, necessitating sealed systems and drier replacement when opened.
  • Unit Dimensions and Weight:
    • 4TWR3018C, 4TWR3024C: 29 x 30 x 33 inches, 161-163 lbs.
    • 4TWR3030B, 4TWR3036B, 4TWR3042B: 33 x 30 x 33 or 33 x 34 x 37 inches, 193-227 lbs.
    • 4TWR3048B: 37 x 34 x 37 inches, 234 lbs.
    • 4TWR3060B: 41 x 34 x 37 inches, 248 lbs.
  • Refrigerant Piping Limits:
    • Maximum horizontal line length: 60 feet.
    • Maximum vertical change (lift): 60 feet.
    • For lengths exceeding 60 feet, refer to specific Trane application guides.
  • Service Valve Connection Sizes:
    • 1.5-2 Ton (4TWR3018C, 4TWR3024C): 5/8" Vapor, 3/8" Liquid.
    • 2.5-3.5 Ton (4TWR3030B, 4TWR3036B, 4TWR3042B): 3/4" Vapor, 3/8" Liquid.
    • 4-5 Ton (4TWR3048B, 4TWR3060B): 7/8" Vapor, 3/8" Liquid.
  • Low Voltage Wiring:
    • 18 AWG: 150 Ft. Max.
    • 16 AWG: 225 Ft. Max.
    • 14 AWG: 300 Ft. Max.
  • Defrost Control: Selectable termination temperature (47°F as shipped, 70°F with Jumper J2 cut for ambient below 30°F).

Usage Features:

  • Installation Location:
    • Ensure 5 feet unrestricted clearance above the unit.
    • Provide 3 feet clearance in front of the control box and any other service side.
    • Maintain a minimum of 12 inches from any wall or shrubbery for adequate airflow.
    • Avoid locations near bedrooms or windows where noise or defrost vapor could be an issue.
    • For roof installations, ensure structural support.
    • In cold climates, elevate the unit 3-12 inches above the pad/rooftop to allow for snow/ice drainage and prevent obstruction of drain holes. Consider a snow drift barrier.
  • Refrigerant Line Routing:
    • The vapor line must always be insulated.
    • Prevent direct metal-to-metal contact between liquid and vapor lines.
    • Use isolation hangers when fastening lines to building structures to prevent vibration transmission.
    • Insulate and isolate lines running through walls or sills.
    • Minimize 90° turns.
    • Secure vapor line from joists using isolators every 8 ft. Secure liquid line directly to vapor line using tape/wire every 8 ft.
  • Brazing: Use dry nitrogen purge during brazing. Wrap wet rags around valve bodies to prevent heat damage. Remove valve cores before brazing.
  • Leak Check: Pressurize lines and coil to 150 PSIG with dry nitrogen and check for leaks with soapy solution.
  • Evacuation: Evacuate to no higher than 350 microns. Evacuation is complete if the micron gauge does not rise above 500 microns in one minute after closing the valve to the vacuum pump.
  • Service Valves: Open gas service valve 1/4 turn counterclockwise to fully open. Open liquid service valve by backing out the stem counterclockwise until it touches the rolled edge (approx. 5 turns). Replace valve stem caps and tighten.
  • Electrical: High voltage power supply must match equipment nameplate. Install a separate disconnect switch. Ground the outdoor unit. Low voltage wiring diagrams are provided for various indoor unit configurations (Air Handler, Communicating Indoor Unit, Variable Speed Furnace, *AM7 Air Handler).
  • Start-Up: Ensure all installation steps are complete. Set thermostat to OFF. Turn on disconnects. Wait one hour before starting if compressor crankcase heater accessory is used and ambient is below 70°F. Set thermostat to ON.
  • Charge Adjustment:
    • Cooling Mode (Above 55°F Outdoor Temp.): Use the subcooling method. Determine final subcooling value based on line length and lift using provided charts. Measure liquid line temperature and pressure. Adjust charge until measured liquid gage pressure matches the chart value for the final subcooling and liquid temperature. Stabilize system for 20 minutes after any charge adjustment.
    • Heating Mode (Below 55°F Outdoor Temp.): Subcooling method is not recommended. Charge by weighing in the charge based on nameplate charge and additional charge for line length (using provided tubing information table). Aim for a minimum of 10° subcooling in heating mode.

Maintenance Features:

  • Troubleshooting: A detailed "System Faults" table is provided, categorizing issues by "Refrigerant Circuit" and "Electrical" and listing primary and secondary causes.
  • Pre-installation Check: Check for shipping damage and report to carrier. Remove unit from pallet by cutting tabs.
  • Post-installation Check: Perform a final unit inspection to ensure factory tubing has not shifted, connections are tight, and all wiring is properly secured.
  • Checkout Procedure: Includes steps for leak checking, insulating lines, securing lines, sealing masonry passages, verifying electrical connections, observing outdoor fan operation, ensuring indoor coil drain line drains freely, checking supply registers/return grilles, verifying return air filter installation, and confirming correct airflow settings.
  • R-410A Handling: Emphasizes using R-410A approved service equipment, replacing driers when opening the system, and never breaking a vacuum with air. If the system has been open for more than 4 hours, compressor oil must be replaced.

Trane 4TWR3 Specifications

General IconGeneral
BrandTrane
Model4TWR3
CategoryHeat Pump
LanguageEnglish

Related product manuals