RLC-SVX14H-GB
21
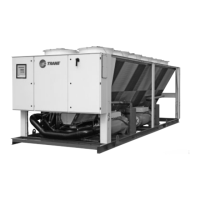
Unit Description
Installation overview and requirements.
Contractor responsibilities
A list of the contractor responsibilities typically
associated with the RTWD installation process is
provided in Table 8.
• Locate and maintain the loose parts. Loose parts are
located in the control panel.
• Install the unit on a foundation with fl at support
surfaces, level within 5 mm and of suffi cient
strength to support concentrated loading. Place the
manufacturer-supplied isolation pad assemblies under
the unit.
• Install the unit per the instructions outlined in the
“Mechanical Installation” section.
• Complete ail water piping and electrical connections.
Note: Field piping must be arranged and supported
to avoid stress on the equipment. It is strongly
recommended that the piping contractor provide at least
1m of clearance between the pre-installation piping
and the planned location of the unit. This will allow for
proper fi t-up upon arrival of the unit at the installation
site. Ail necessary piping adjustments can be made at
that time.
• Where specifi ed, supply and install valves in the water
piping upstream and downstream of the evaporator
and condenser water boxes, to isolate the shells for
maintenance and to balance/trim the system.
• Install fl ow switches or equivalent devices in both
the chilled water and condenser water piping.
Interlock each switch with the proper pump starter
and Tracer CH530, to ensure that the unit can only
operate when water fl ow is established.
• Supply and install taps for thermometers and pressure
gauges in the water piping, adjacent to the inlet and
outlet connections of both the evaporator and the
condenser.
• Supply and install drain valves on each water box.
• Supply and install vent cocks on each water box.
• Where specifi ed, supply and install strainers ahead of
ail pumps and automatic modulating valves.
• Supply and install refrigerant pressure relief piping
from the pressure relief to the atmosphere.
• Start the unit under supervision of a qualifi ed service
technician.
• Where specifi ed, supply and insulate the evaporator
and any other portion of the unit, as required, to
prevent sweating under normal operating conditions.
• For unit-mounted starters, cutouts are provided at the
top of the panel for line-side wiring.
• Supply and install the wire terminal lugs to the starter.
• Supply and install fi eld wiring to the line-side lugs of
the starter
Table 8
Type of
requirement
Trane-supplied
Trane-installed
Trane-supplied
Field-installed
Field-supplied
Field-installed
Foundation Meet foundation requirements
Rigging • Safety chains
• Clevis connectors
• Lifting beams
Isolation Neoprene isolators (optional) Isolation pads or neoprene isloators (optional)
Electrical • Circuit breaker or fusible
disconnects (optional)
• Unit mounted starter
− Wye-Delta starter on SE,
HE, XE versions
− AFD (Adaptive Frequency
Drive) on HSE version
• Flow switches
(may be fi eld-supplied)
• Harmonic fi lters on HSE
version (on request - sizing
according to client electrical
network)
• Circuit breakers or fusible disconnects (optional)
• Electrical connections to unit mounted starter
(optional)
• Electrical connections to remote mounted starter
(optional)
• Wiring sizes per submittal and local regulations
• Terminal lugs
• Ground connection(s)
• BAS wiring (optional)
• Control voltage wiring
• Chilled water pump contactor and wiring
including interlock
• Option relays and wiring
Water piping • Flow switches
(may be fi eld-supplied)
• Taps for thermometers and gauges
• Thermometers
• Strainers (as required)
• Water fl ow pressure gauges
• Isolation and balancing valves in water piping
• Vents and drain on waterbox valves
• Pressure relief valves (for waterboxes as
required)
Relief • Single relief valves
• Dual relief valves (optional)
• Vent line and fl exible connector and vent line
from relief valve to atmosphere
Insulation
• Insulation
• High humidity insulation
(optional)
• Insulation
Water piping
connection
components
•
Grooved pipe
• Grooved pipe to fl anged
connection (optional)
Caution on
exposure to
refrigerant
Respect recommendation of IOM addendum