P 9
Temperature settings for 1 temperature models
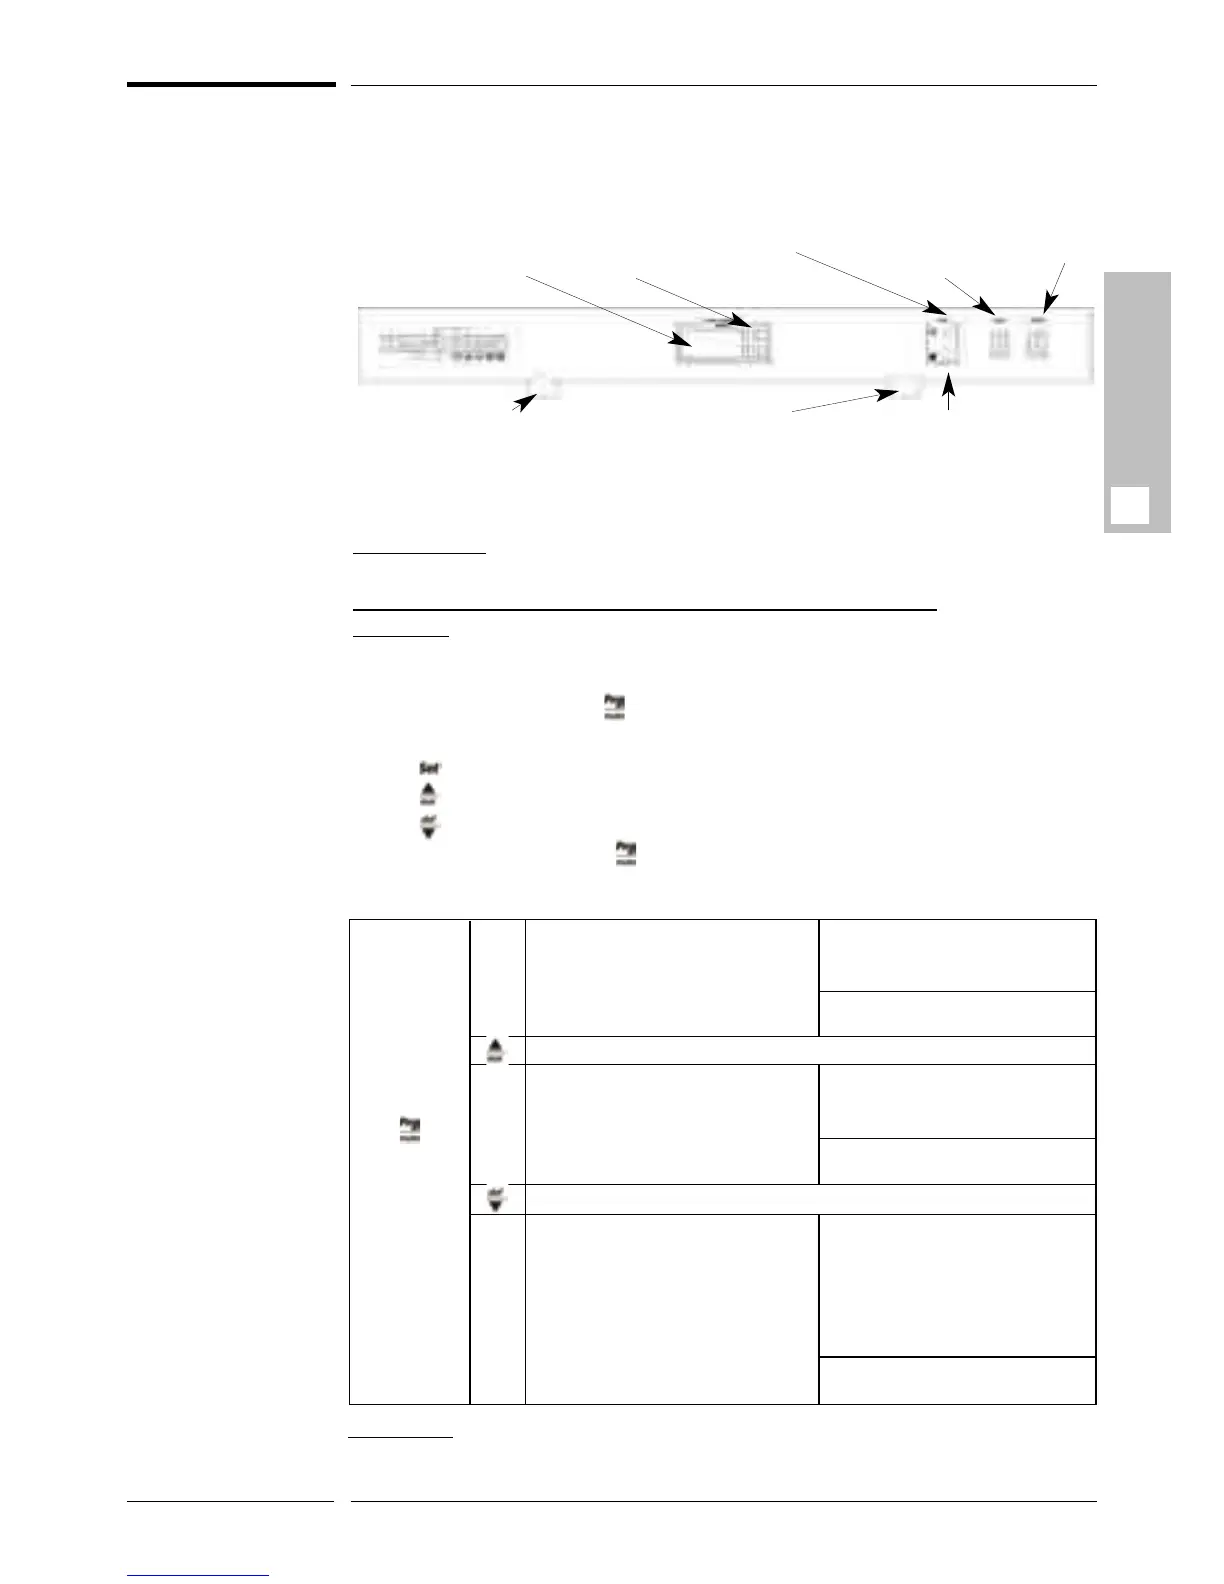
The temperature control(s) and setting(s) are adjusted from your wine cabinet’s
settings panel, as shown below:
If the loading configuration or location of your cabinet justifies it, it is possi-
ble to adjust the temperature setting within a limited range of 6°C to 18°C
(42°F to 64°F) (for an ambient temperature of 25°C (77F°)).
*Please note: The original temperature setting is 12°C (54°F) when the
wine cabinet leaves the factory.
T
o adjust the temperature of your 1 temperature cabinet:
Comments: As soon as you see the display flash during setting, you have approxima-
tely 50 seconds to change or confirm, otherwise, you must restart the process.
If the setting has not been recorded, your cabinet will retain its original settings.
Press and hold down the key for 5 seconds. “St” will appear on the display
(“St”: maturing temperature setting).
Press to read the set temperature*.
Press to increase the set temperature, or
Press to lower the set temperature.
To save your setting, press for 5 seconds until the temperature is displayed.
Otherwise, it will be necessary to restart the process.
Lighting ( LED 1)
Maturing
temperature display
Cold circuit indicator light (Green)
Hot circuit indi-
cator light (Red)
Lighting
ON / OFF
switch
General
ON / OFF
switch
Keyboard
Lighting (LED2)
GB
Pressing! for
5 seconds
allows you
to access:
“ST” allows you to set the wine
maturing temperature (for 1 and 3
temperature models) or the upper
section (for multi-temperature
models).
Pressing Set: Allows you to read
the set temperature of the “ST”
setting.
Pressing Set twice: Allows you to
return to the “ST” display
Allows you to change from “ST” to “F4” then “H4”.
“F4” Allows you to set the tempera-
ture of the chilling compartment (for
3 temperature models) or the lower
section (for multi-temperature
models)
Allows you to change from “ST” to “F4” then “H4”
Pressing Set: Allows you to read
the set temperature of the “F4”
setting.
Pressing Set twice: Allows you to
return to the “F4” display.
Pressing Set: Allows you to read
the “H4” setting value:
H4=O means that the warning
alarm is active.
H4=1 means that the warning
alarm is disabled
Pressing Set twice: Allows you to
return to the “F4” display.
“H4” Allows you to activate or disa-
ble the warning alarm, if a malfunc-
tion occurs.
« ST »
« F4 »
« H4 »
Please note:
- The lighting function is manually controlled (“Light” On/Off switch). If you are no lon-
ger using it, remember to switch off the lighting.
 Loading...