2
INSTALLING THE HEAD TUBE ISOZONE
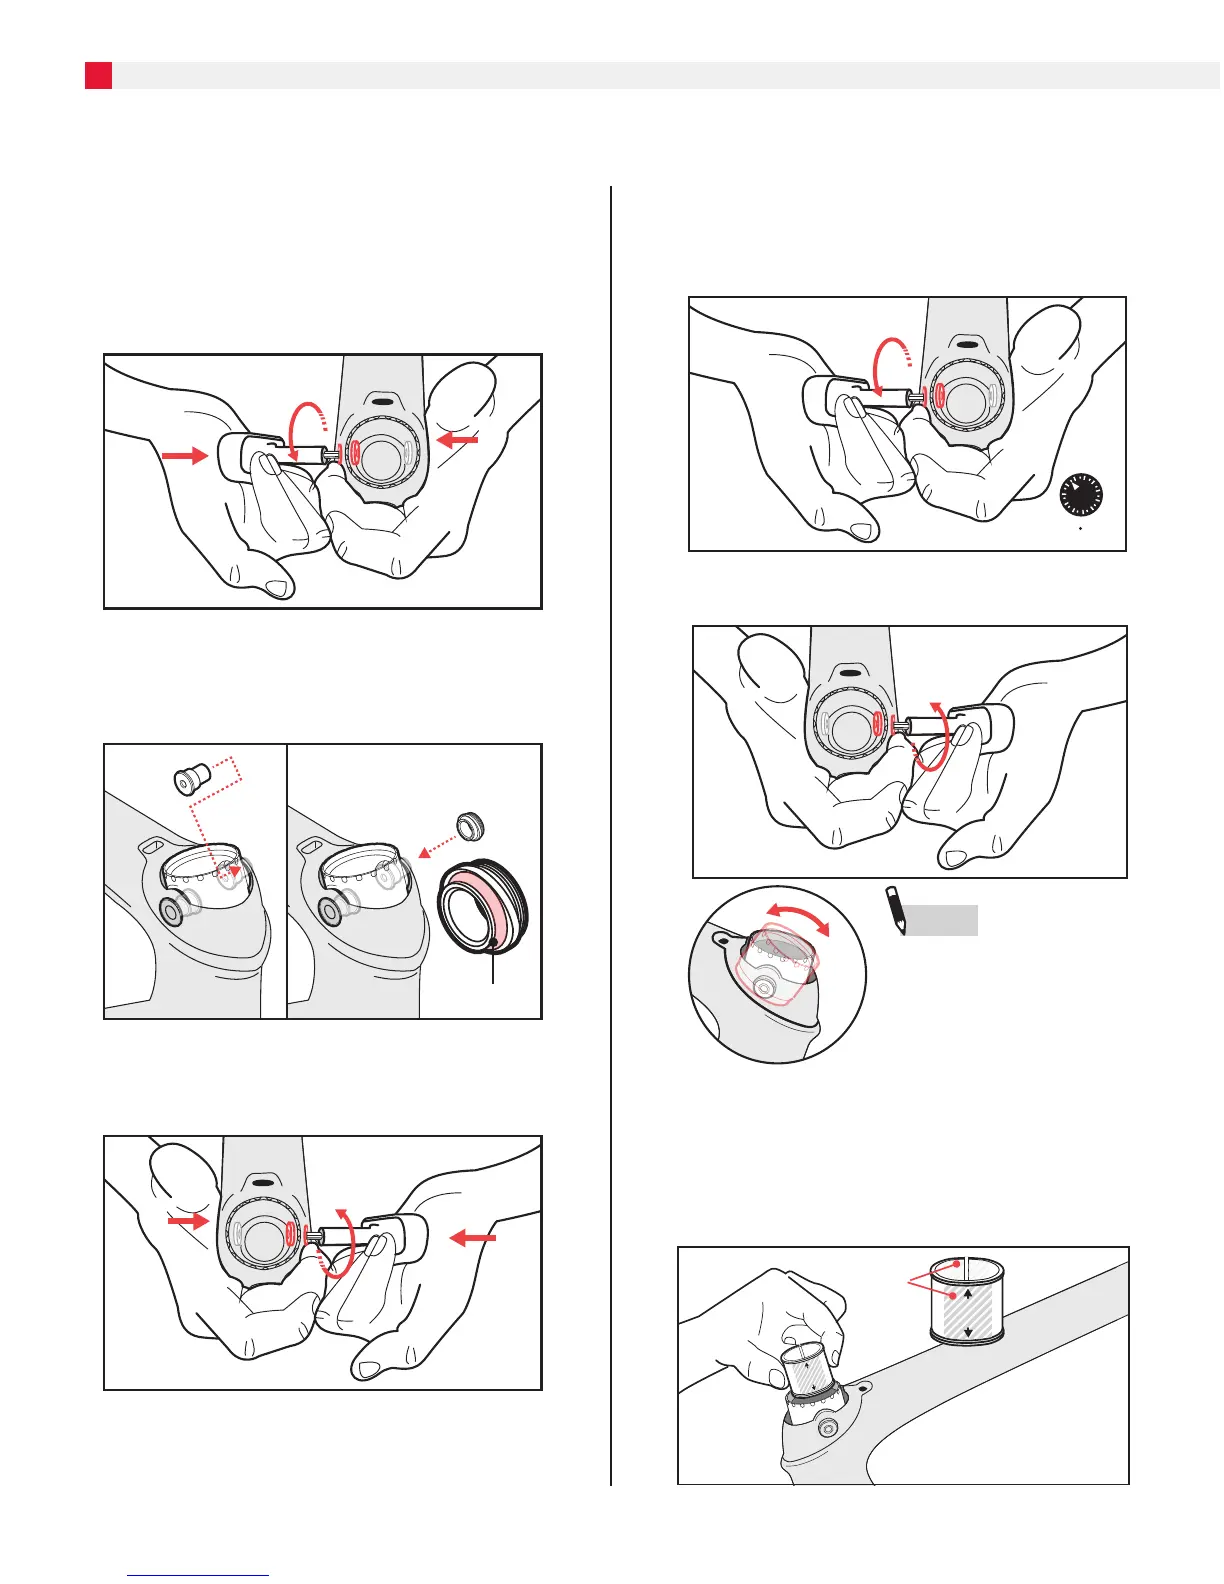
9. Place one hand on the opposite side of the head
tube (9a) and with the other, insert the torque key
into the nut and apply pressure with both hands
until the nut seats into head tube (9b).Then turn
clockwise, with firm pressure (9c). This will draw
the screw inside the head tube towards the nut.
Turn until snug, do not fully tighten.
9b
9c
9a
10. Repeat installation of the screw and elliptical nut
for the other side.
CHAMFER
11. Repeat the seating process for the other side.
12. To fully tighten, apply good pressure while
turning the torque key in the nut. This will
prevent the bolt inside the decoupler from
spinning as well as draw it towards the nut.
Tighten to maximum of 5 Nm.
N m
5
13. Repeat for the other side.
NOTE
Decoupler should move
freely after installation. If
not, loosen and reinstall,
clean connections and apply
grease.
14. Lower the pre-load spacer into the decoupler
so that the label “BEARING” is on the top and
“SPRING” is pointed down. Also note there are
flat sides, these line up with the screws on either
side of the decoupler.
FLAT
SIDES
BEARING
SPRING
10












 To Next Page