T5
-14-
Beam Trammel Routing
Cutting Arcs with the Router
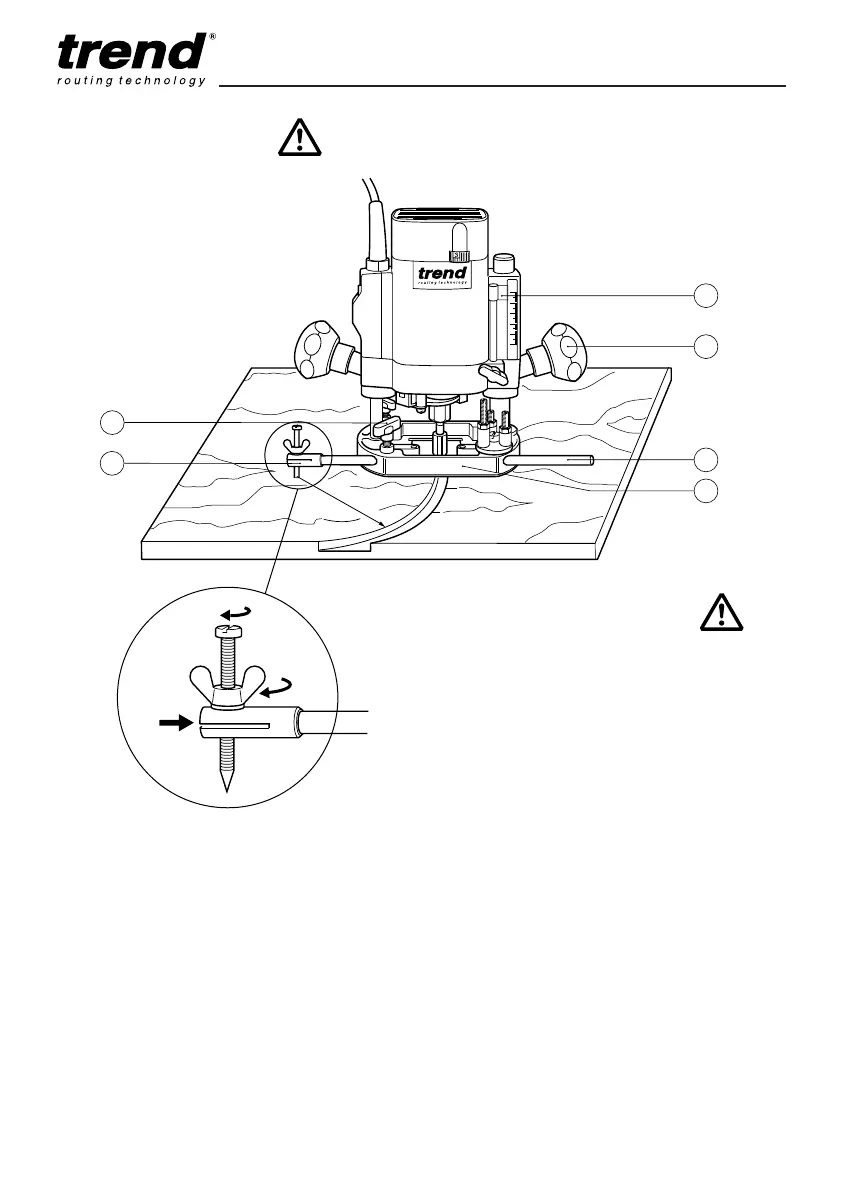
■ Place the machine on the workpiece.
■ Set the cutting depth using the depth stop (2).
■ Fasten the fence rod (1) in the routing base
(3) with the thumb knob (4).
■ Fit on the beam trammel point (5) as shown.
■ Measure the radius and fix the point of the
beam trammel in position.
■ Switch on the machine.
■ After releasing the plunge locking knob (6),
lower the machine slowly as far as the depth
stop and lock it there.
■ Cut grooves, rebates etc. at a steady rate of
feed, in an anti-clockwise direction. Ensure
the beam trammel point does not move.
■ When finished, release locking knob to raise
the machine.
■ Switch off the machine.
Fitting the beam trammel attachment
■ Fit the beam trammel attachment (A) to the
end of one rod and tighten wing nut (C)
securely.
■ Height adjustment of the pivot point can be
achieved by loosening wing nut (C) and
rotating screw (B).
■ Once set to the correct height, lock securely
wing nut (C).
MANU-T5 v8.0 1/9/05 12:06 pm Page 14