8
4. Initial Wireless Setup
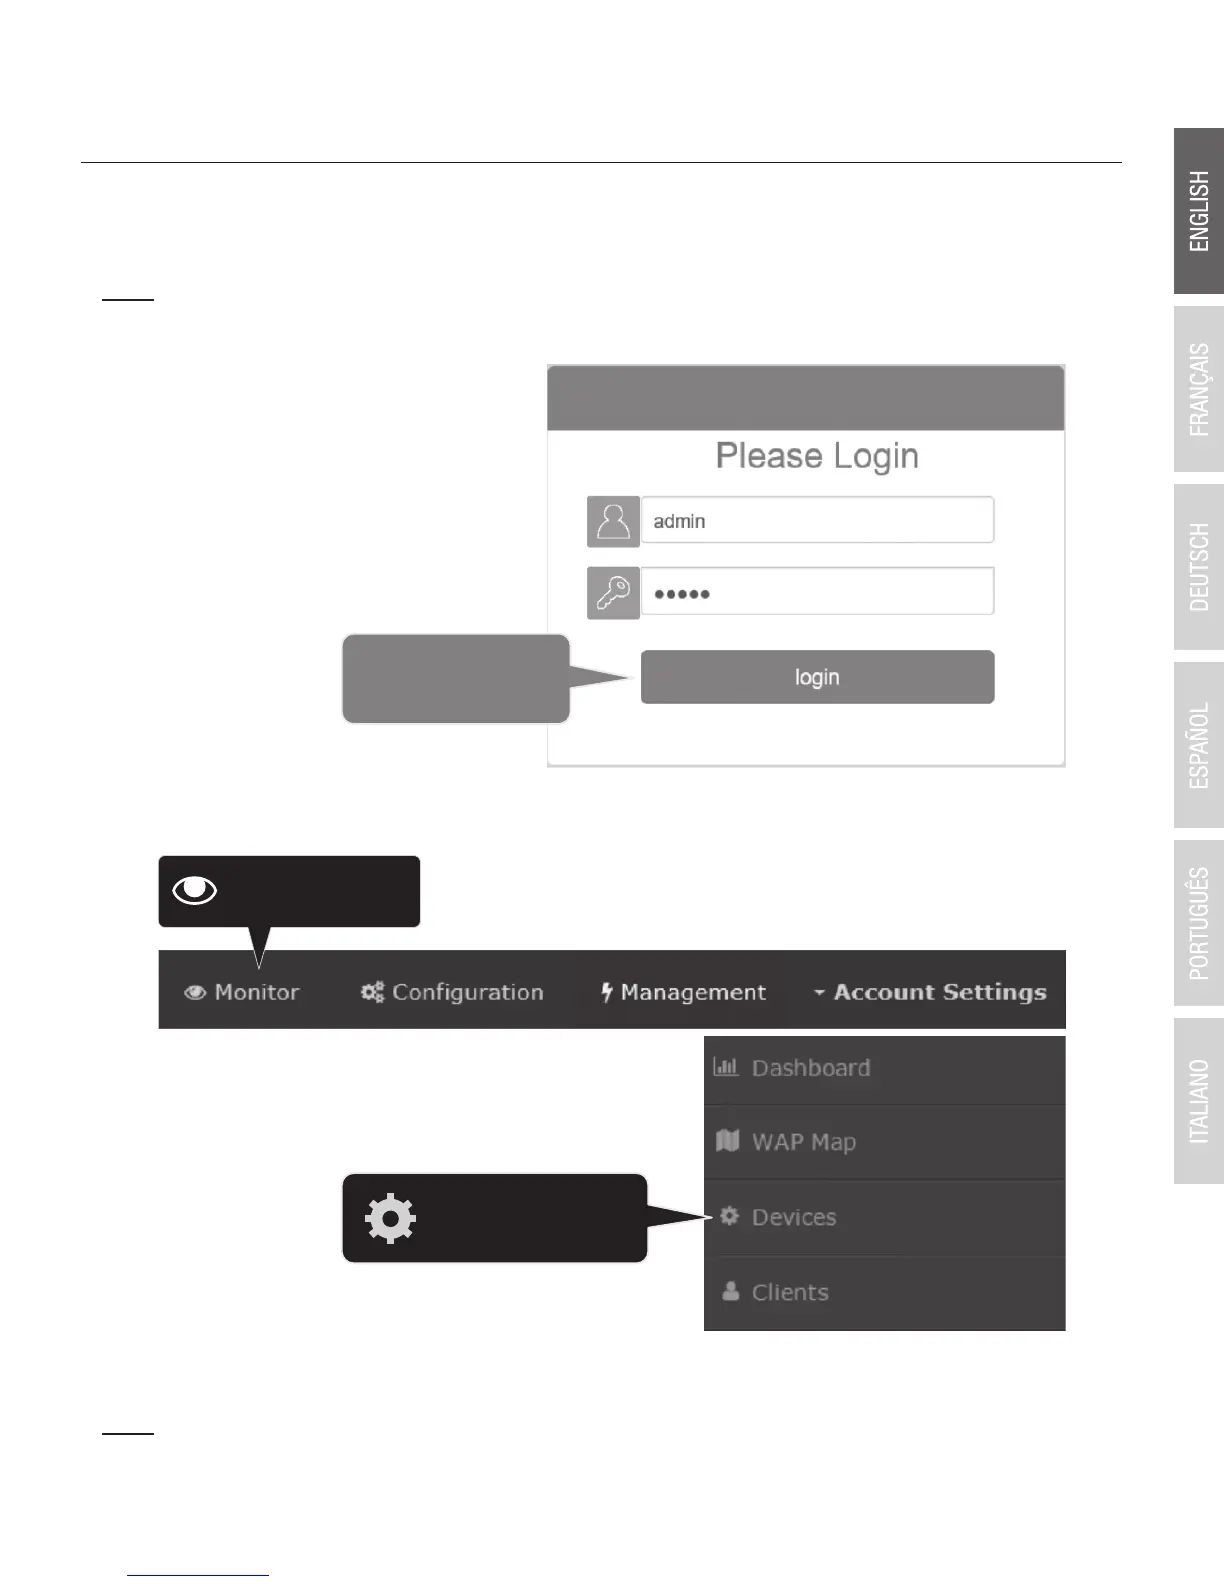
1. Using your computer and web browser, access the wireless controller management page
using the newly assigned IP address settings (configured in Section 2) and login.
Note: If the IP address settings were not changed in Section 2, the IP address settings for the
controller are 192.168.10.200 / 255.255.255.0.
2. Click Monitor and click Devices.
3. The access points will be discovered automatically and appear in the Device List.
Note: If the access points do not appear, make sure access points are powered by checking the
physical LEDs and physical cable connections and refresh the page.
 Loading...