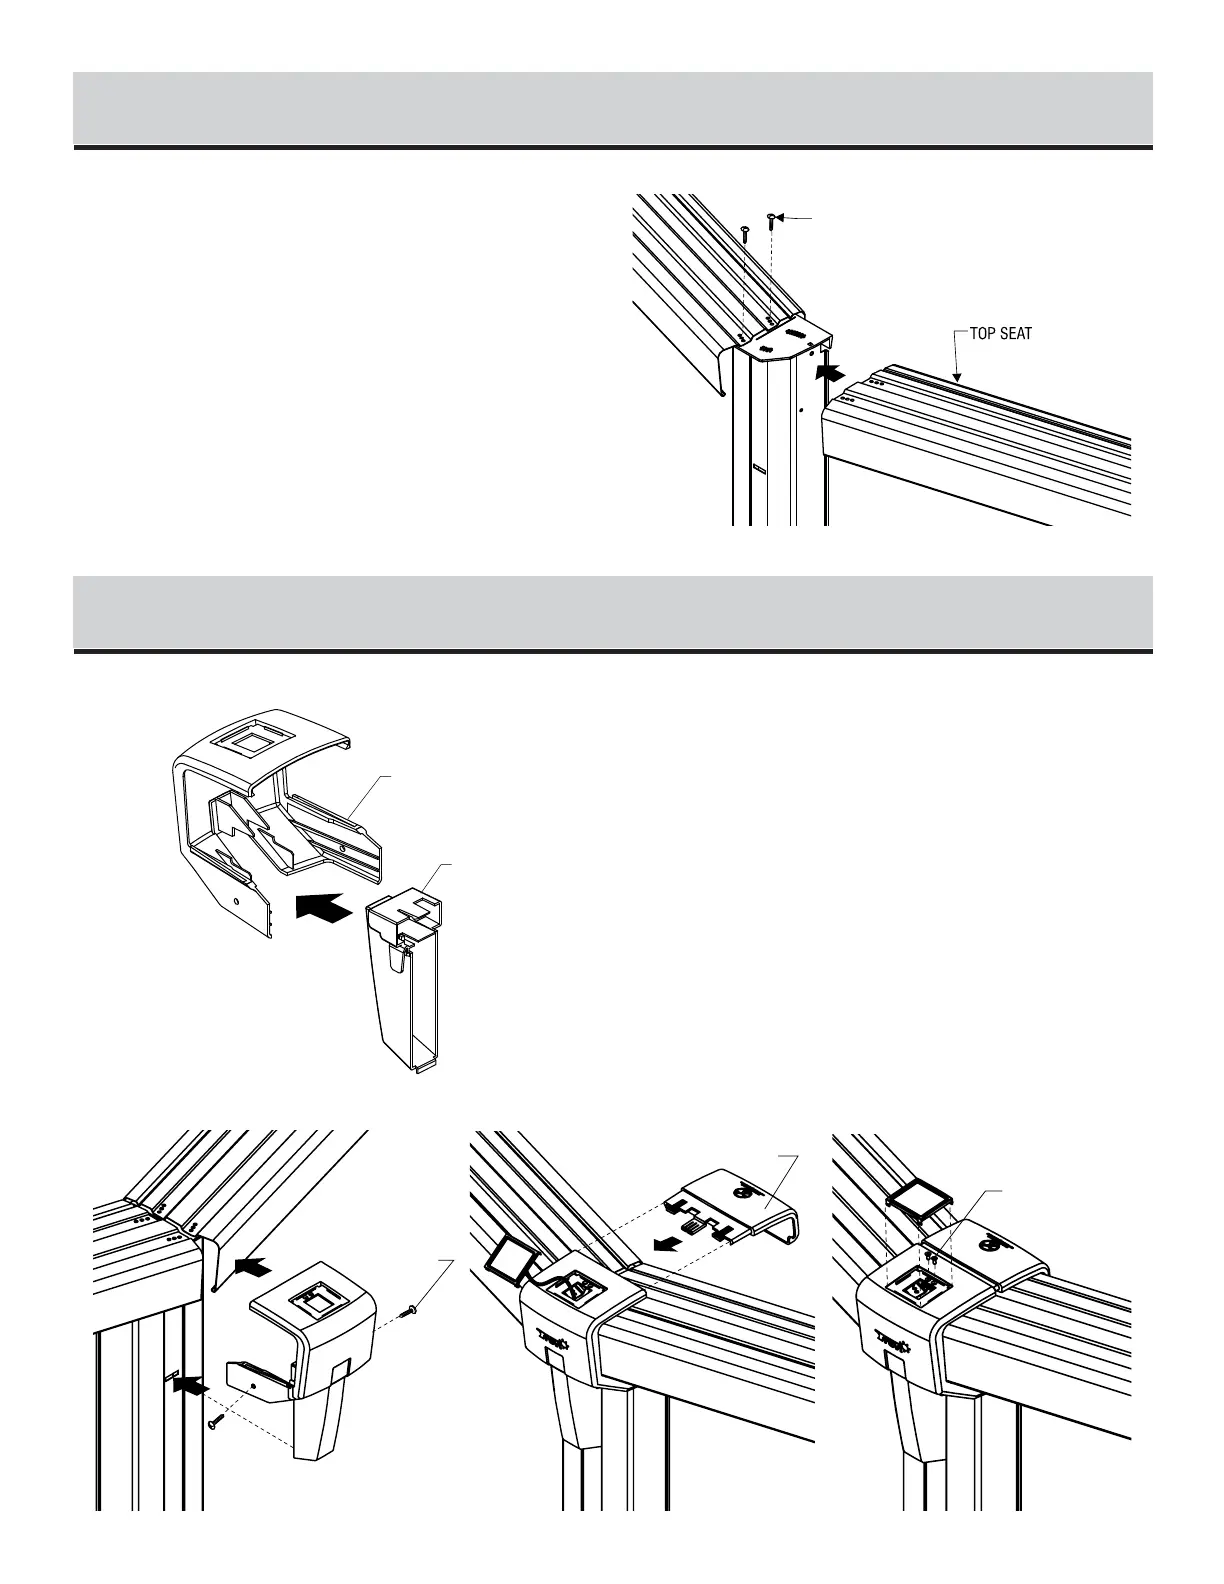
TOP SEAT INSTALLATION
13
Be sure to have a vertical (plumb) upright before fixing the top seat.
Place the top seat on the upper side of the upright.
Center the top seat between the two uprights and secure with four
(4) screws “Z”.
SEAT CAP INSTALLATION
14
Slide the lens inside the round section cap extension
Hook the base of the lens previously attached to the round section
cap extension in the slot on the front of the upright. Secure the cap
extension it in place on the upright with two (2) screws ‘’Z’’ on each
side. (Illustration 14.1)
Then place the seat cap on the inside edge of the seats and snap it
to the top of the cap extension. (Illustration 14.2)
Secure the seat cap with two (2) screws no6 flat head x 3/8 in.
Install the plastic cap on the seat cap. (Illustration 14.3)
 Loading...