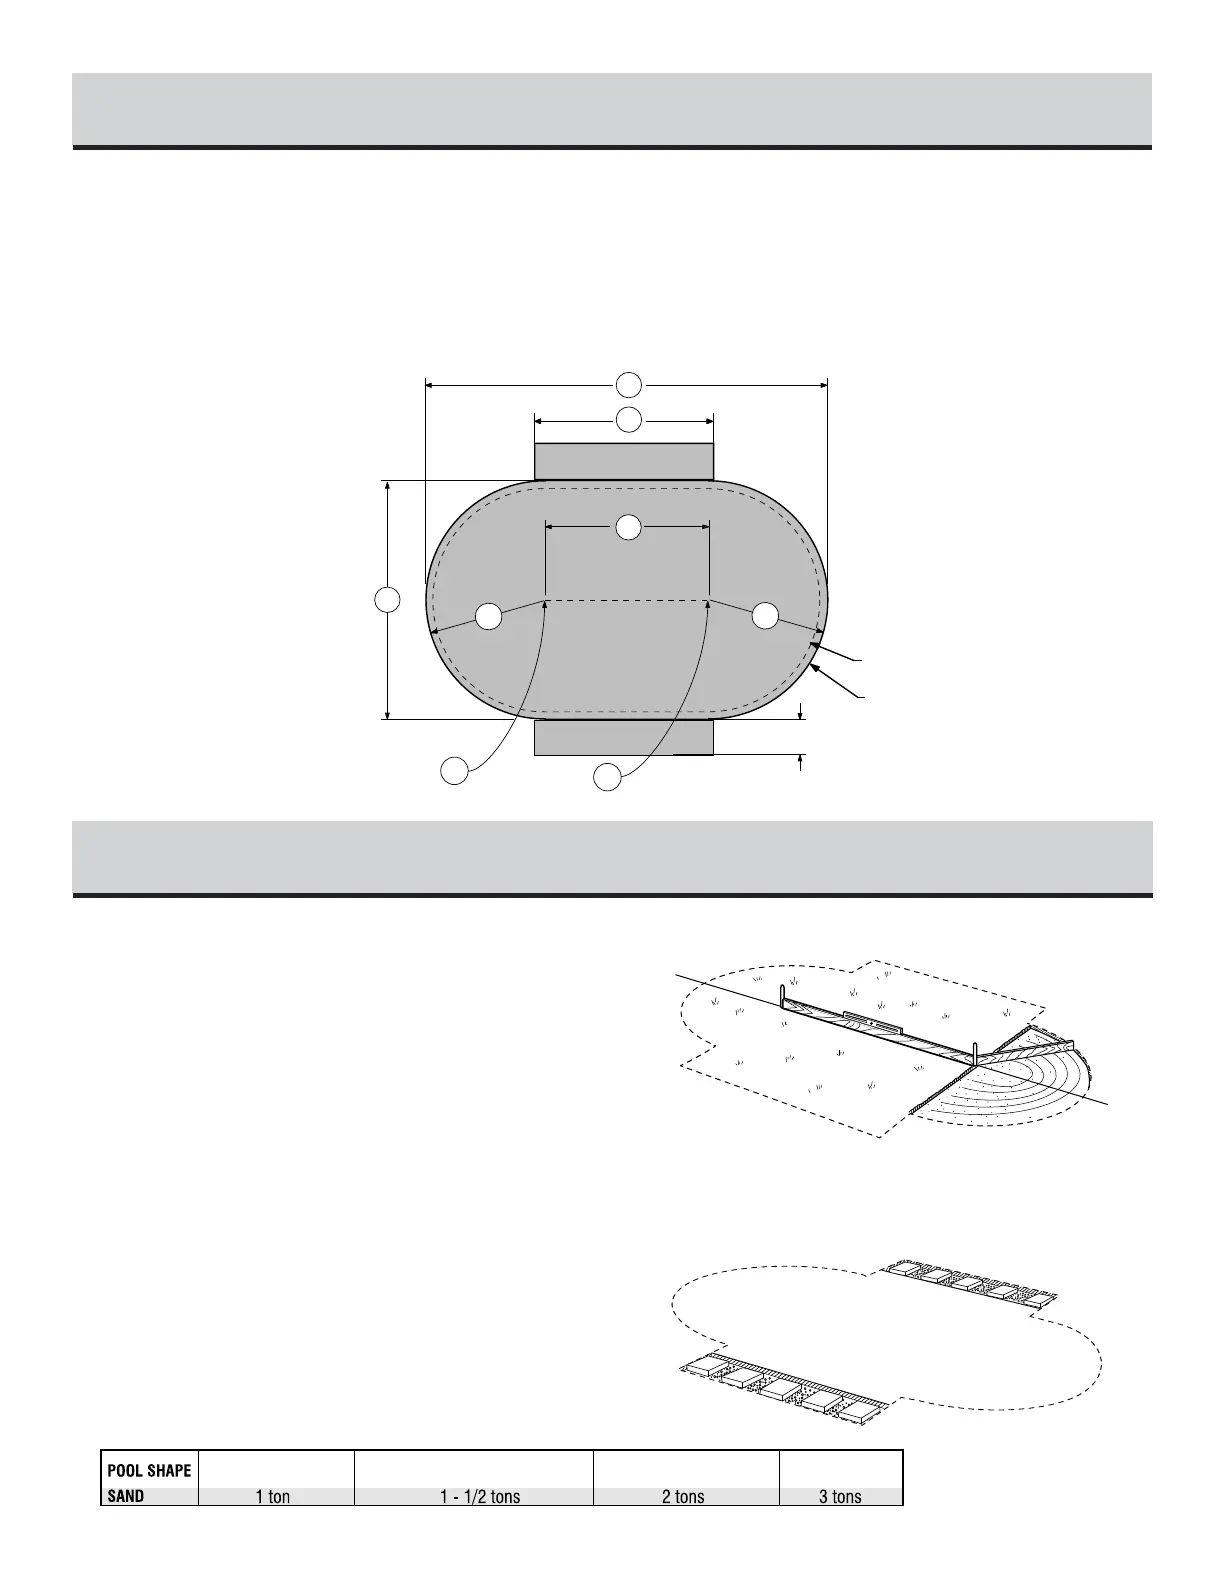
Chart: Sand quantity
1) Drive a stake into the ground at points A and B respecting the
distance of the straight section between those two points (A-B).
2) Draw two half circles respecting the radius (R).
3) Join the two half circles with straight lines respecting the width
between these two lines (D).
4) Verify that the total length is consistent. (E)
5) Add 89cm (36”) wide trenches on each side, respecting the
length (F)
6) Remove all grass from the area you have just outlined.
SITE PREPARATION (continued)
1
SITE LEVELLING
2
Figure 1.1
SITE LEVELLING
For an oval pool, the bottom must absolutely be levelled, using a
carpenter's level and a straight plank. Eliminate any protrusions.
Ensure that the surface is free of debris such as rocks, wood, etc.
TRENCHES FOR BUTTRESS ASSEMBLIES
1) Dig trenches to a depth equal to the thickness of the patio blocks
(2” thick slabs recommended). (Refer to illustrations for trench lay-
out details).
2) Make sure trenches are smooth and leveled without compacting
them.
3) Place and level patio blocks into trenches. Make sure that the
top of the slab is level with the pool area. And bottom of framework
must be level with pool area.
In order to ensure proper water drainage around the pool, a 2-degree
slope needs to be erected around the perimeter of the pool. THE
MANUFACTURER WILL NOT BE HELD RESPONSIBLE FOR ANY LI-
ABILITY SHOULD THIS STEP BE OMITTED.