Prestige SOLO 60, 175 and 250 Boilers
Natural to Propane Instructions
2
Installation of the Propane Orifice
1. Turn off the electrical power supply to the boiler.
2. Close the manual gas shut off valve to the unit.
3. Remove the front panel of the Prestige by
removing the mounting screw(s) along the
upper edge of the unit. Lift the panel up and
pull forward to remove the front panel from the
unit.
4. Remove the Phillips head retaining screw from
the control panel. Open the display panel cover
and swing the control panel out (MCBA).
5. Remove the air inlet elbow from the venturi
using a twist motion.
6. Disconnect the gas supply piping inside the
Prestige enclosure at the brass union located
just below the gas valve.
7. Unscrew the Phillips screw securing the rectifi-
er cable / plug to the gas valve. Disconnect the
rectifier plug from the gas valve (MCBA).
8. Remove Molex plug from gas valve (TRIMAX).
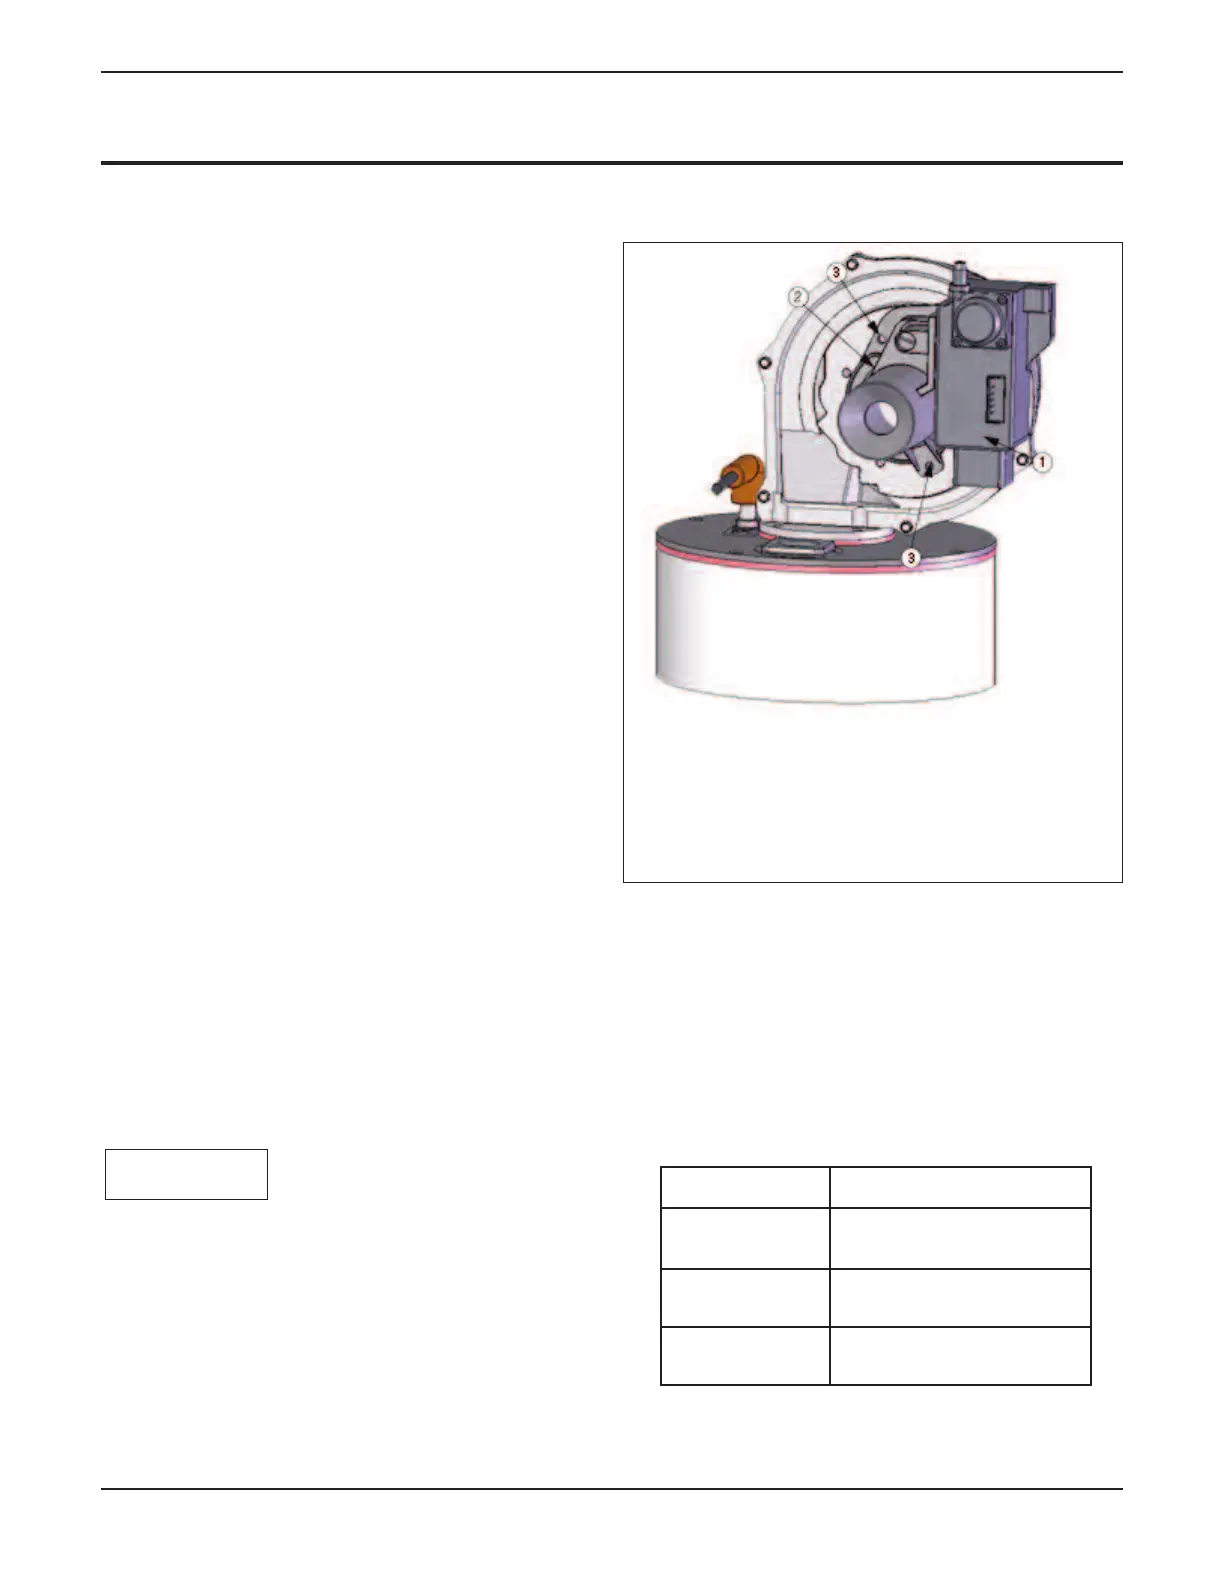
9. Remove the two T-25 Torx head screws used to
mount the venturi / gas valve assembly to the blow-
er. Do not discard the screws. Dismount the venturi
/ gas valve assembly from the blower. See Fig. 1.
There is a gasket between the venturi and the
blower housing. This gasket must be reinstallat-
ed when the venturi is mounted back onto the
blower. Use care not to damage the gasket.
10. Using a T-25 Torx wrench remove the three
mounting screws attaching the gas valve to the
venturi. Note the orientation of the gas valve to
the venturi for reference later when the gas
valve is reassembled to the venturi.
11. Install the appropriate brass propane orifice
from Table 1 in the gasket between the gas
valve and the venturi. The black rubber gasket
must remain attached to the gas valve. See Fig.
2 page 3.
NOTICE
Table 1: Propane Gas Orifice
Model Orifice Size
Solo 60 0.120 inch (3.1 mm)
Solo 175 0.221 inch (5.6 mm)
Solo 250 0.250 inch (6.3 mm)
1. Gas Valve
2. Venturi
3. T-25 Torx Head Screws. Attaching Gas
Valve/Venturi to Blower Housing
Fig. 1: Prestige Burner Assembly
 Loading...