PRESTIGE Solo 60, 110, 175 and 250
HX Field Replacement
Kit
8
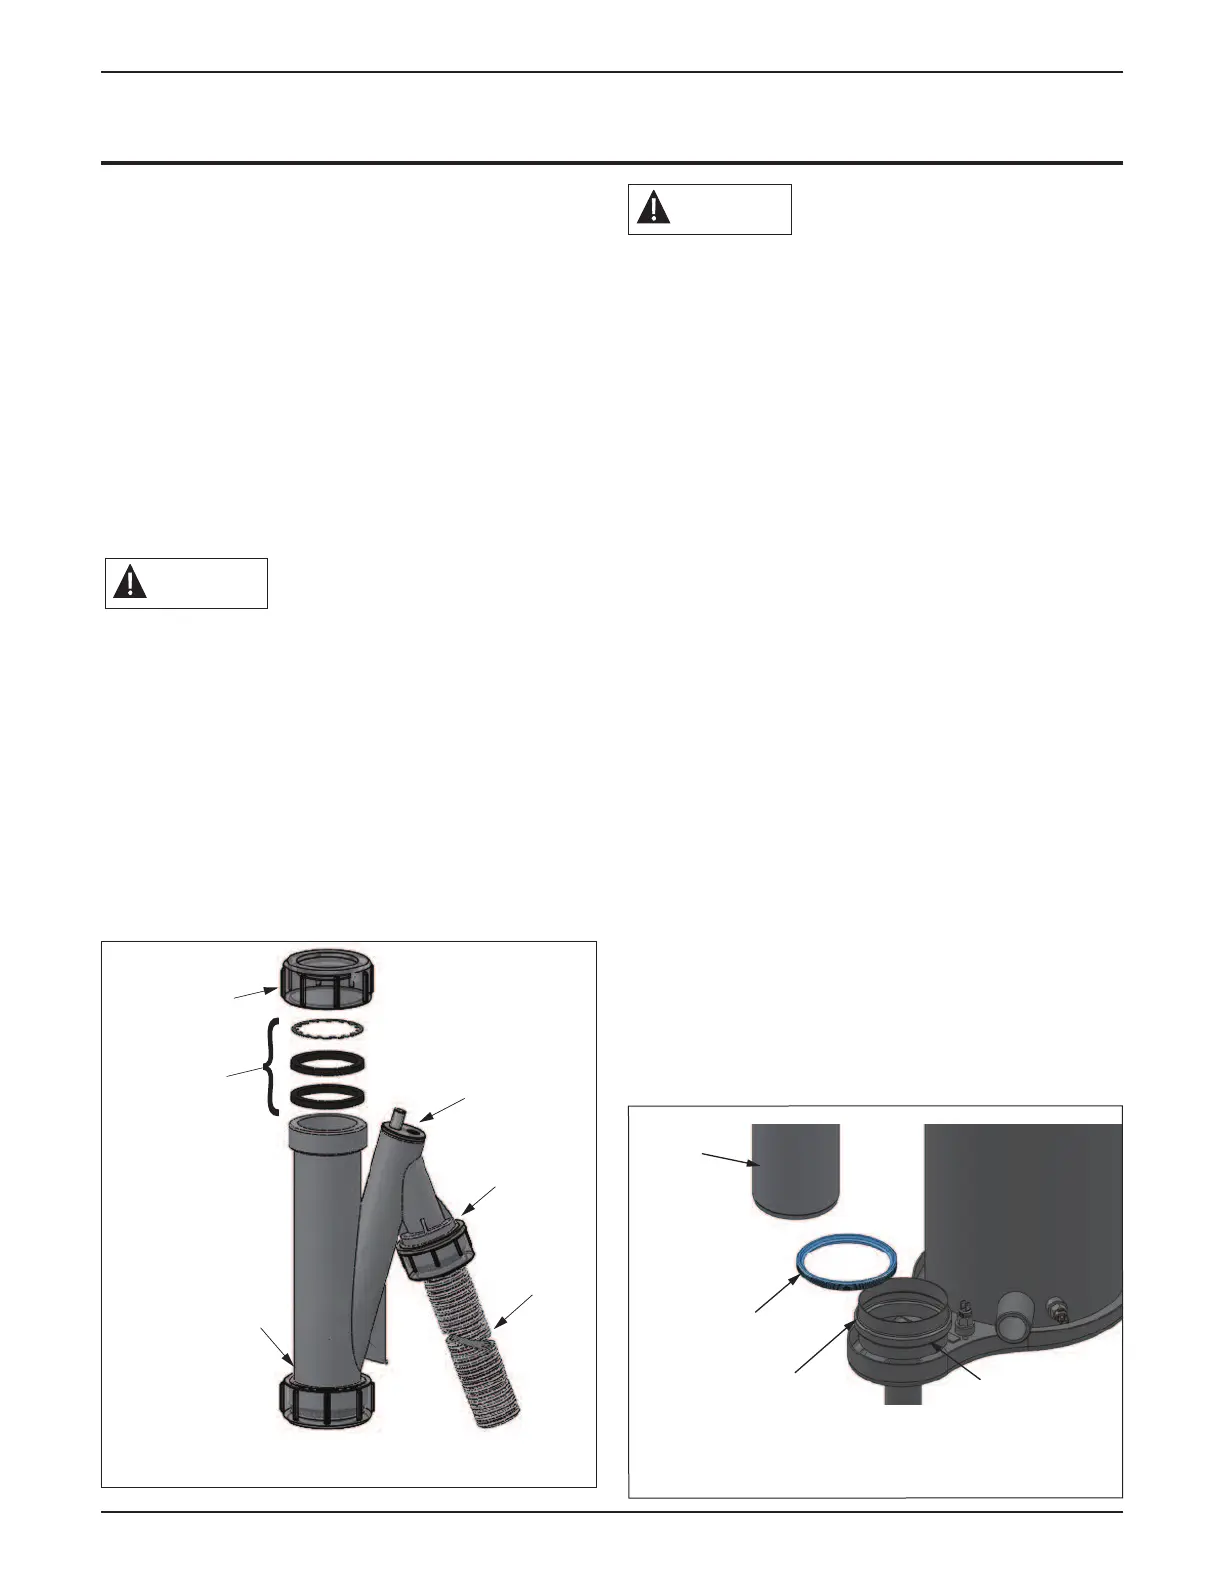
5. A new metal washer must be installed when
installing the condensate drain assembly onto a
polypropylene condensate pan. The new metal
washer must first be cut using a pair of diagonal
cutting pliers to make it into a split washer.
Insert the split metal washer into the retaining
nut and screw onto the condensate drain assem-
bly without rubber gaskets. Use the condensate
drain assembly as a tool to press the retaining
nut with split metal washer onto the polypropy-
lene condensate pan. Unscrew the condensate
drain assembly and proceed to the next step.
Ensure the installation of the condensate drain
assembly included the metal washer when
attaching to a polypropylene condensate pan.
Failure to comply could result in the trap assem-
bly dislocating from the boiler.
6. Slide the retaining nut, and rubber seals from the
condensate drain assembly over the heat exchang-
er condensate drain nipple. Connect the condensate
drain assembly to the retaining nut and tighten.
Ensure the condensate drain assembly contains
the plastic seated ball. Do not install the conden-
sate drain assembly if the ball is lost or missing,
replace the entire assembly.
Installation of Gas Connection
1. Install the gas piping inside the unit if it was
removed for additional clearance/access.
2. Connect gas piping to the gas valve at the brass
union located just below the gas valve. Tighten
the union using two wrenches. See Table 2, page
14 for torque specifications.
Installation of Stainless Steel Vent Outlet
Adapter
1. Ensure flue gasket is seated properly in the heat
exchanger adapter. Apply clean water to the bot-
tom of the vent outlet adapter and flue gasket.
(Fig. 12).
2. Insert vent outlet adapter through the top jacket
panel into the heat exchanger adapter. (Fig. 12).
Use a slight twist motion with a downward
force as it is inserted into the adapter. Ensure
the gasket remains seated in the heat exchanger
adapter.
WARNING
WARNING
Moisten
Gasket Prior
to Insertion of
Flue Tube
Vent
Outlet
Adapter
Ensure
Adapter is
Clean of All
Debris
Heat Exchanger
Adapter
Fig. 12: Heat Exchanger/Flue Tube Gasket
Flexible Tubing
(or 3/4 PVC/
CPVC Piping
to Drain)
Compression
Nut with
Rubber Seal
Fill Plug
with Vaccum
Break Port
Condensate
Drain Assembly
Plastic Ball
(Not shown)
Retaining Nut
Place the Metal
Washer and (2)
Rubber Gaskets
in this Order for
Proper Seal.
Fig.11: Condensate Drain Assembly
 Loading...