13
6. Control Panel
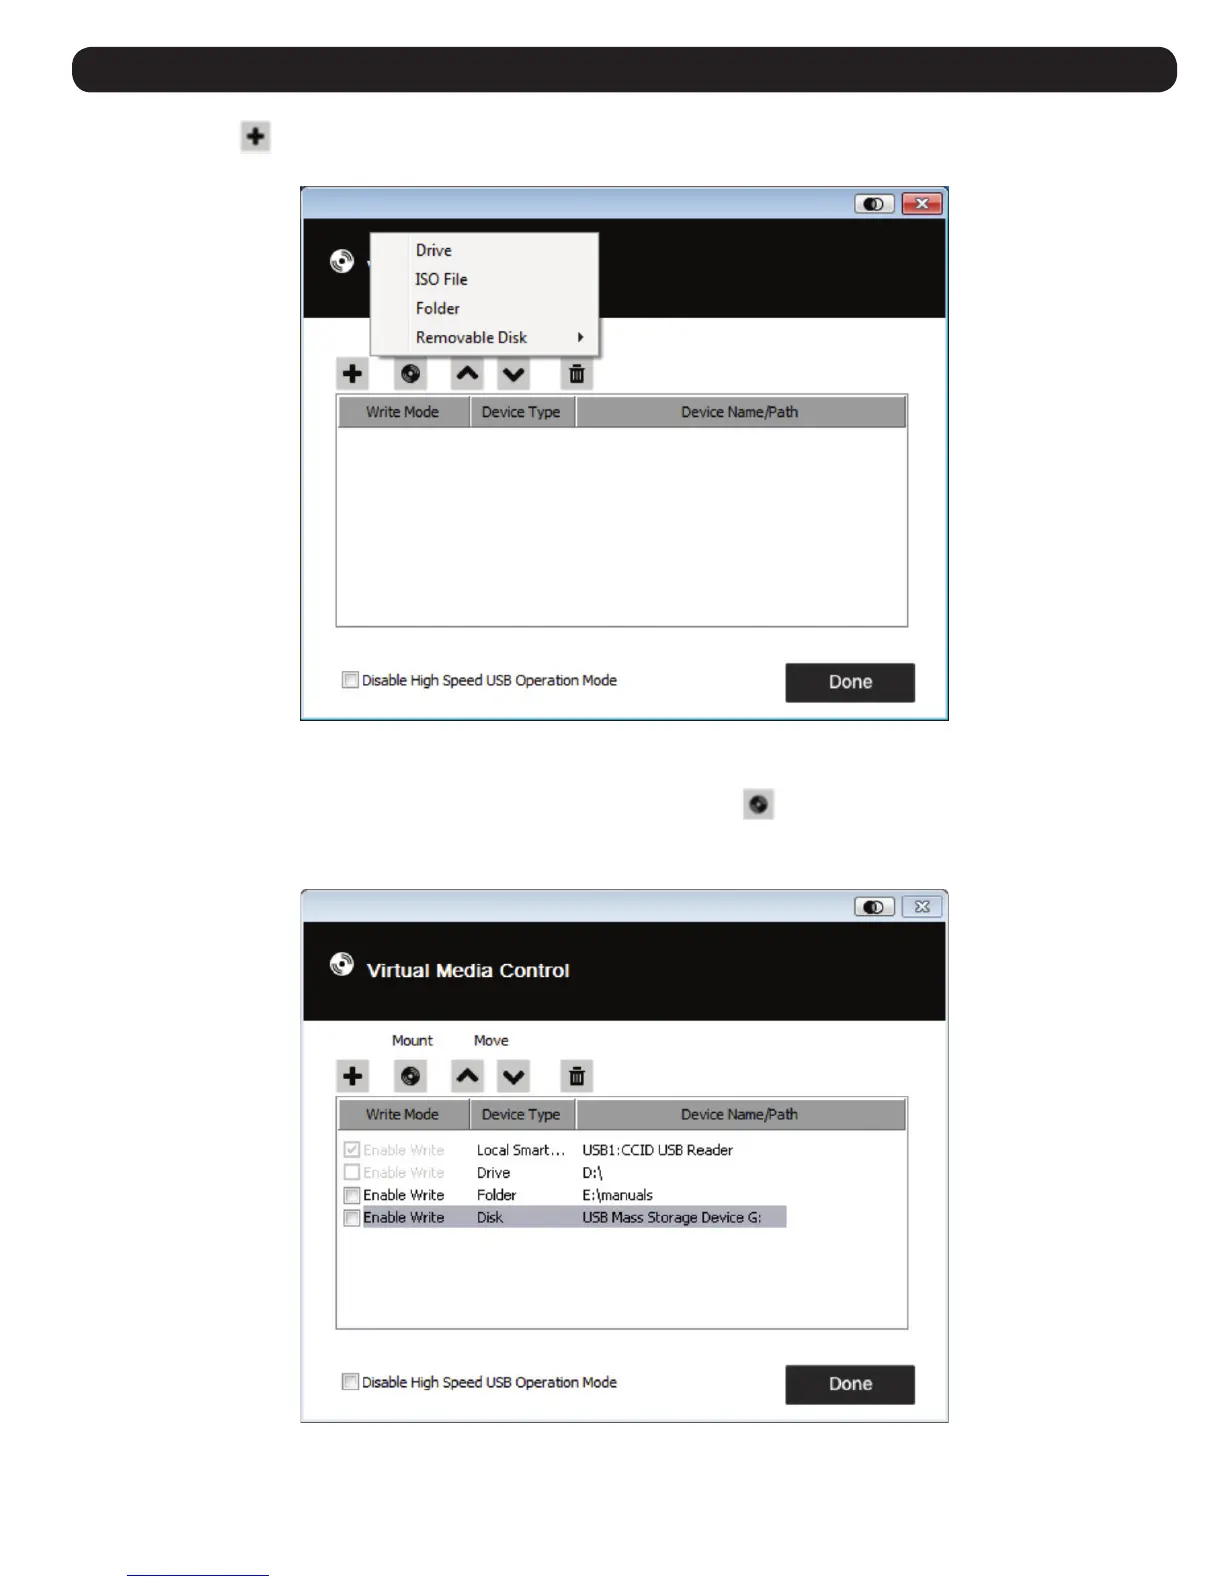
2. Click the plus icon and then select the media source. Depending on your selection, additional dialog boxes appear to let you select the
desired Drive, ISO File, Folder or Removable Disk.
3. If your device only supports full speed USB, click the Disable High Speed USB Operation Mode checkbox.
4. To add additional media sources, repeat steps 2 and 3. You can select as many sources as you want, but you can only mount up to three at a
time. The top three in the list are automatically selected when you click the Mount icon . To rearrange the selection order, highlight the device
you want to move, then click the arrow icons to move it up or down the list.
5. “Read” refers to the redirected device being able to send data to the remote server. “Write” refers to the redirected device being able to have data
from the remote server written to it. For the redirected device to be writable, as well as readable, click the Enable Write checkbox:
Note: If a redirected device cannot be written to, it appears in gray.