Never fit the trigger strap when using the saw hand-held.
Before fitting the Trigger Strap (K) always
ensure that the saw is not connected to
the power and that the switchbox is in
the “OFF” position.
Wrap the trigger strap around the
handgrip of the saw, with the hook & loop
side facing inwards.
Pass the end of the strap through the
buckle, until the security loop has passed
through.
Hold in the “lock-out” button on the saw
handle and engage the trigger while
tightening the strap back onto itself.
Ensure the trigger is locked fully “on”.
Page 5
K
K
Fitting the Trigger Strap (K)
1
2
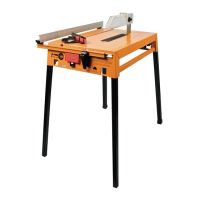
The clamp knobs have cut-away edges. When all four
cut-aways are facing the saw and correctly lined up,
the saw can be lifted straight out of the clamps.
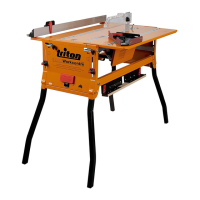
The clamp bases will ensure the
saw returns to the same position
when re-fitted. Turn the knobs
clockwise about half a turn to
tighten the saw back down.
NOTE: Rotate the clamp knob
beneath the saw handle to allow
full adjustment depth of the saw
while clamped securely down.
2
Removing the Saw (I)
Ensure the trigger strap is removed before
using the saw hand-held.
Rest the saw table upside down on packers.
Release the saw height lever and pivot the saw
away from the baseplate so that all four clamp
knobs can be accessed.
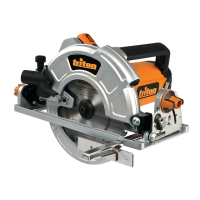
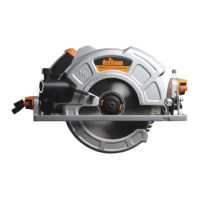
1. With the saw removed from the saw table,
hold in the shaft lock button and use the saw
spanner to remove the arbor bolt - turn in the
direction of the blade rotation. The shaft will
turn slightly before locking, allowing the bolt
and outer arbor washer to be removed.
2. Hold the lower blade guard fully back and
carefully slide the blade through the baseplate
and position it onto the inner washer on the
shaft. The graphics should face out and the
arrow on the blade should point in the same
direction as the arrow on the guard.
Fitting the Saw Blade
2
1
1
3
 Loading...