12 13
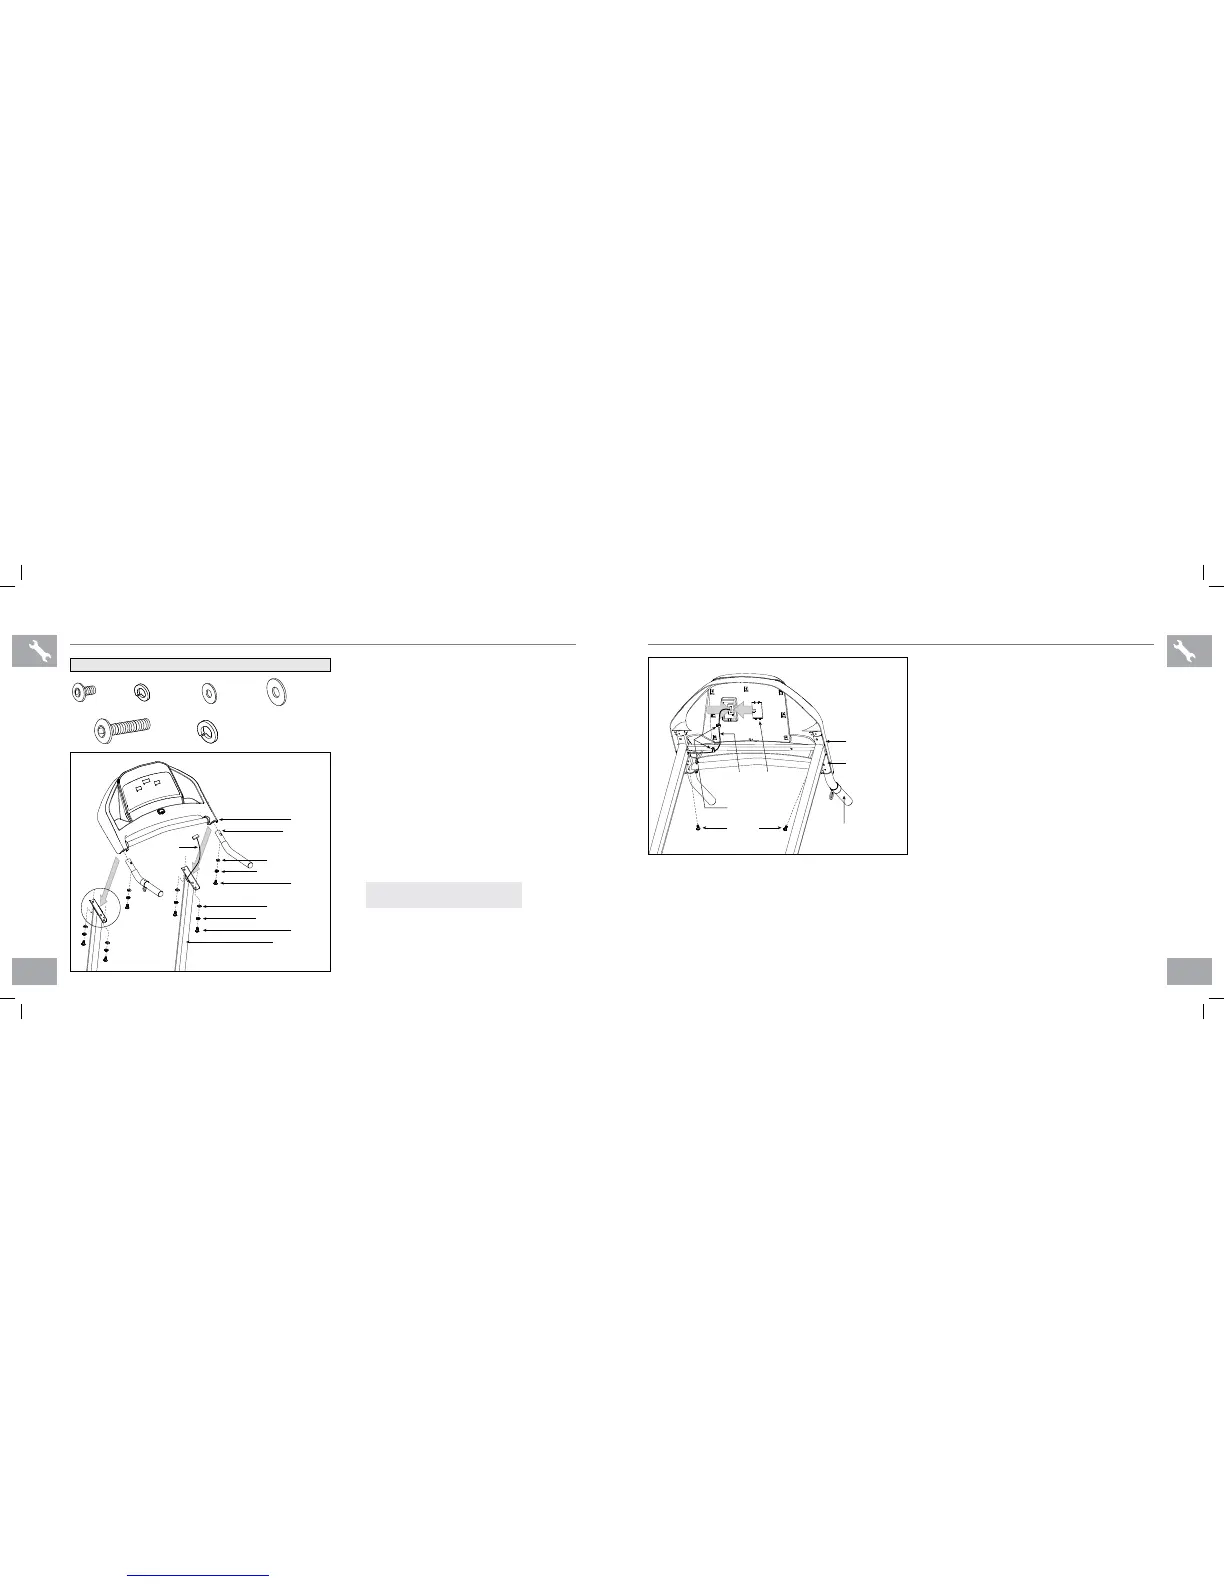
ASSEMBLY STEP 3
A Open hardware bag 3.
B Slide each handlebar into the console
and attach using 2 bolts (e), 2 spring
washers (f) and 2 arc washers (g). Do
not completely tighten bolts until step D.
C Gently place the console on top of the
console masts. Attach the left side first
using 2 bolts (h), 2 spring washers (b)
and 2 arc washers (d).
D Attach the right side of the console using
2 bolts (h), 2 spring washers (b) and 2
arc washers (d). Completely tighten all bolts
from steps B–D.
BOLT (E)
15 mm
Qty: 4
BOLT (H)
55 mm
Qty: 4
SPRING
WASHER (F)
6 mm
Qty: 2
ARC
WASHER (G)
6 mm
Qty: 2
SPRING WASHER (B)
8 mm
Qty: 4
ARC
WASHER (D)
8 mm
Qty: 4
HARDWARE BAG 3 CONTENTS :
ASSEMBLE
LEFT SIDE
FIRST
CONSOLE
CABLE
BOLTS (E)
SPRING WASHERS (F)
ARC WASHERS (G)
HANDLEBAR
CONSOLE
BOLTS (H)
SPRING WASHERS (B)
ARC WASHERS (D)
CONSOLE MAST
NOTE: be careful not to pinch any
wires while attaching the console.
CONSOLE
CABLE
CONSOLE
CABLE
COVER
PLASTIC CLIPS
BOLTS (E)
CONSOLE MAST
HANDLEBAR
CONSOLE
E Remove the console cable cover.
F Connect the console cable and secure the
cable in the 2 plastic clips. Carefully tuck
excess cable in the console mast to avoid
damage.
G Attach the console cable cover to secure
the console cable.
H Secure the handlebars to the console
masts by inserting 2 bolts (e) from below the
console.
ASSEMBLY STEP 3 CONTINUED
400T-OM-rev1_1.indd 12-13 10/29/10 1:44 PM