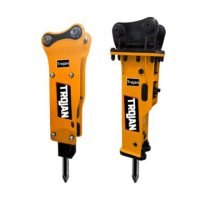
The Trojan "TH" series Hydraulic Hammer is a high-performance machine designed for breaking various objects, including rocks, boulders, asphalt, and concrete. It is successfully developed with the latest technology and years of experience, ensuring durability even under harsh working conditions.
Function Description:
The hydraulic hammer operates by transferring impact power to a tool (chisel) through a moving piston, which is generated by hydraulic power. The main valve controls the reciprocal action of the piston with hydraulic fluid distribution. A back head, charged with nitrogen (N2) gas, provides energy for the next blow. The front head retains the tools using tool pins, which can be removed to change the tool. A rod pin installed on the front head prevents the tool from coming off during operation.
Important Technical Specifications (across various models TH-SSL to TH-300):
- Operating Weight: Ranges from 152 kg (335 lbs) for TH-SSL/TH-35 to 2635 kg (5809 lbs) for TH-300.
- Weight of Main Body: Ranges from 86 kg (190 lbs) for TH-SSL/TH-35 to 1283 kg (2828 lbs) for TH-300.
- Required Oil Flow: Ranges from 25-50 l/min (6.6-13.2 gal/min) for TH-SSL/TH-35 to 180-240 l/min (48-63 gal/min) for TH-300.
- Operating Pressure: Ranges from 90-120 bar (1280-1706 psi) for TH-SSL/TH-35 to 160-180 bar (2276-2560 psi) for TH-200/TH-300.
- Impact Rate: Ranges from 600-1100 bpm for TH-SSL/TH-35 to 300-450 bpm for TH-300.
- Hose Diameter: Ranges from 1/2" for TH-SSL/TH-35/TH-50/TH-80 to 1 1/4" for TH-300.
- Tool Diameter: Ranges from 53 mm (2.087 inch) for TH-SSL/TH-35 to 155 mm (6.102 inch) for TH-300.
- Applicable Carrier Weight: Ranges from 2.5-4.5 ton for TH-SSL/TH-35 to 28-35 ton for TH-300.
- Impact Energy Class: Ranges from 350 ft.lbs for TH-SSL/TH-35 to 6500 ft.lbs for TH-300.
Usage Features:
- Installation: The hydraulic hammer connects to an excavator using two oil hoses and two pins. The process involves aligning pin holes, fixing pins, and connecting oil hoses after ensuring they are clean. Opening the Stop Valve on the excavator arm completes the connection. Slowing down the engine can make pin hole alignment easier.
- Dismantling: Requires shutting off the Stop Valve, removing oil hoses and pins, and then raising the excavator arm. End caps should be fastened to prevent dirt ingress.
- Storing: For temporary storage, the chisel should be removed, the N2 chamber emptied, the piston struck back to the cylinder, and the front head lubricated with grease. The hammer should be placed on crossties and covered or stored indoors. Loosening end caps of oil hoses allows the piston to return easily.
- Operation: The chisel must be pressed hard and vertically against the object to be broken. Striking begins by stepping on the pedal and should stop immediately once the object is broken.
- Chisel Types:
- Moil Point type Chisel: Best for quick breaking of very hard objects, but less efficient for breaking into pieces.
- Wedge type Chisel: Commonly used in civil engineering for trenching, asphalt concrete roads, or splitting rocks. More efficient for breaking objects into pieces than the Moil Point type.
- Blunt type Chisel: Ideal for demolition work, quickly breaking rocks, boulders, and construction buildings into pieces. If the object is too hard, the Moil Point type is more efficient.
- Safety Warnings:
- Avoid idle running (striking without the chisel pressed hard against an object) to prevent damage to the chisel, bush, through bolt, and accumulator.
- Do not strike the same position continuously for more than 1 minute to prevent abnormal wear and damage. If the object is not broken, try another position.
- Do not use the chisel to move or pry rocks, as this can damage through bolts, chisel, and bush.
- Avoid heavily hitting objects, which can damage the excavator. Instead, slowly press the chisel hard and then start striking.
- Do not strike when the piston is at its stroke limit to prevent excavator damage.
- Do not immerse the hammer in water, as this will cause damage.
- Do not use the hammer to lift or carry objects, as this can damage the hammer or excavator.
- Stop working immediately if oil hoses vibrate abnormally and investigate the problem.
- In hot summer, avoid continuous work to prevent high hydraulic oil temperatures. Stop working if oil temperature reaches 80 degrees Celsius until it cools down.
Maintenance Features:
- Before & After Use Checks:
- Bolts & Nuts: Check for looseness, missing parts, or damage (Through Bolt, Side Bolt, Accumulator Body Bolt, Accumulator Cover Bolt, etc.).
- Chisel & Surroundings: Check for missing or damaged Chisel, Chisel Pin, Stop Pin, Inner & Outer Bushes, Rubber Plug, Cir clip, etc.
- Pipe & Hose: Check for looseness or leaking in Steel Pipe, Rubber Hose, Connectors, and the entire pipeline.
- Oil Leaking: Check for leaks between Chisel & Bush, Back Head & Cylinder, Accumulator & Cylinder, etc.
- Lubrication: Lubricate with grease after every 2 or 3 working hours.
- Hydraulic Oil:
- Check if clean and sufficient.
- For first-time running, change new oil within 250 working hours and the oil filter within 50 working hours.
- After the first change, replace new oil within 600 working hours and the oil filter within 100 working hours.
- Use #46 Hydraulic Oil for hot weather and #68 Hydraulic Oil for cold weather. Dirty oil can damage the hammer, and leaking oil requires timely seal kit replacement.
- Nitrogen Gas Recharging:
- Gas pressure is pre-adjusted at the factory but should be checked before first use and regularly every two months.
- N2 Chamber: Proper pressure is around 16 Bar. The process involves connecting a 3-way valve, checking pressure, discharging if too high, or charging from an N2 bottle if too low.
- Accumulator: Proper pressure is around 60 Bar. The process is similar to the N2 chamber, involving connecting a 3-way valve, checking pressure, and adjusting as needed.
- Bolts & Nuts Fastening: All bolts and nuts should be checked before every use and fastened in specific orders (e.g., A→D→B→C for through bolts) with specified torque values (e.g., 40 kg.m for TH-SSL through bolt, 100 kg.m for TH-SSL side bolt, 35 kg.m for charging valve). When replacing more than two through bolts or dismantling the hammer, first empty the nitrogen in the N2 chamber, then loosen all bolts, and finally fasten them in the specified order.
- Chisel & Surroundings Maintenance:
- Before every use, check the chisel, chisel pin, and bush conditions.
- Regularly check the clearance between the bush and chisel; excessive clearance can cause piston and chisel breakage.
- Replace chisels if the diameter abrades more than 3mm, or bushes if the inner diameter abrades more than 6mm.
- To prevent single-face wear or deformation of chisel pins, exchange them to different interfaces every 100-500 working hours. Repair or grind deformed bushes or chisel pins.
- Regular Replacement of Wearing Parts: Customers are advised to purchase extra wearing parts.
- Chisel: According to actual working conditions.
- Rod Pin: Change different interfaces to fix the chisel every 30 days.
- Stop Pin: Every four months.
- Rubber Cap: Replace if worn, missing, or damaged.
- Oil Seal: Every six months.
- Cylinder Through Bolts & Nuts: Every six months.
- Hammer Shell Bolts & Nuts: Every six months.
- Hydraulic Hose: Every six months.
- Outer Bush: Every three months.
- Inner Bush: Every four months.
- Note: All wearing parts are not covered by the warranty policy.
- Troubleshooting: The manual provides a table linking common problems (e.g., too weak striking, no striking, unsteady striking, nitrogen leaks) to possible causes and solutions (e.g., regulating engine speed, checking/recharging gas pressure, replacing oil seals, repairing surfaces, fastening bolts).