7 EN
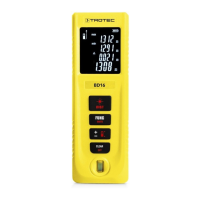
Operating manual – laser distance measuring device BD16
Switch-on
Warning of laser radiation
Laser class2, P max.: > 1mW, λ: 650nm,
EN 60825-1:2014
Do not look directly into the laser beam or the opening
from which it emerges.
Never point the laser beam at people, animals or
reflective surfaces. Even brief eye contact can lead to
eye damage.
Examining the laser output aperture by use of optical
instruments (e.g. magnifying glass, magnifiers and the
like) entails the risk of eye damage.
When working with a laser of class2, observe the
national regulations on wearing eye protection.
1. Briefly press the Switch-on/measurement button(7).
ð The display is switched on and the device is ready for
operation.
Switch-off
1. Press the Switch-off button(10) for a long time.
ð The display is switched off.
Basic settings
Aborting the measurement and deleting the display
1. Briefly press the Delete button(10) to abort the current
measurement or to delete the displayed measured values
one at a time. The laser switches off for this purpose.
Setting the reference value
The device always measures the total distance starting at the
reference point. This means that if the rear end of the device is
set as reference point, the length of the device will be part of
the measurement. By default the reference point is set to the
rear of the device. You can, however, also relocate the
reference point to the front part of the device.
To do so, please proceed as follows:
1. Press the Reference button(9) for a long time to relocate
the reference point to the front end of the device.
ð The Reference value front indication(23) appears on
the display.
2. Proceed the same way to relocate the reference value to the
end of the end piece.
When switching the device off and then on again, the reference
value will automatically be relocated to the rear end of the
device.
Changing the units
1. Press the Unit button(8) for a long time to switch between
the units for the measured values. Available units are ft, in
and m.
Calling up a measured value in the device history
The device automatically saves the last 10 measured values.
The saved measured values can be called up as follows:
1. Briefly press the Function button (8) five times to call up the
history.
ð The History indication(18) appears on the display.
2. Briefly press the Plus/Minus button(9) to navigate through
the history and call up the saved measured values.
3. You can return to the normal measuring menu by briefly
pressing the Delete button(10) or the Measurement
button(7).
Carrying out measurements
Warning of laser radiation
Laser class2, P max.: > 1mW, λ: 650nm,
EN 60825-1:2014
Do not look directly into the laser beam or the opening
from which it emerges.
Never point the laser beam at people, animals or
reflective surfaces. Even brief eye contact can lead to
eye damage.
Examining the laser output aperture by use of optical
instruments (e.g. magnifying glass, magnifiers and the
like) entails the risk of eye damage.
When working with a laser of class2, observe the
national regulations on wearing eye protection.
Info
Note that moving from a cold area to a warm area can
lead to condensation forming on the device's circuit
board. This physical and unavoidable effect can falsify
the measurement. In this case, the display shows
either no measured values or they are incorrect. Wait a
few minutes until the device has become adjusted to
the changed conditions before carrying out a
measurement.
Carrying out single distance measurement
1. Briefly press the Switch-on/measurement button(7) to
activate the laser if it is switched off.
2. Point the laser at the target area.
3. Briefly press the Switch-on/measurement button(7) again
to perform a distance measurement.
ð The measured value is immediately indicated on the
display.