EN 7
voltage detector BE20
Operation
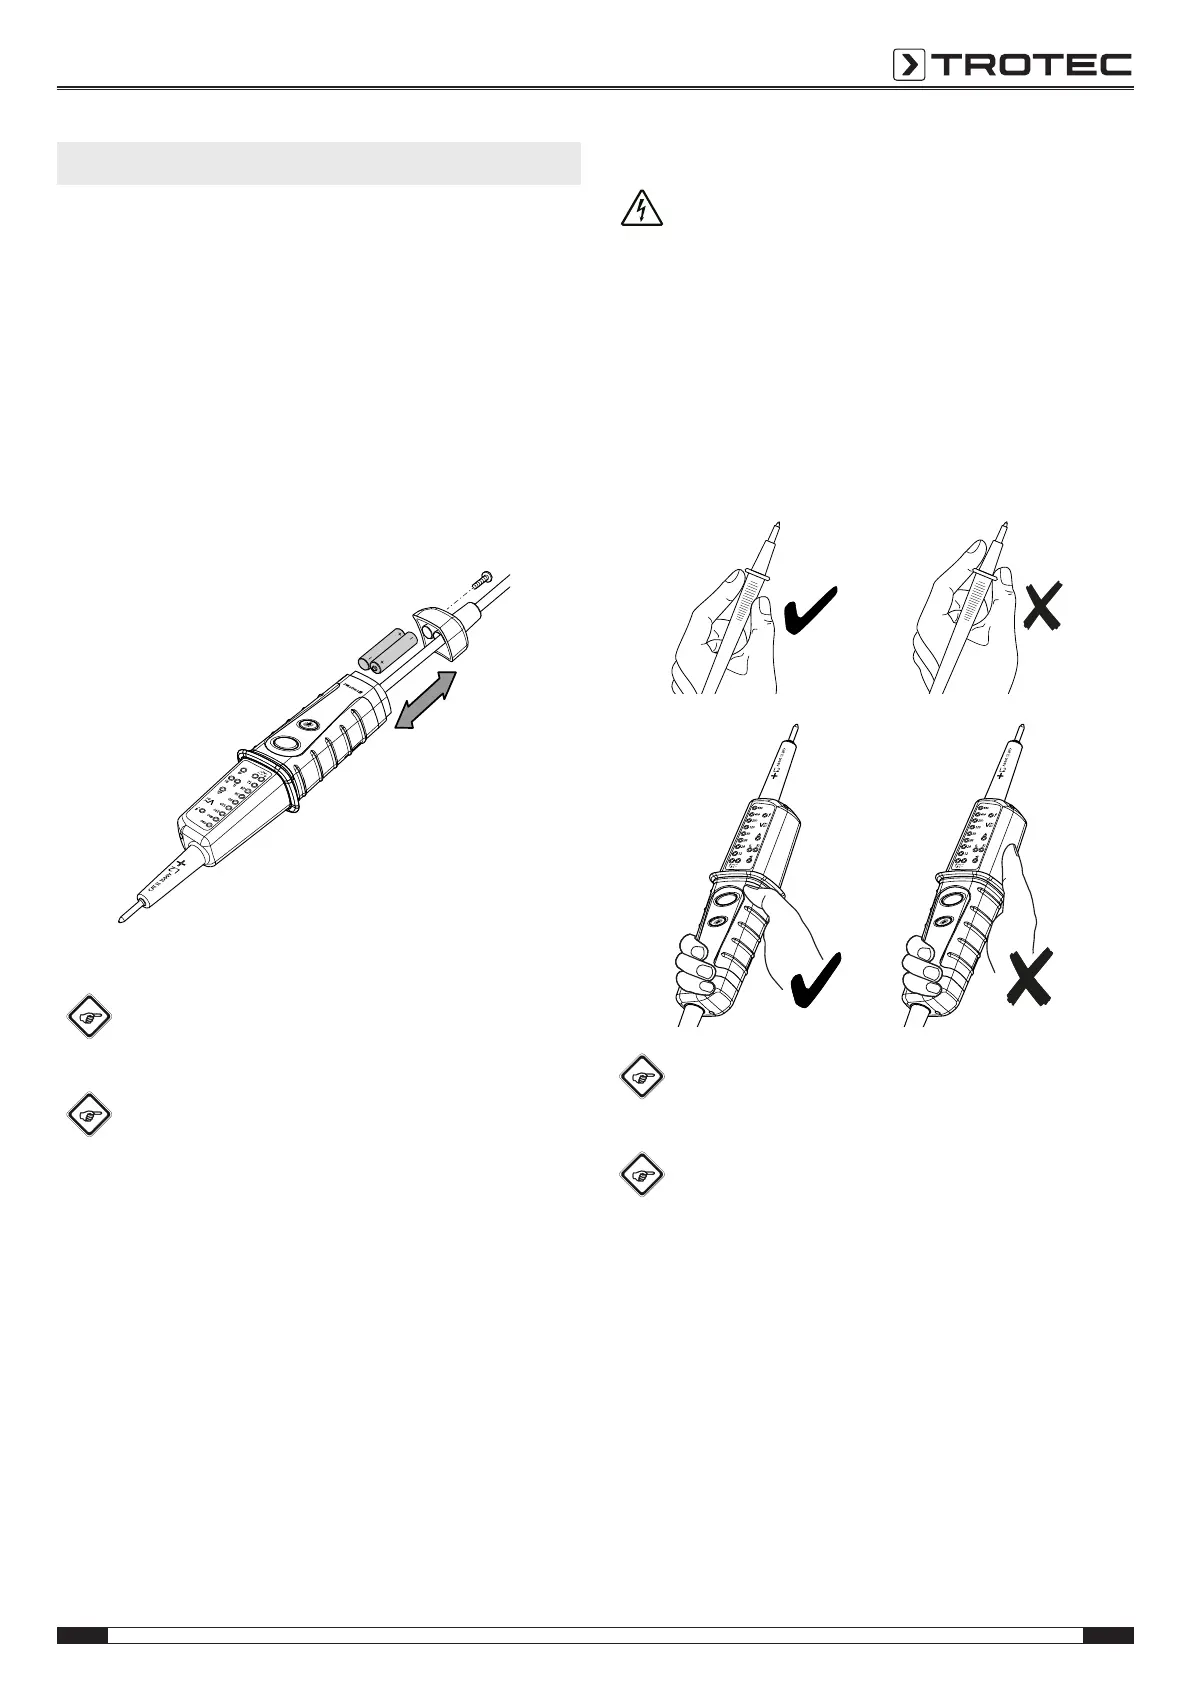
Inserting the batteries
Note
Make sure that the surface of the device is dry and the
device is switched off.
1. Loosen the screw below the battery compartment cover(7)
with a suitable screwdriver.
2. Remove the battery compartment cover(7).
3. Insert the batteries (2x 1.5V batteriesAAA) into the
battery compartment with correct polarity.
4. Place the battery compartment cover(7) back onto the
device and retighten the screw.
Function test
Info
Check the device for reliable functioning at a known
voltage source before each voltage detection.
Info
The LED is also illuminated if the battery level is low; it
is lit as soon as there is a voltage exceeding 50V.
1. Press and hold the autotest button(5) on the device for a
few seconds.
ð The continuity test indication(12) is illuminated.
ð All voltage detection LED displays(14) are illuminated.
ð If the autotest has been successful, an acoustic signal is
emitted.
Note
A defective voltage detector must not be used. If the
device does not react as described when you carry out
the function test, no longer use the voltage detector.
Voltage detection
Warning of electrical voltage
Risk of electric shock and risk of injury!
• During the measurement, make sure to observe the
measuring ranges of the device specified in the technical
data.
• Test the device for proper functioning at a known voltage
source before each measurement.
• When holding onto the device, make sure to always hold it
by the insulated handles and do not reach behind the
protection against contact(8). Never reach behind the
protection against contact and never touch the test probes.
Info
For technical reasons, the instrument cannot display
DCvoltages within the range of approx.0V to 8V.
Note
Note that the actual voltage can be up to 30% lower
than the voltage indicated on the display. For example:
If a voltage value of 36V is displayed, the actual
voltage can have its range between 25.2 and 36V (see
display tolerance).