Troy-Bilt Small Frame Tillers
13
7.6. Allow all of the gear oil to drain from the trans-
mission case assembly.
7.7. Rotate the transmission 180° to the right until it
is in the upright position.
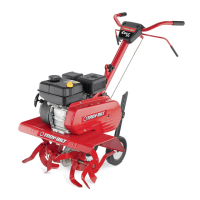
7.8. Remove the front transmission cover gasket
from the transmission using a scraper. See Fig-
ure 7.8.
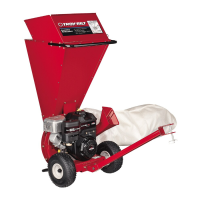
7.9. Remove all four hex flange screws securing the
rear transmission cover and gasket to the trans-
mission housing assembly using a 1/2” socket.
See Figure 7.9.
Figure 7.8
Cover Gasket
Wheel Worm
Figure 7.9
Rear Transmission Cover
Hex Screws
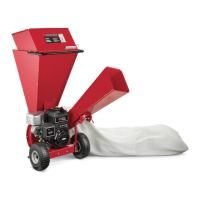
7.10. Remove the rear transmission cover gasket from
the transmission using a scraper. See Figure
7.10.
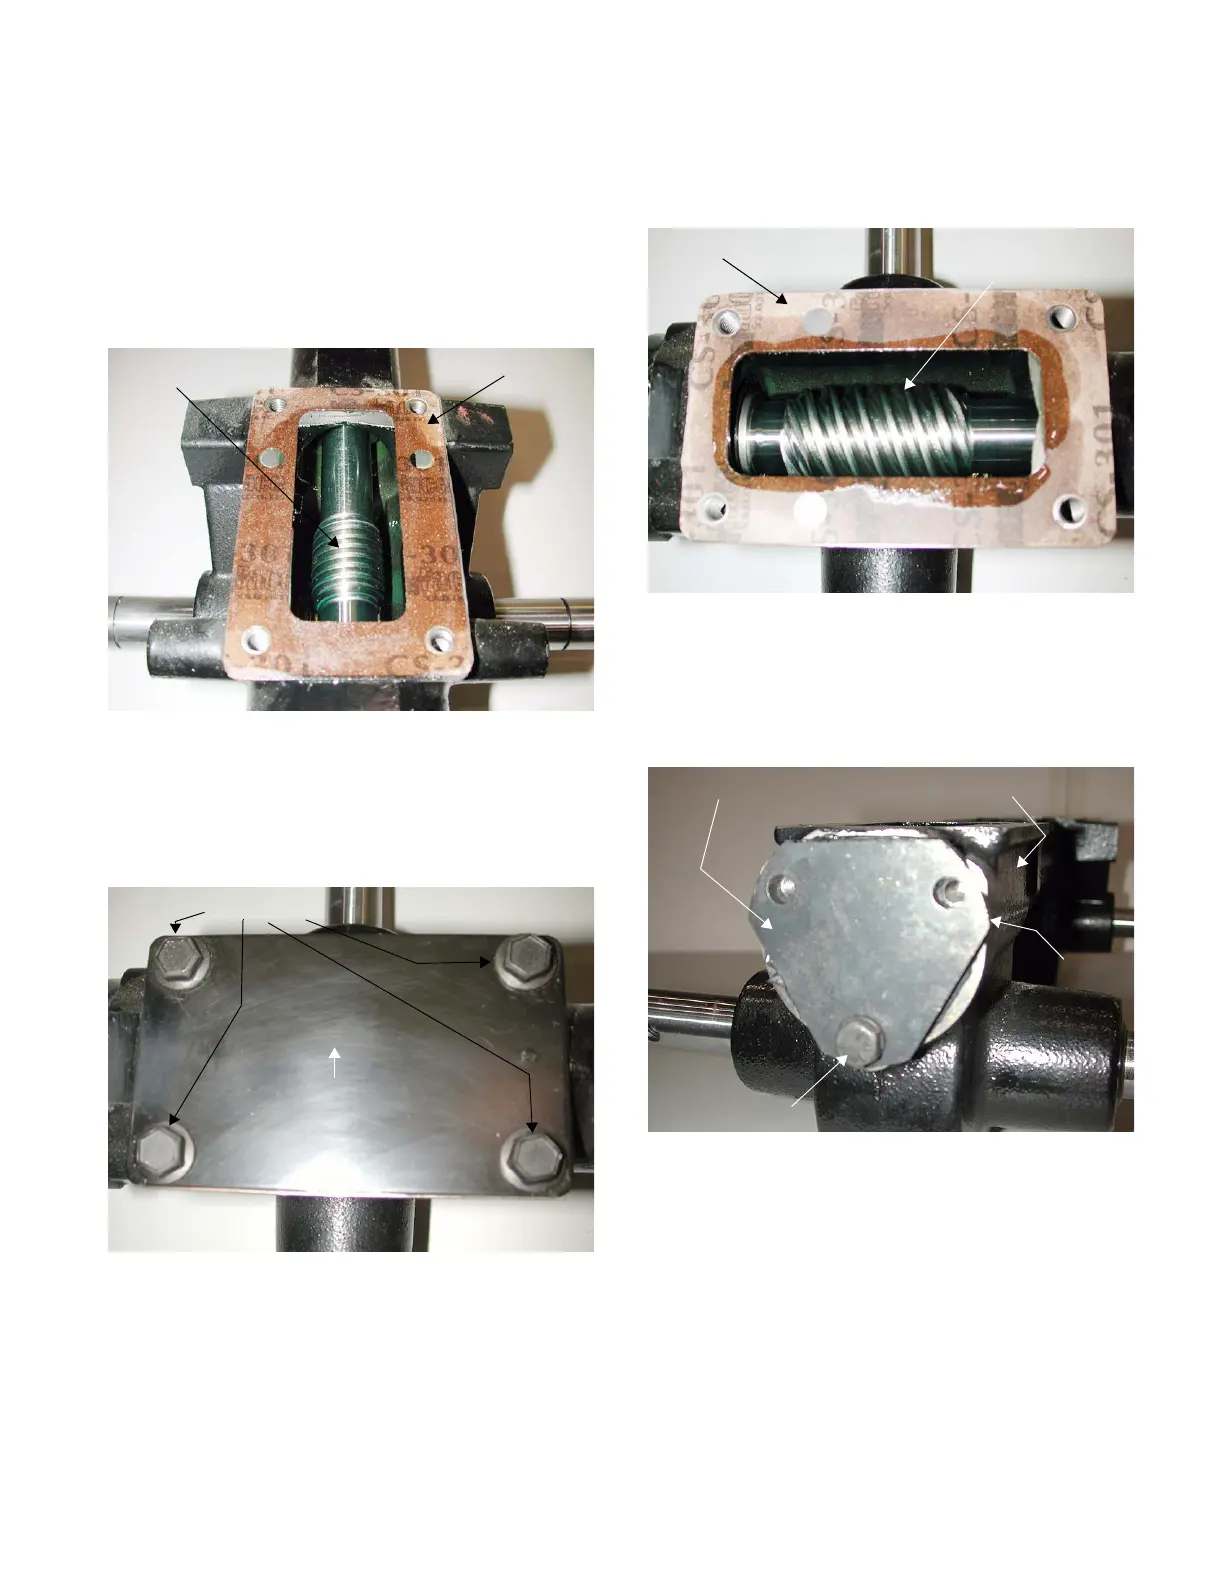
7.11. Remove the remaining lower hex flange screw
securing the rear bearing cap to the transmis-
sion housing assembly using a 1/2” socket. See
Figure 7.11.
7.12. Break the rear bearing cap free from the trans-
mission housing at any overlap position using a
punch and hammer.
Figure 7.10
Cover Gasket
Tine Worm
Figure 7.11
Short Hex Flange Screw
Rear Bearing Cap
Transmission
Overlap Point
 Loading...