Thewarrantyonthisunitdoesnotcoveritemsthathave
beensubjectedtooperatorabuseor negligence.To
receivefullvaluefromthewarranty,theoperatormust
maintaintheunitasinstructedinthisoperator'smanual.
WARNING: Battery tools do not have to be
plugged into an electrical outlet; therefore, they
are always in operating condition. To prevent
serious personal injury, take extra precautions
and care when cleaning, performing
maintenance and service, or when changing
the cutting attachment or other attachments.
I_[WARNING: To prevent serious personal I
injury,remove ordisconnectthebatteryI
beforeservicing,cleaningor removing
mater a from the un t.
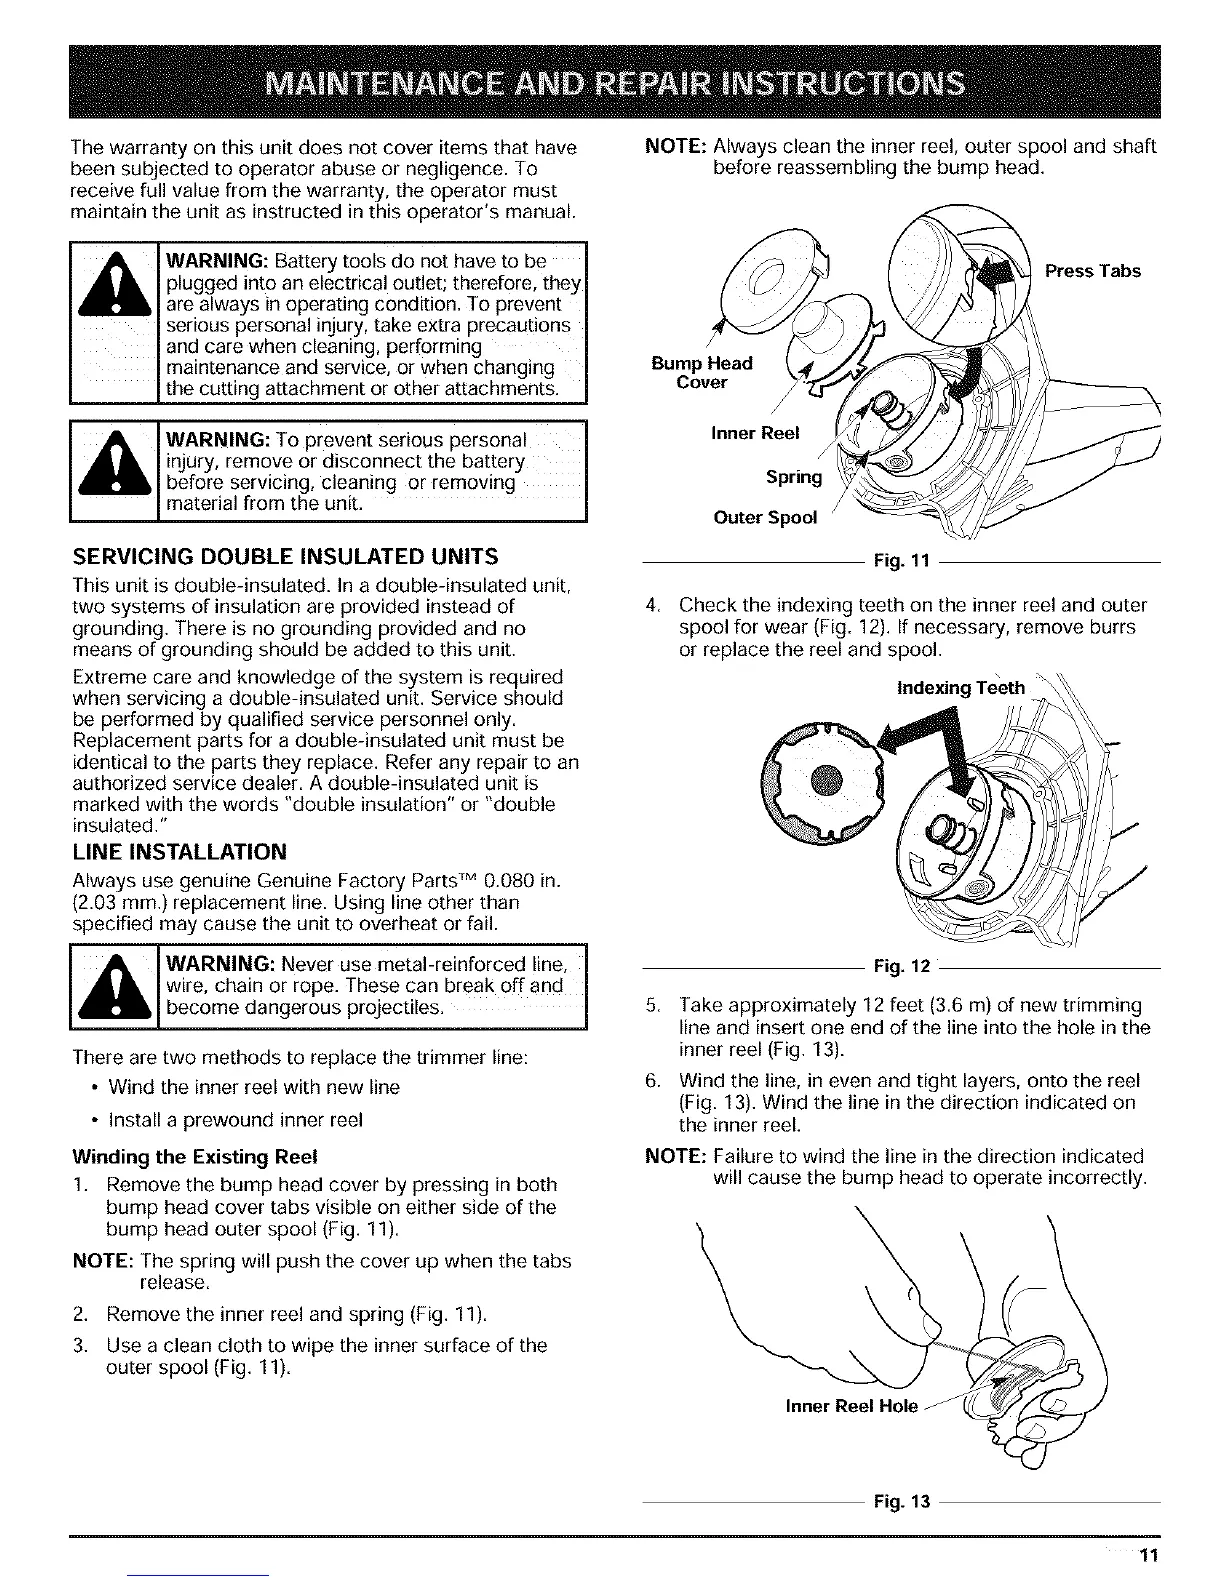
NOTE: Always clean the inner reel, outer spool and shaft
before reassembling the bump head.
Outer _7 _/_
Press Tabs
SERVICING DOUBLE INSULATED UNITS
This unit is double-insulated. In a double-insulated unit,
two systems of insulation are provided instead of
grounding. There is no grounding provided and no
means of grounding should be added to this unit.
Extreme care and knowledge of the system is required
when servicing a double-insulated unit. Service should
be performed by qualified service personnel only.
Replacement parts for a double-insulated unit must be
identical to the parts they replace. Refer any repair to an
authorized service dealer. A double-insulated unit is
marked with the words "double insulation" or "double
insulated."
LINE INSTALLATION
Always use genuine Genuine Factory PartsTM 0.080 in.
(2.03 ram.) replacement line. Using line other than
specified may cause the unit to overheat or fail.
wire chain or rope. These can break off and
I [WARNING: Never use metal-reinforced line,
become dangerous project es.
There are two methods to replace the trimmer line:
• Wind the inner reel with new line
• Install a prewound inner reel
Winding the Existing Reel
1. Remove the bump head cover by pressing in both
bump head cover tabs visible on either side of the
bump head outer spool (Fig. 11).
NOTE: The spring will push the cover up when the tabs
release.
2. Remove the inner reel and spring (Fig. 11).
3. Use a clean cloth to wipe the inner surface of the
outer spool (Fig. 11).
4.
Fig. 11
Check the indexing teeth on the inner reel and outer
spool for wear (Fig. 12). If necessary, remove burrs
or replace the reel and spool.
\
Indexing Teeth \
Fig. 12
.
6.
Take approximately 12 feet (3.6 m) of new trimming
line and insert one end of the line into the hole in the
inner reel (Fig. 13).
Wind the line, in even and tight layers, onto the reel
(Fig. 13). Wind the line in the direction indicated on
the inner reel.
NOTE: Failure to wind the line in the direction indicated
will cause the bump head to operate incorrectly.
Fig. 13
11
 Loading...