39
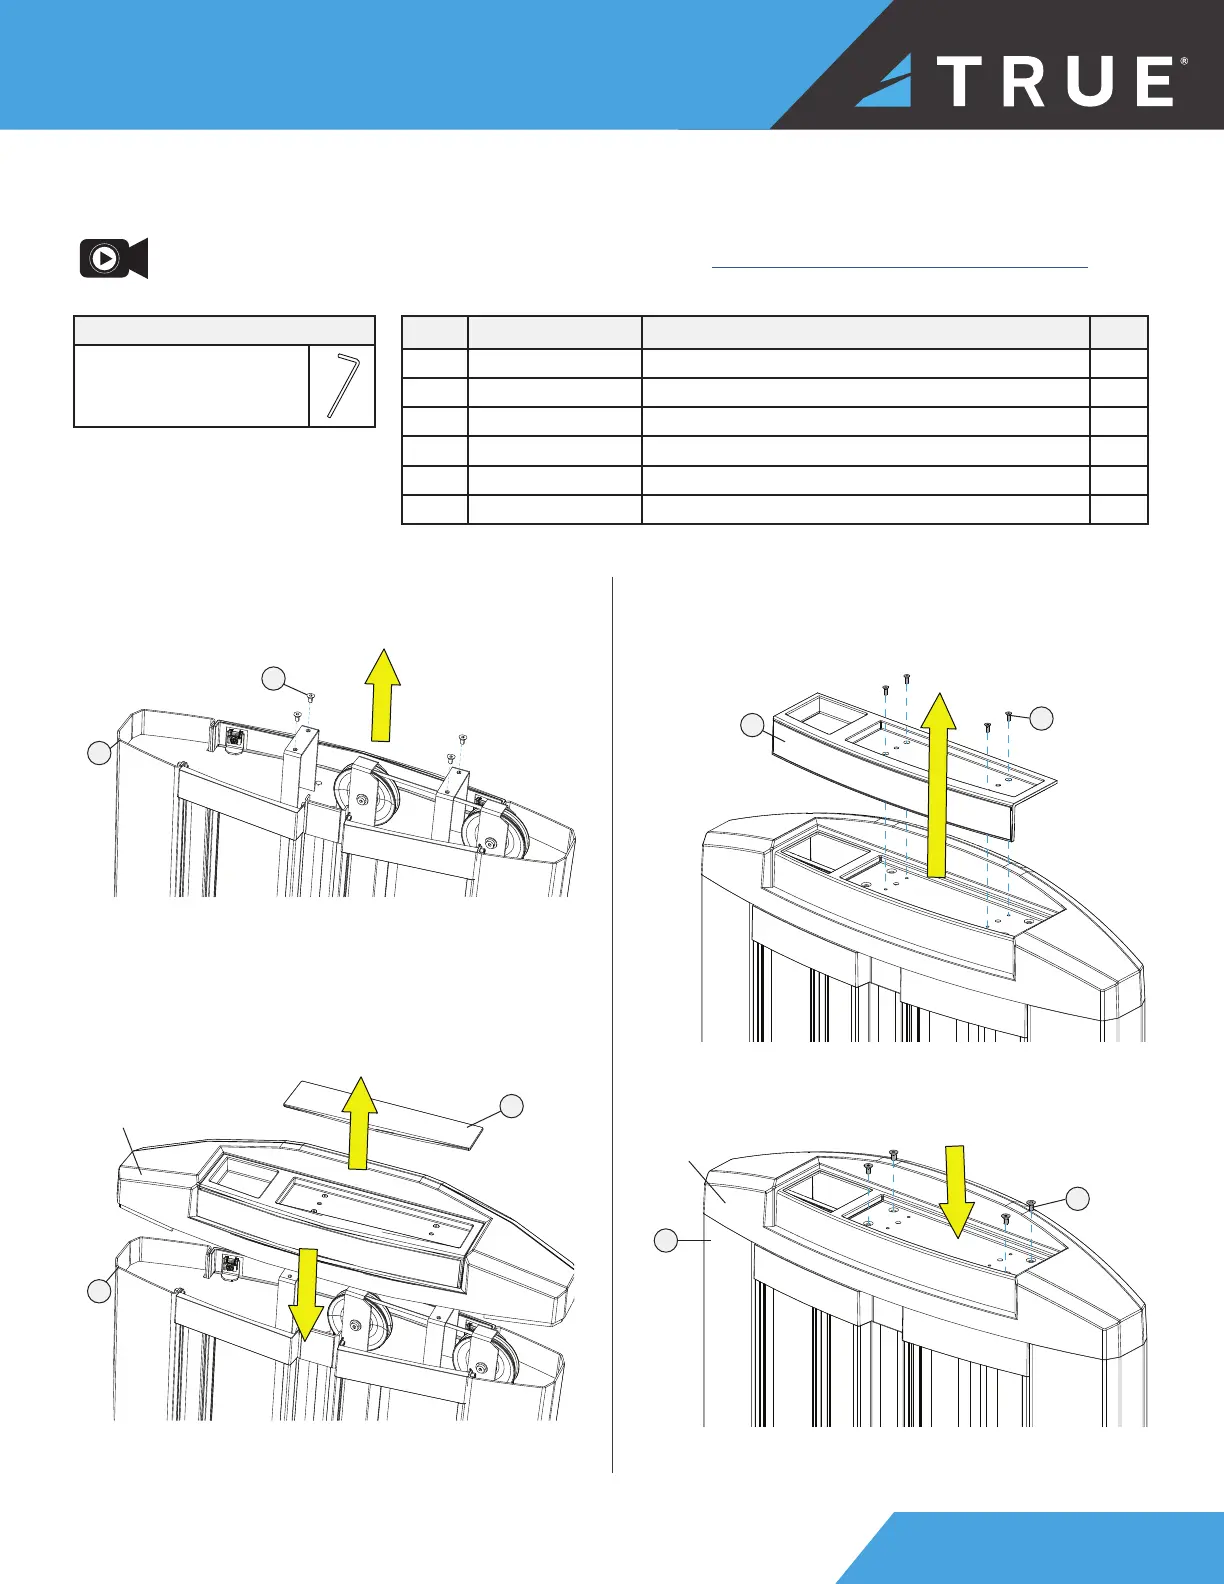
STEP 5—ATTACH TOP COVER TO UPRIGHT ASSEMBLY
ITEM PART DESCRIPTION QTY
1 SPL-10-UPR200X UPRIGHT ASSEMBLY 1
2 SPL-00-CVR021 CAP, UPRIGHT 1
3 SPL-00-CVR022 TRAY, UPRIGHT COVER 1
4 SPL-00-CVR023 MAT, UPRIGHT TRAY 1
5 C1239 FHCS, 8-32 X 1/2” 4
6 C1240 FHCS, 1/4”-20 X 1/2” 4
1
6
a. Using a 5/32" allen wrench, remove and set
aside the 4 top cover hex screws from the upright
assembly.
TOOLS NEEDED
Allen Wrenches
3/32" and 5/32"
NOTE: Supplemental top cover video available on vimeo.com: https://vimeo.com/723539522?share=copy.
3
5
b. Place the top cover onto the upright assembly.
Remove and set aside the tray mat.
c. Using a 3/32" allen wrench, remove and set aside
the 4 tray cover hex screws. Remove and set aside
the tray cover.
d. Attach the top cover to the upright assembly using
the 4 previously set aside top cover hex screws.
top cover
1
6
1
4
top cover