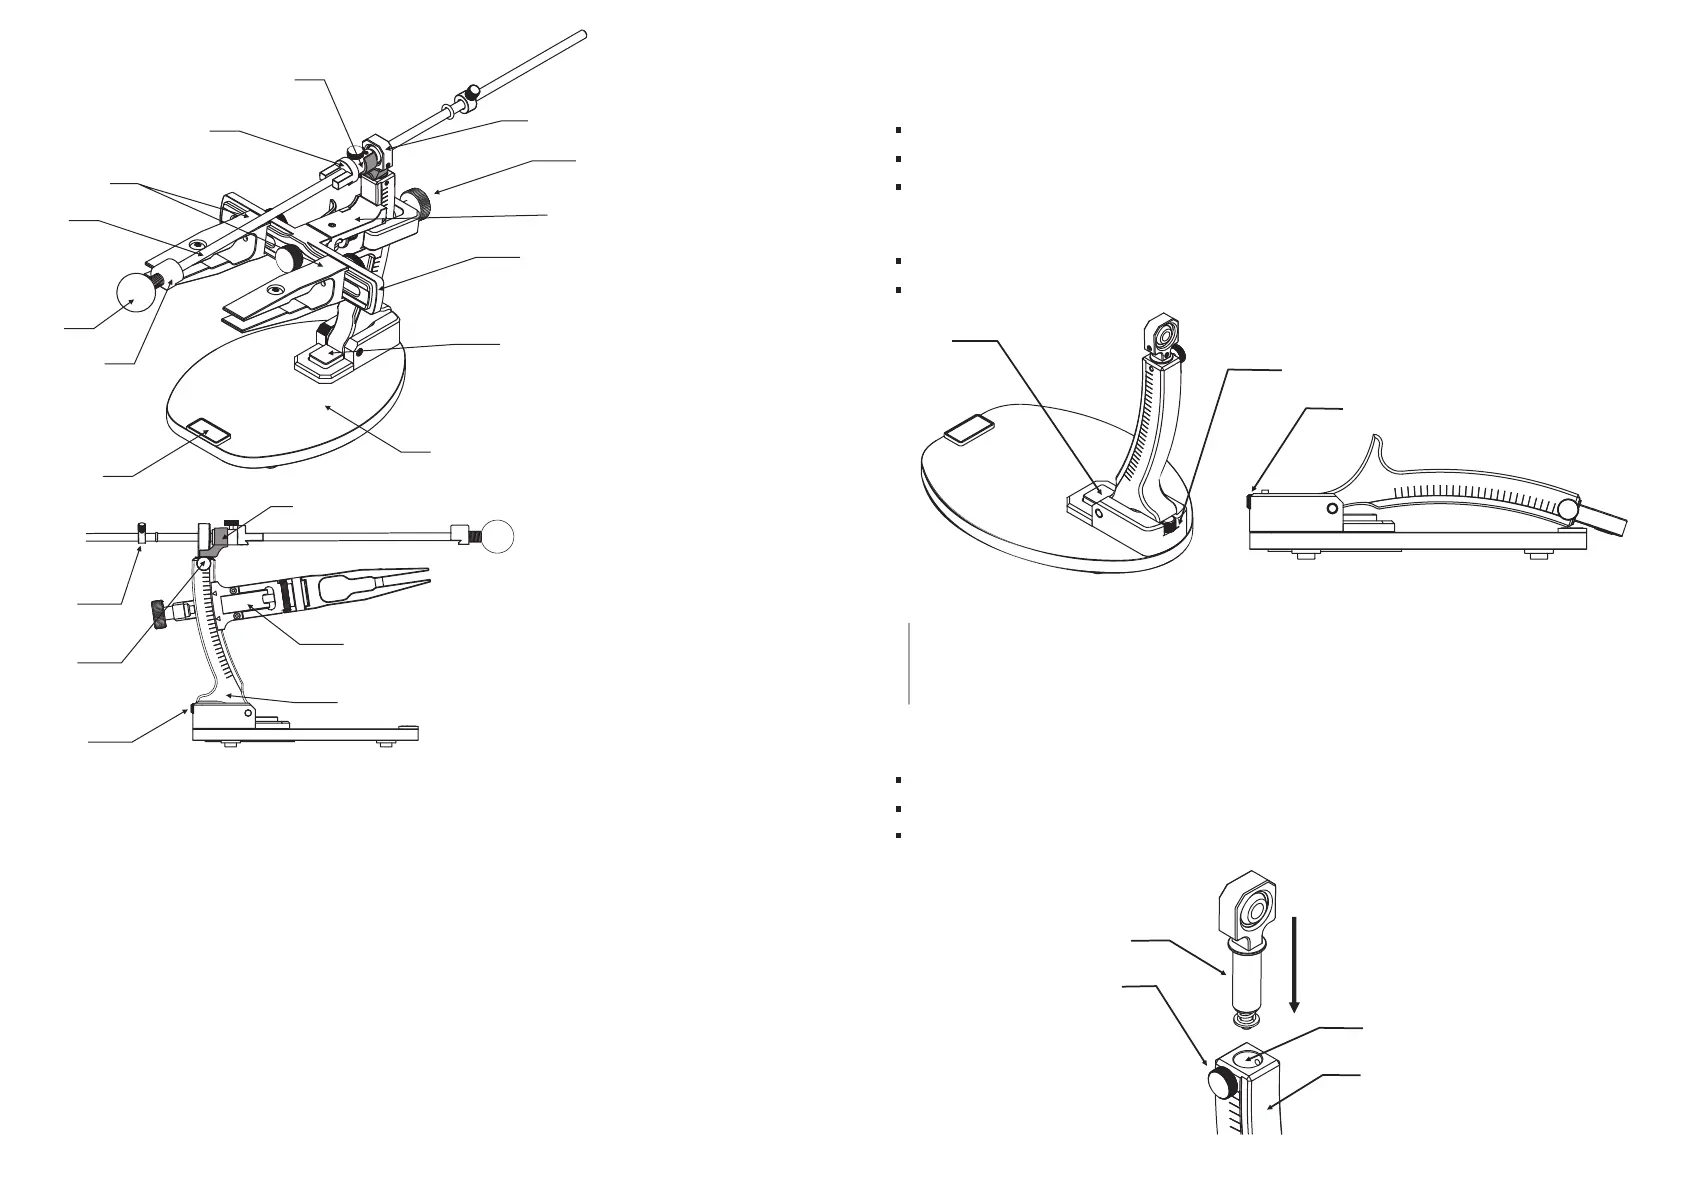
4. CONSTRUCTION
21
22
(fig. 1.)
Your Kadet Expert sharpening devise has some features:
The folding rack with a hinged joint and a collapsible abrasive holder allow you to significantly
reduce the overall dimensions of the device for easy storage and transportation;
The rotary mechanism with a clamp allows you to work without resetting the knife in the clamp and
keep the same angle on both sides;
The position of the cutting edge (hereinafter referred to as CE) remains unchanged at all stages
of work, including changing the sharpening angle and turning the clamp. This is important for keeping
the abrasive and its working stroke in the plane of the table, as well as for the convenience
of observing the process of sharpening the CE;
The design of the device has increased resistance to dynamic effects on the sharpening angle;
The frame for clamps is designed to work with both double whole-milled clamps for Kadet Expert,
and clamps for TSPROF K03 sharpening device.
1
2
3
4
5
6
7
8
9
10
11
12
13
14
15
16
17
18
19
- Stand
- Bumper
- Movable abrasive clamp
- Handle
- Abrasive holder
- Knife clamps, 2 pcs.
- Stationary abrasive clamp
- Соupling
- Hinged joint
- Fixation handle
- Rotary mechanism
- The rotary mechanism
body frame -
- Button
- Frame
- Flip lever
- Arched rack
- Rigid fixation screw
- Fixation screw
- Abrasive holder limiter
5. PREPARING FOR WORK
5.1. Working position of the rack:
before setting the rack make sure that the rigid fixation screw (1) is tightened until bumping;7.1.
set the rack vertically until the button clicks (2);7.1.
for the rigid fixation tighten the fixation screw (1) firmly.7.1.
5.2. Folding of the rack:
screw the rigid fixation screw (1) clockwise until tight;7.1.
press the button (2) holding the rack steady. 7.1.
(fig. 2)
2
1
1
5.3. Setting the hinged joint:
Hinged joint (1) is supplied removed from the rack (4) in order to avoid damages.6.3.
place the hinged joint in the slot (2) with a light push;6.3.
install the thumb screw (3) on the workable side of the rack;6.3.
fix the hinged joint with the thumb screw (3)6.3.
1
2
3
4
(fig. 3)
It is not allowed to fold the construction with an installed rotary mechanism!
It is not allowed to fold the construction with an untighten screw!
It is not allowed that the rack hits the stand sharply!
17
16
4
5
1
3
6
7
8
9
12
13
10
2
11
14
15
18
19