6
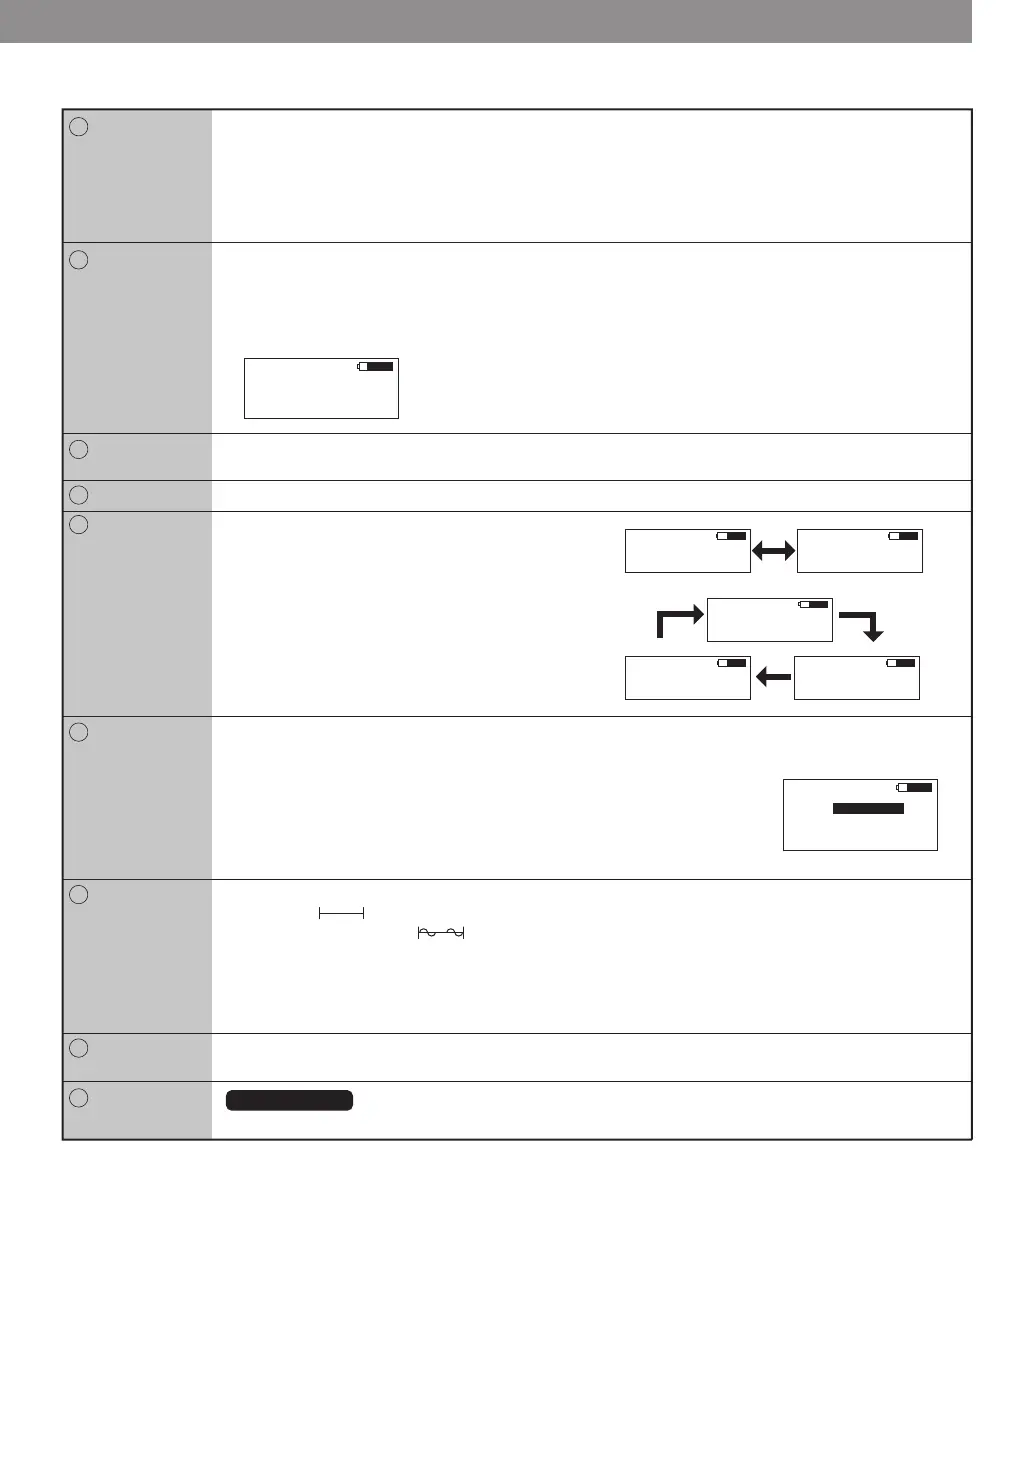
1.Press MEASURE button to set up auto trigger mode.
*Initially is shown.
*During measurement is shown.
The measurement starts after receiving a signal from a sensor
2.It will start measuring after selecting belt type and press MEASURE button.
3.After changing measuring frequency range, press MEASURE button for measuring changed
frequency range.
MEASURE
10
Thissensorhasnarrowpathofφ12.5mmandaction-pipewhichcansetasensorpositionhandily.
Itisbestusedwhenonecannotputthemainbodyonthefloor.
Flexiblearm
sensor
11
One-touch
connector
There is the hollow of a dent, insert a convex connector at the top.
To remove a connector, slide the joint part and pull out.
1
Power button
Press the power button to turn BDTM201 on.
It will automatically turn off five minutes after the last measure.
2
●【To show the preinstalled mass】
The belt type is shown by pressing and holding the MASS button for one second or more.
And choose by UP or DOWN button and push MEASURE button for confirmation.
*Showing unit : g/m.
*CAT(rough standard), tension and frequency won't be shown without selecting belt type.
Selectbutton
●【Memory of measuring condition】
Press SELECT button to choose any desired input number displayed in power-on.
40 memory functions selectable from No. 0 to 39
*To pass on, press SELECT button back to back, to jump in the number, press the wished
number directly on it.
Please press the number continuously to call out larger than the number ten.
4
WIDTH button
●Press WIDTH button for putting the width of the belt with numeric key.
*Enter capacity: 000.1 - 999.9 mm/R
6
SPAN button
● Press SPAN button for putting the width of the belt span numeric key.
7
Hz button
(switching
frequency and
tension)
● Press Hz button for selecting frequency or
tension.
*The mode changes every time this button is
pressed.
● Press Hz button more than one second to show
both records with tension and frequency.
8
0/RANGE
button(switch
frequency
range)
Press 0/RANGE button more than one second to change measurement frequency range.
HIGH…900〜5000Hz
STANDARD…10〜1000Hz
LOW(V)…10〜50Hz
*Change to HIGH for measuring over 1000Hz
9
Becausethesizeofthissenorisanarrowpathofφ12.5mm,itismeasurableby
everyplaces.
Sensor
(Option)
12
4. Explanation of the parts of BDTM201 main body
Flexible arm sensor11
One-touch connector
1
Measure button
(Decision button)
10
Power button
2
●Cord type sensor
Sensor(Option)
12
OLED
3
Span button
7
Select button
(Call button of
measured results)
Power supply: Triple A type x 2 pieces
4
Hz button
(change a frequency ⇔ tension)
8
LED
(Left: Red, Right: Green)
Width button
6
Mass button
5
O/Range button
Change a frequency range
9
UP/DOWN
button
5
S No 01
STANDARD
LOW(V)
HIGH
S No 01 P5M
RESULT
TEN N
S No 01 P5M
RESULT
FREQ Hz
Measured tension
S No 01 P5M
RESULT
FREQ Hz
TEN N
Measured tension & frequency
S No 01 P5M
FREQUENCY
CAT Hz
RES Hz
Frequency & Catalog frequency
S No 01 P5M
Tension & Catalog tension
Measured tension & Frequency
TENSION
CAT N
RES N
OLED
This displays
tension value
3
S No 00
M 9 9 9. 9 g/m
W 9 9 9 .9 mm/R
S 9 9 9 9 mm
S No 00 PX 2M
TENSION
99900 N
Measurement
frequency level
H : HIGH
S : STANDARD
L : LOW (V)
Memory No.
The measured result
In measurement of belt type
Battery residual quantity
【Overview of OLED showing pattern】
Note: This will be shown
pre-installation.
Unit mass belt width span indication example
●Tension numerical number is shown by three digits from
0.01 〜 99,900.
●Frequency numerical number is shown by three digits
from 10.0 〜 5,000 Hz.
●The red light and ERROR will be shown on the screen
when the result of the measure is out of the standard
range.
NOTE: If the standard range over occurs after the result is
shown, it beeps twice until the second measure.
●A battery type signature at the time of the battery
consumption is shown.
LOW BATT blinks on and off when the battery is low.
●OLED will turn off after no operation for 1 minute.
S No 02
PX 5M 4.1
PX 3M 2.0
01
03
02
PX 2M 1.4
5
MASS button
By UP or DOWN button to choose
the range, and press
MEASURE button for confirmation.
Cordtype
 Loading...