1) USB interface:
A the mouse to the USB port, the camera can then be controlled directly
by the mouse;
B connect the USB port to PC to make the camera work as a Driver-Free
camera. Use Mosaic software to control it.
2) HDMI interface Use the HDMI cable to connect HDMI camera to the screen.
Image data is transferred and displayed on the monitor according to the HDMI
protocol.
3) Power interface Please use the provided 12V/2A power supply. When power is
plugged in, the red light is on. When camera is switched on, blue light is on.
4) ON/OFF key Press the ON/OFF key until the blue light is on or off to turn on or
off the HDMI camera.
5) SD card To get faster and more stable data transfer, we recommend you to
use a Class10 SD card.
: Connect
: Or
:
:
:
:
⑤ Power supply*
* Note: Some cameras support USB power supply, no need to install additional power
supply, please refer to whether the power supply accessories are provided in the
accessory list.
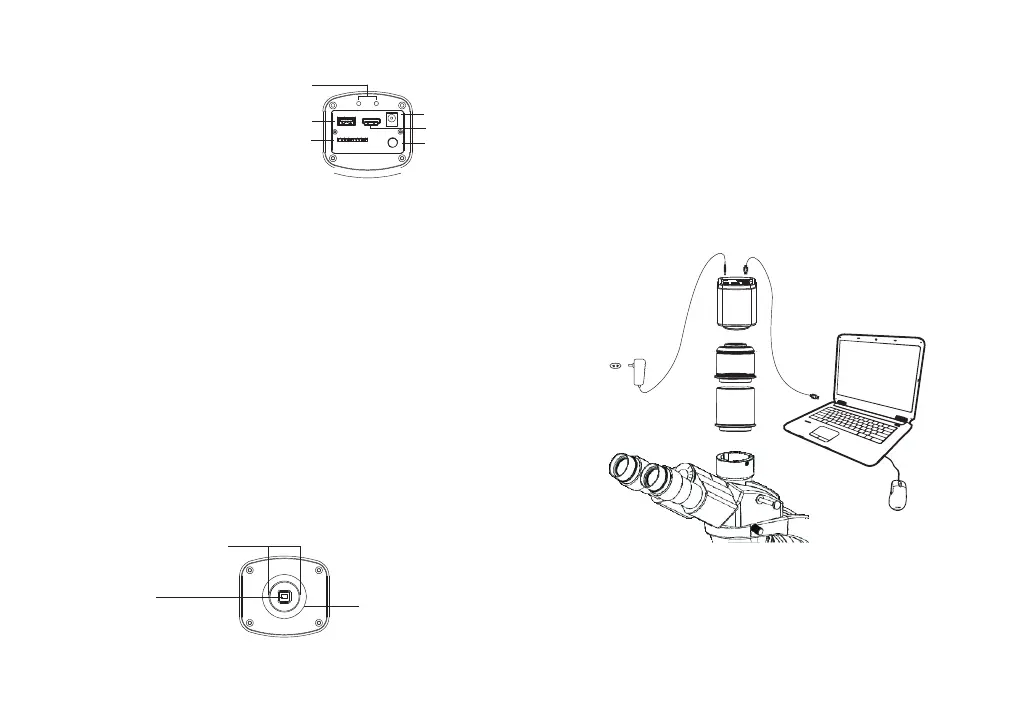
3.1 Camera Installation
① Camera
③ USB Cable
② Microscope
④ PC
⑤ Indicator light
① USB ② HDMI ③ Power
⑥ SD card slot
④ ON/OFF
2.4 HDMI Cameras
①
⑥
⑤
③
④
②
2.5 Optical Interface Description
① Standard C-mount optical port
② Anti-dust seal
Please tear off before installation
③ Adjustable ring
In PC mode, connect the camera to the computer with a USB cable and use the software
to control the camera. It is suitable for all cameras that provide a USB interface. The
camera installation is as follows:
-6--5-
3. Use in PC Mode