3
SP-403 Multi-Press
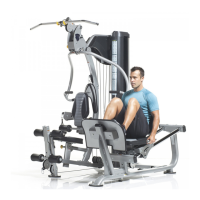
FIG. 5 Maneuver the two Guide Rods (#4) into the holes on the
bottom side of the Guide Rod Retainer (#5). Next, secure the Guide
Rod Retainer (#5) along with the two captive Guide Rods (#4) to the
Weight Stack Frame (#1) using two Hex Head Cap Screws 1/2-13 X
3 1/4 (#78), four Flat Washers SAE 1/2” (#29), and two Nylon Insert
Lock Nuts 1/2-13 (#22).
FIG. 6 Locate the Selector Pin w/Coil (#94) and slide the ring over
the Selector Bar (#9) as shown above.
5
1
4
4
94
9
9
94
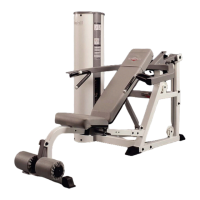
FIG. 7 Connect the Cable (#87) to the Top Plate Selector Bar
(#9) by threading the Finished Hex Nut 1/2-13 (#69) and inserting a
Split Lock Washer 1/2” (#66) to the Cable Hex Tap Bolt 1/2-13 X 3
(#88). Then, thread the Cable Hex Tap Bolt 1/2-13 X 3 (#88) to the
threaded socket of the Top Plate Selector Bar (#9).
Loosely Fasten: Do not completely fasten this hardware as-
sembly at this time, as it will be completely fastened later in
the assembly process.
Note: Refer to Fig A on fold-out page 10 for further detailed il-
lustration of this assembly.
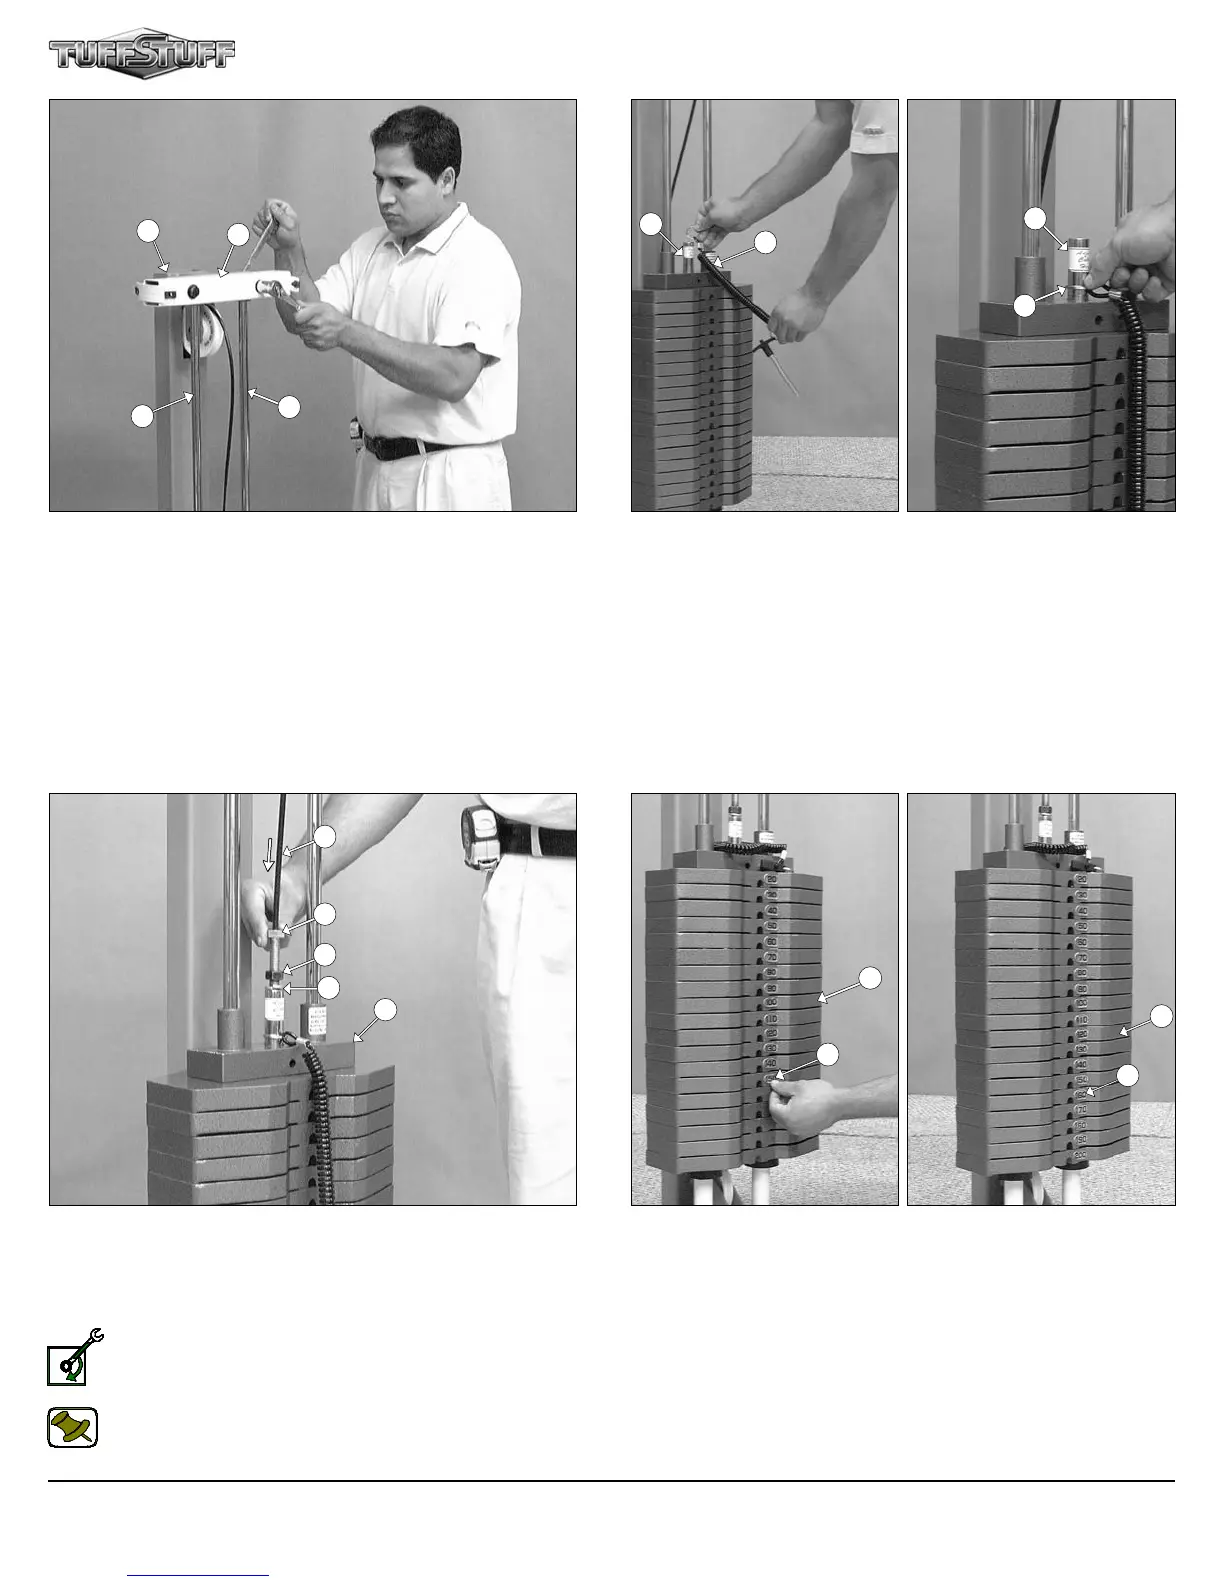
FIG. 8 Adhere the Decal Weight Numbers (#82) to the Weight Plates
(#8) in the corresponding order. Begin with the 20 at the top, 30 next,
and so on.
88
69
66
9
82
8
82
8
87