# 6725159 6
Installation
BASE INSTALLATION DOOR HANDLE INSTALLATION
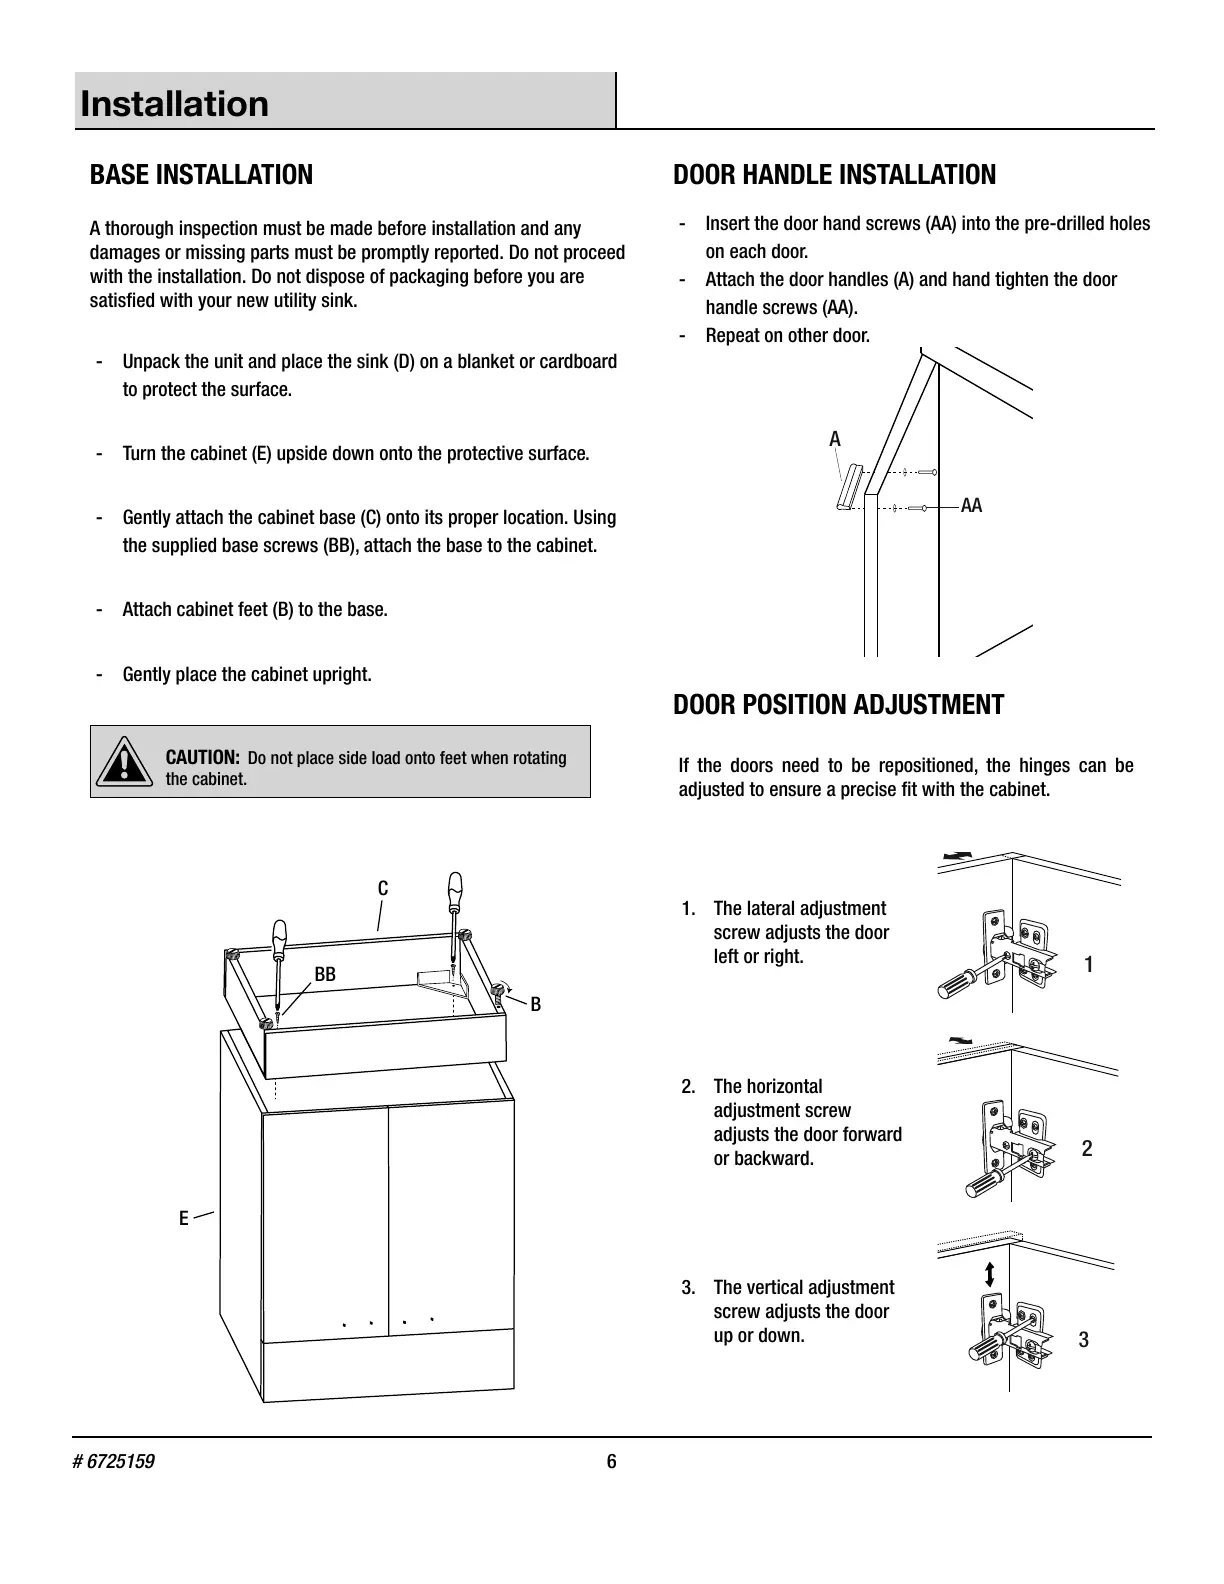
- Insert the door hand screws (AA) into the pre-drilled holes
on each door.
- Attach the door handles (A) and hand tighten the door
handle screws (AA).
- Repeat on other door.
AA
A
DOOR POSITION ADJUSTMENT
If the doors need to be repositioned, the hinges can be
adjusted to ensure a precise t with the cabinet.
1. The lateral adjustment
screw adjusts the door
left or right.
1
2. The horizontal
adjustment screw
adjusts the door forward
or backward.
2
3. The vertical adjustment
screw adjusts the door
up or down.
3
A thorough inspection must be made before installation and any
damages or missing parts must be promptly reported. Do not proceed
with the installation. Do not dispose of packaging before you are
satised with your new utility sink.
- Unpack the unit and place the sink (D) on a blanket or cardboard
to protect the surface.
- Turn the cabinet (E) upside down onto the protective surface.
- Gently attach the cabinet base (C) onto its proper location. Using
the supplied base screws (BB), attach the base to the cabinet.
- Attach cabinet feet (B) to the base.
- Gently place the cabinet upright.
CAUTION: Do not place side load onto feet when rotating
the cabinet.
E
C
B
BB