7
Please contact cs@conglomkb.com or 1-888-449-9194 for further assistance.
Installation (continued)
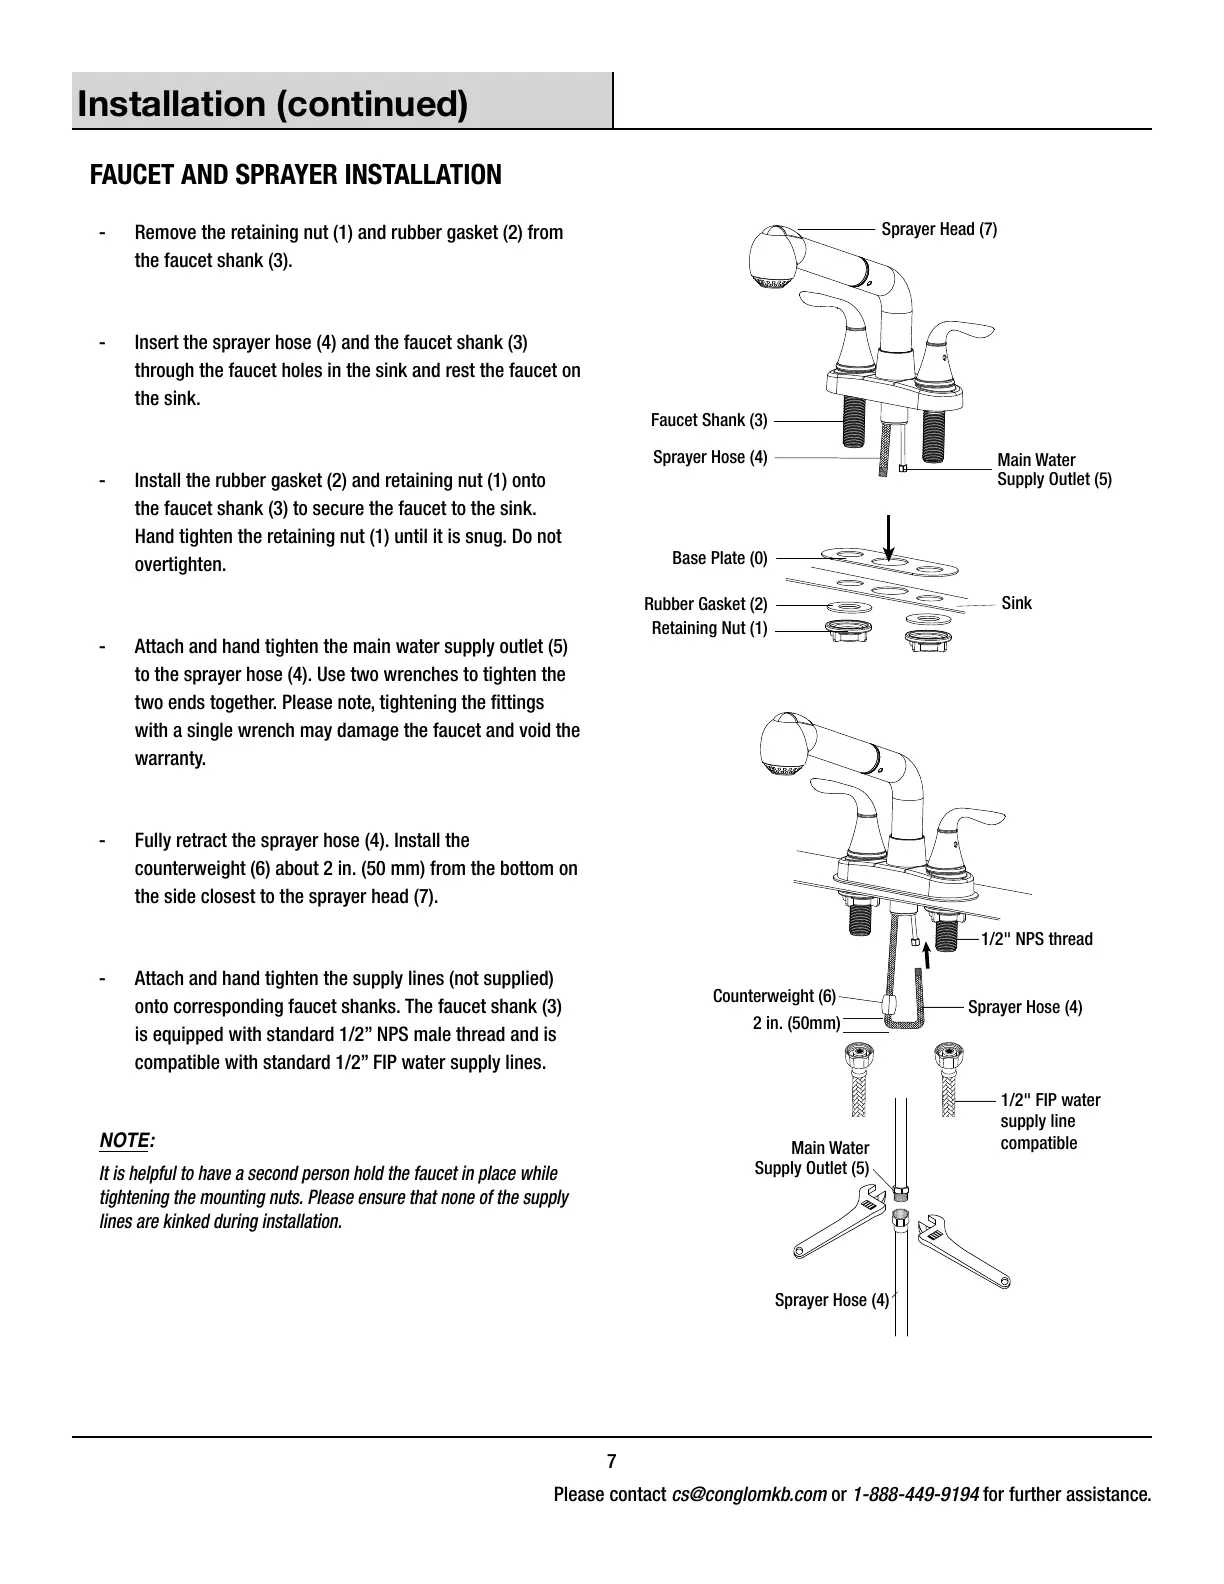
FAUCET AND SPRAYER INSTALLATION
- Remove the retaining nut (1) and rubber gasket (2) from
the faucet shank (3).
- Insert the sprayer hose (4) and the faucet shank (3)
through the faucet holes in the sink and rest the faucet on
the sink.
- Install the rubber gasket (2) and retaining nut (1) onto
the faucet shank (3) to secure the faucet to the sink.
Hand tighten the retaining nut (1) until it is snug. Do not
overtighten.
- Attach and hand tighten the main water supply outlet (5)
to the sprayer hose (4). Use two wrenches to tighten the
two ends together. Please note, tightening the ttings
with a single wrench may damage the faucet and void the
warranty.
- Fully retract the sprayer hose (4). Install the
counterweight (6) about 2 in. (50 mm) from the bottom on
the side closest to the sprayer head (7).
- Attach and hand tighten the supply lines (not supplied)
onto corresponding faucet shanks. The faucet shank (3)
is equipped with standard 1/2” NPS male thread and is
compatible with standard 1/2” FIP water supply lines.
NOTE:
It is helpful to have a second person hold the faucet in place while
tightening the mounting nuts.
Please ensure that none of the supply
lines are kinked during installation.
Faucet Shank (3)
Retaining Nut (1)
Rubber Gasket (2)
Base Plate (0)
Sprayer Head (7)
Sink
Sprayer Hose (4)
Main Water
Supply Outlet (5)
Counterweight (6)
Sprayer Hose (4)
2 in. (50mm)
Main Water
Supply Outlet (5)
Sprayer Hose (4)
1/2" NPS thread
1/2" FIP water
supply line
compatible