Rev: 2012.04.23a 11
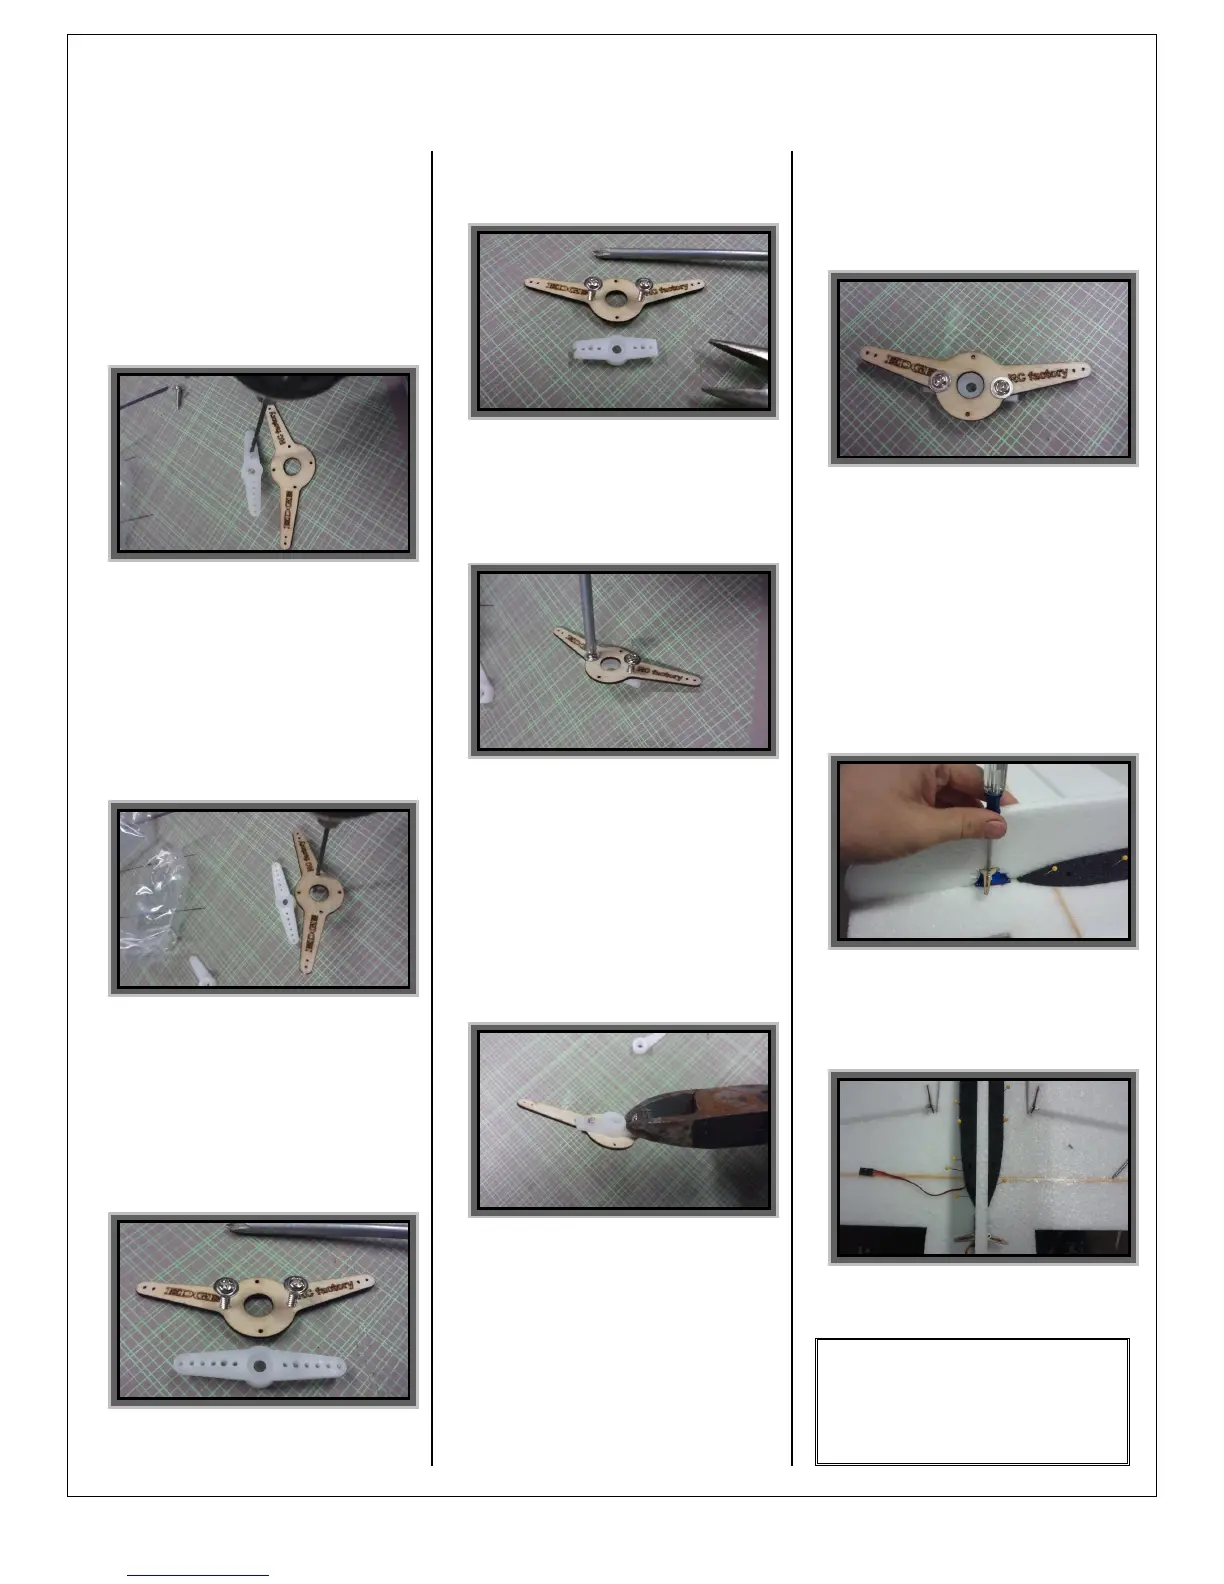
Aileron Servo Horn Assembly
Locate the wood differential
aileron horn and the stock 9g
servo horn. Drill the stock
horn out slightly smaller then
screws being used. If using the
screws that came with the 9g
servo, use a 1/16” diameter
drill bit
Drill the differential (wood)
horn out to provide clearance
for the screws being used. If
using the screws that came with
the servos, use a 3/32”
diameter drill bit
Check the alignment of the
holes in the differential horn
and the stock horn. If the holes
do not match it could case the
wood differential horn to split
If desired, clip the extra length
off of the stock horn
Screw the two pieces together
Clip off the extra length of the
screw. A rotary tool with a
cutting wheel also works, but
use caution to not over heat the
screw and melt the plastic
Finished horn assembly ready
for installation onto the servo
output shaft
Install on to the servo output
shaft with the arms pointing
forward. It will be necessary
“push” the foam off to the side
a little in order to access the
output shaft screw location.
Note: make sure the servo is
Note: make sure the servo is Note: make sure the servo is
Note: make sure the servo is
centered electronically before
centered electronically before centered electronically before
centered electronically before
installing the horn
installing the horninstalling the horn
installing the horn
Installed and ready for linkages
Note:
Note:Note:
Note: it is important for the
differential horn to be installed
as shown in order to achieve
equal up and down aileron
control surface deflection
 Loading...