Do you have a question about the Tyger TG-BP9F80298 and is the answer not in the manual?
Read instructions carefully, check parts, and photograph any damage before starting installation.
Details torque values for fasteners of various sizes in ft-lbs for Class 8.8 and Class 10.9.
Remove license plate, unplug lights, trailer plug, and wire harness. Ensure compatibility with 7-wire plugs.
Support bumper with blocks or jack stands before removing factory hardware attaching it to the frame.
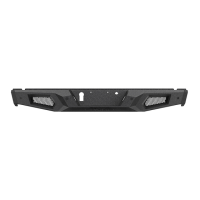
Unplug and remove sensors, license plate lights, spare tire lock, and trailer plug, then release wiring harness.
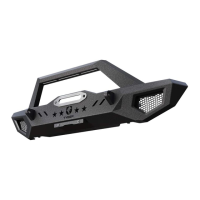
Install optional LED lights into bumper openings, removing screens if necessary for clearance.
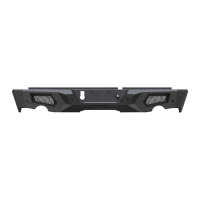
Install sensors onto the bumper using foam washers, spacers, and retaining clips as per model type.
Pry off star washers from factory bolt plates used to attach the original bumper to the frame.
Attach mounting brackets to the frame using factory bolt plates and nuts, snugging hardware temporarily.
Insert 10mm double bolt plates into bumper mounting tabs and secure with plastic retainers.
Repeat Step 8 to install the second 10mm double bolt plate on the opposite side of the bumper.
Attach the bumper assembly to the mounting brackets using flat washers and nylon lock nuts, snugging hardware.
Level and adjust the bumper, then fully tighten all previously installed hardware.
Reinstall license plate lights, spare tire access lock, and trailer plug to the front of the bumper.
Attach wiring harness to lights and trailer plug, using wire ties to secure it to the bumper and frame.
Use the included push-in plugs to attach the license plate to the front of the bumper.
Conduct regular checks to ensure all hardware remains secure and tight after installation.
Avoid abrasive polishes or waxes; use mild soap for cleaning the bumper assembly.
| Brand | Tyger Auto |
|---|---|
| Model | TG-BP9F80298 |
| Material | Steel |
| Color | Black |
| Type | Bumper Guard |