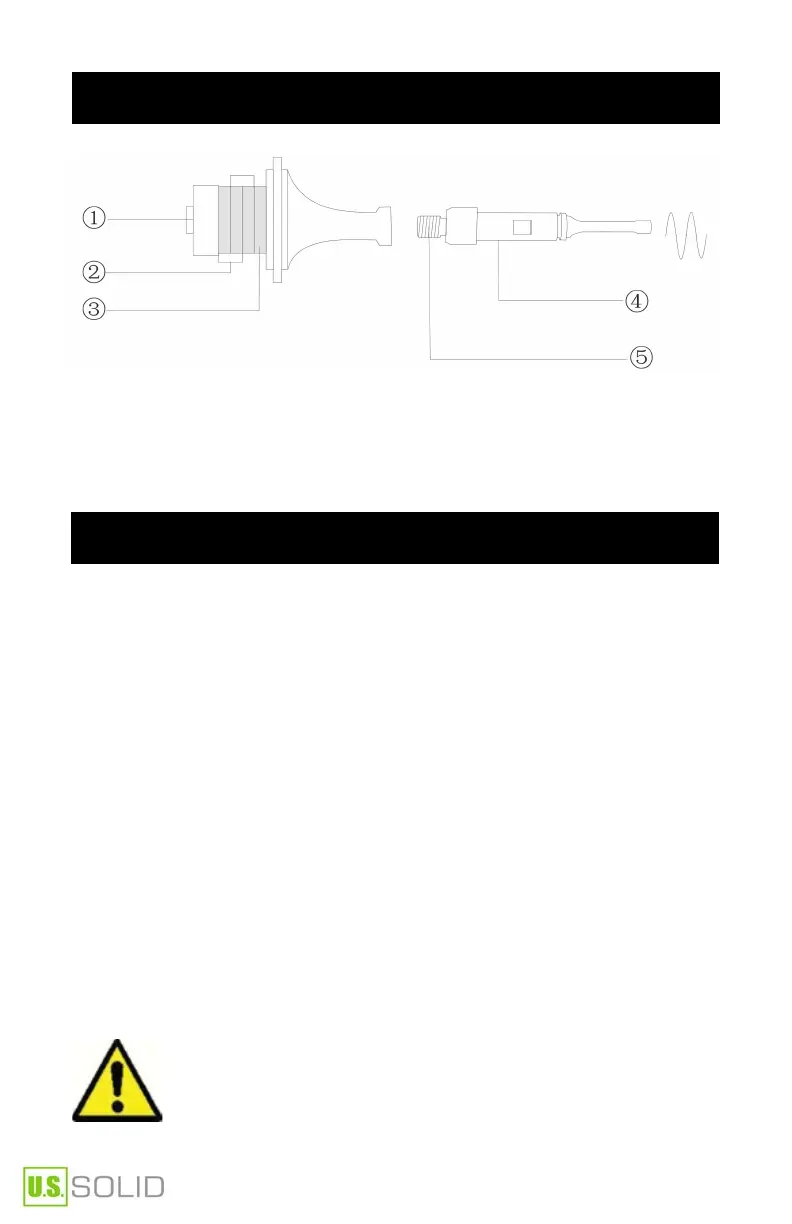
VII. Energy Converter Transducer
3. Piezoelectric Ceramics
1. High Tensile Screw
4. Amplitude
2. Electrode Plate
5. Connecting Screw
VIII. Installation
1. Have the bracket and clamp assembled (the holding system for the
transducer).
2. Have the transducer cable and transducer connected, then connect them
with the main machine (ultrasound generator).
3. Connect the power cable to the power supply and main machine.
4. Put the transducer unit on the bracket or soundproof box. Make sure the
ultrasonic probe tip is inserted into the sample liquid surface and in the
center of the container. The probe should get into the liquid 5 mm to 10
mm beneath the liquid surface. For large sample volumes, the distance
between the probe tip and the container’s bottom should be bigger than
30 mm. (The ultrasonic probe tip can be as close as 10 mm from the
bottom of the container when processing a small sample size or when
using a lower transducer power setting) If you hold the transducer unit to
process the sample, hold it on SLEEVE position. Other positions are not
allowed.
It is prohibited to start ultrasonic output when the probe tip is
out of the liquid. Otherwise the energy converter and
ultrasonic wave generator will be damaged.