Operating instructions for Heatermax Compact 10 / 20 Swimming Pool Heat Pumps
1
16
Operation of the heat pump
1. Work ow of the compressor
After the compressor work has been interrupted (e.g. through manual switching o,
with constant temperature), 3 minutes should pass before it restarts.
2. Water pump work ow
• The compressor of the heat pump should be switched on 1 minute after the pool pump.
• The pool pump should be switched o 1 minute after the heat pump.
3. Ventilation motor work ow
• If the heat pump is switched on, the ventilation begins 30 seconds before the compressor begins to work.
• If the heat pump is switched o, the ventilation stops 30 seconds after the compressor has stopped working
First operational commissioning of the heat pump
Note: In order to heat up the water in the pool (or whirlpool), the lter pump must run so that the water can circulate through the heat pump. The heat pump does not start if the water is not circulating.
1. Verications which must be implemented before operational start-up of the device:
• The hydraulic connections must be sealed.
• The device must be in a stable, at and upright position.
• The mains cable may not be exposed to any sharp or hot objects.
2. In addition, verication which must be implemented by a qualied technician:
• The correct conditions of work must be checked for all safety-relevant component parts.
• The grounding of all metallic component parts must be checked.
• The connection and the fastening of the mains cable must be checked.
Remark: Incorrectly tightened cable clamps can cause overheating of the electrical connection and result in the voiding of the guarantee.
3. Start of the heat pump
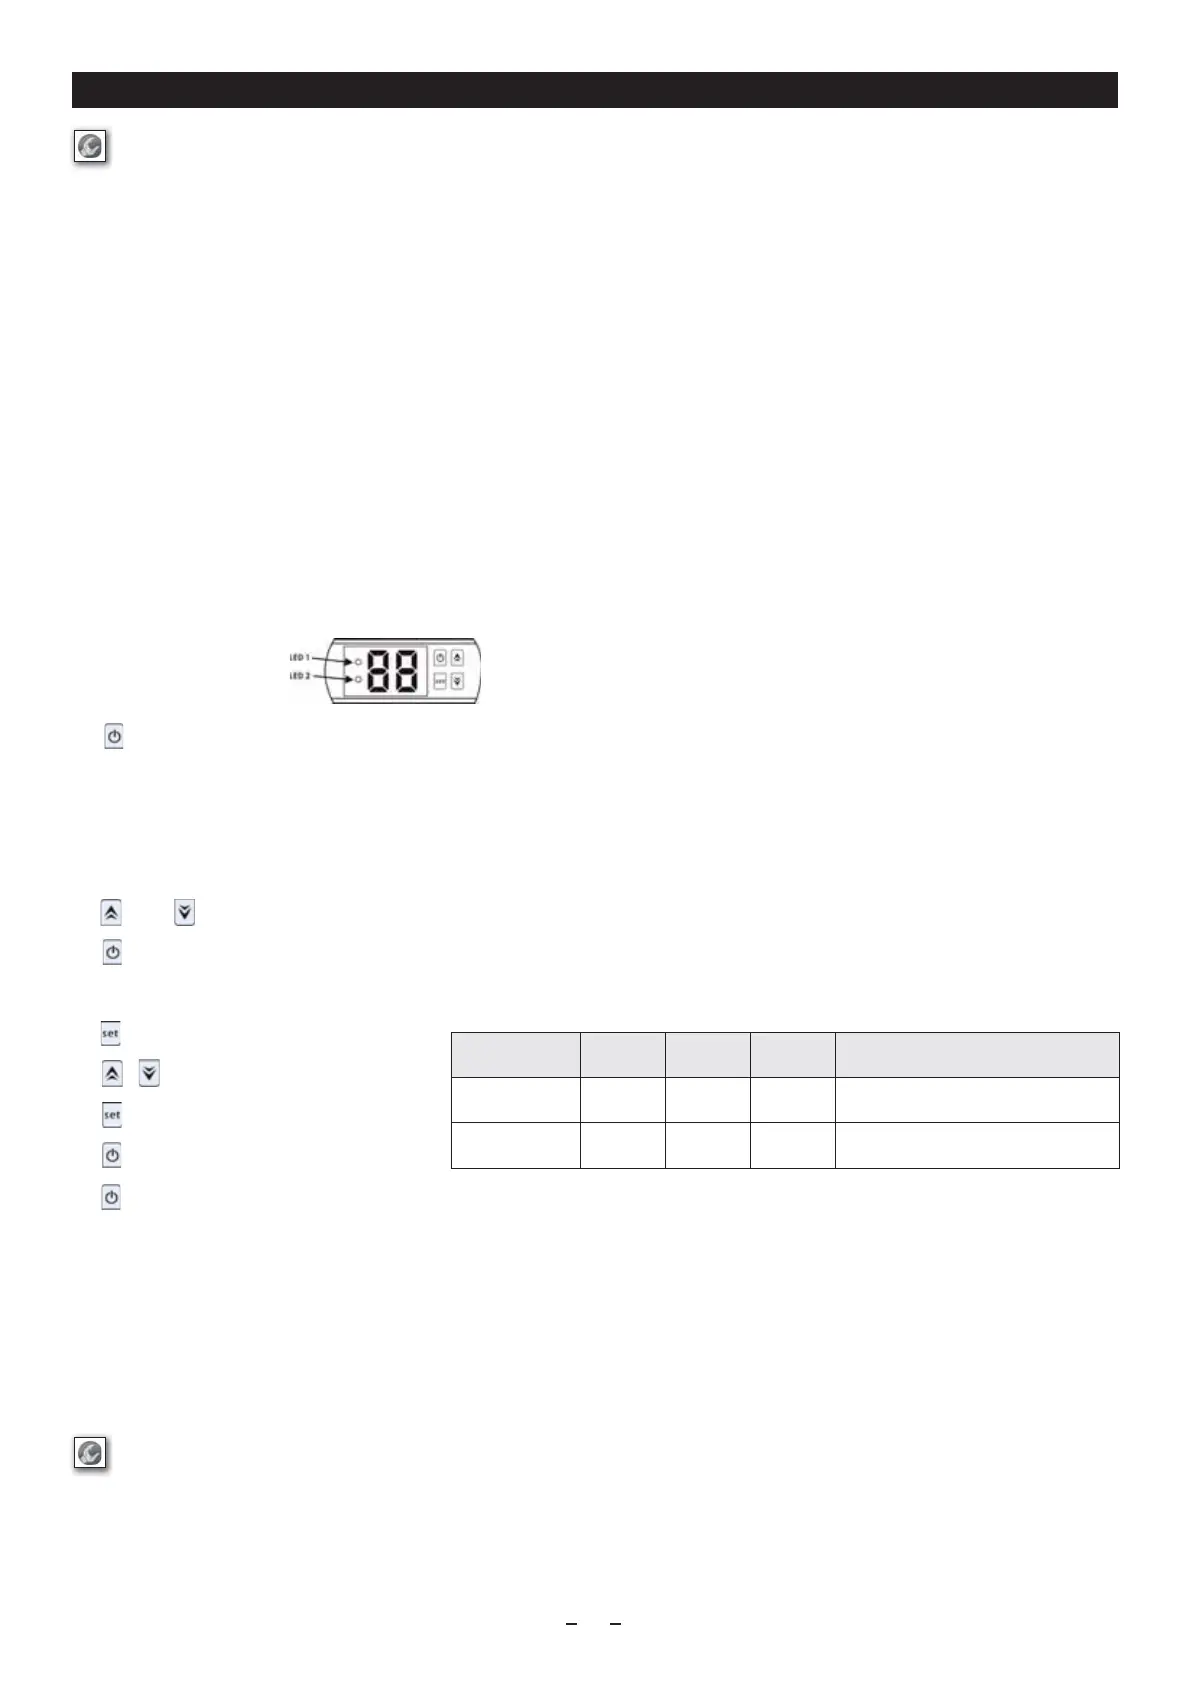
Indication and keys of the LED display
Press in order to switch on the heat pump, the LED display indicates the adjusted water temperature for 5 seconds and then indicates the water inlet temperature. .
Note: The heat pump has a built-in 3-minute start delay in order to protect the switching circuit and to avoid excessive contact wear. Also a short interruption of current can activate this delay and prevent the
immediate new start of the device. When the heat pump is running, the LED display indicates the water inlet temperature.
Wanneer de warmtepomp werkt, geeft het led-display de ingangstemperatuur van het water weer.
- LED 1 lights up when the compressor is running.
- LED 2 lights up if an error code occurs
Press or directly in order to adjust water outlet temperature (range: .10-42 °C)
Press to save the adjustment and then to end..
Verication of the ambient and water temperature
Press in order to call up parameter verication.
Press or in order to select the d0 / d1 code .
Press again in order to display the measured value.
Press to save the adjustment and then to end.
Press again in order to switch o the heat pump.
Temperature characteristics
A heat pump takes heat out of the ambient air and transfers it to the water in the pool. The higher the air temperature, the more heat can be transferred by the heat pump to the water in the pool.
In order to increase the eciency of your heat pump, you should consider the following points:
• Protect your pool with a covering (oating tarpaulin, rolling canvas cover ...) in order to avoid heat loss.
• Select times with mild outside temperatures (average > 10°C), in order to facilitate the temperature rise (this can last several days). The actual time can vary according to weather conditions and performance of the heat pump.
• Check whether the lter time is sucient: During the warm-up phase, the water must circulate continuously. Keep the temperature constant during the complete season.
Guarantee an „automatic“ circulation for a minimum 12 hours a day. The water does not warm up faster if you adjust the temperature to maximum..
Attention! Your device discharges water in the form of condensate water. This is normal. In this case, it involves the humidity which condenses on contact with certain cold component parts
in the interior of the heat pump. Your device can discharge several litres of water per day.
Parameter Code Unit Area Remark
Ambient temperature d0 °C 0-99 ashes and displays whether outside of the range
Water temperature d1 °C 0-99 ashes and displays whether outside of the range
Maintenance
Attention! Ensure before every maintenance that the device is disconnected from the power supply.
• Clean your pool and your lter system regularly, in order to prevent your device being damaged by contamination or a clogged lter.
• Examine your device so that no foreign bodies block the ventilation grill.
• Do not rotate or bend the shutter blades when cleaning the heat pump and do not use a high-pressure cleaner for cleaning.
• We recommend a general maintenance, both when you make the device winter-resistant as well as when you put it into operation again, in order to ensure proper operation of your heat pump
and to prevent possible defects.
• Empty the condenser if you do not operate the heat pump for a longer time (particularly during the winter months).
 Loading...