This document outlines the features, operation, and maintenance of the Uberhaus Portable Air Conditioner, model MPG-10CRN1-BH9. Designed for domestic use, this air conditioner offers various modes to ensure comfort and includes features for easy installation and care.
Function Description
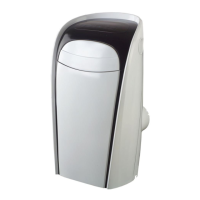
The Uberhaus Portable Air Conditioner is a versatile unit capable of providing cooling, dehumidification, and fan-only operation. It is designed to be easily moved and installed in different rooms, offering a flexible solution for climate control. The unit operates within specific temperature ranges for each mode to ensure optimal performance and energy efficiency.
Usage Features
The air conditioner can be controlled either through its integrated operation panel or via a remote controller, providing convenience and flexibility.
Operation Panel:
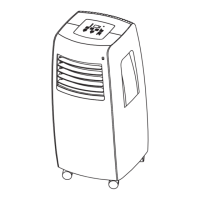
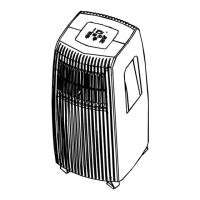
The operation panel, located on the top of the unit, features several buttons and an LED display.
- MODE Select Button: Allows users to cycle through different operating modes: AUTO, COOL, DRY, and FAN. An indicator light illuminates to show the currently selected mode.
- SWING Button: Activates or deactivates the automatic louver swing feature, which helps distribute air evenly throughout the room.
- UP (∧) and DOWN (∨) Buttons: These buttons are used to adjust temperature settings in 1°C/1°F increments, ranging from 17°C (62°F) to 30°C (86°F). They also control the TIMER settings, which can be set from 0 to 24 hours. A unique feature allows switching between Fahrenheit and Celsius display by pressing and holding both buttons simultaneously for 3 seconds.
- POWER Button: Turns the unit on or off.
- TIMER Button: Initiates the AUTO ON start time and AUTO OFF stop time programs. It works in conjunction with the UP and DOWN buttons to set desired timings.
- SPEED Button: Selects the fan speed from four options: AUTO, LOW, MED (on some models), and HIGH. Indicator lights show the selected fan speed, except for AUTO speed, where all lights turn dark.
- SLEEP Button: Activates the SLEEP operation, which adjusts the set temperature gradually over time to optimize comfort and energy efficiency during sleep.
- LED Display: Shows the set temperature in °C or °F, as well as Auto-timer settings. In DRY and FAN modes, it displays the current room temperature.
Remote Controller:
The remote controller mirrors most of the functions available on the operation panel and introduces additional features for enhanced control.
- ON/OFF Button: Starts or stops the unit's operation.
- MODE Select Button: Cycles through AUTO, COOL, DRY, and FAN modes, similar to the panel.
- SWING Button: Controls the automatic louver swing.
- TEMP/TIME Buttons (▲/▼): Adjusts indoor temperature settings or TIMER settings. Pressing and holding these buttons for 3 seconds also toggles between °C and °F display.
- FOLLOW ME Button: A unique feature that allows the remote controller to act as a remote thermostat. When activated, the unit uses the temperature detected by the remote controller at its location for precise temperature control. The unit's panel will flash to confirm signal reception, and the remote will continuously send signals every 3 minutes. If no signal is received for 7 minutes, the unit will beep, indicating the end of Follow Me mode. The remote's display will show the temperature at its location.
- SLEEP Button: Activates the SLEEP mode, which incrementally adjusts the set temperature (increasing for cooling, decreasing for heating) by 1°C/2°F over 30-minute intervals, maintaining the new temperature for 7 hours before returning to the original setting. This feature is not available in FAN or DRY modes.
- RESET Button: Resets all current settings to their initial defaults.
- FAN Button: Selects fan speed (AUTO, LOW, MED, HIGH).
- TIMER Button: Presets AUTO ON (start) and AUTO OFF (stop) times.
- CANCEL Button: Cancels any active TIMER programs.
- CLOCK Button: Used to set the time on the remote controller.
- LED Button: Toggles the digit display on the air conditioner unit.
- LOCK Button: Locks all current settings on the remote controller, preventing accidental changes.
Operating Modes:
- COOL Operation: Sets the desired room temperature within 17°C-30°C (62°F-86°F) and allows fan speed selection.
- DRY Operation: Dehumidifies the room without temperature adjustment or fan speed selection. Windows and doors should be kept closed for optimal effect.
- AUTO Operation: Automatically selects cooling, heating (on some models), or fan-only operation based on the selected temperature and current room temperature. Fan speed is automatically controlled.
- FAN Operation: Circulates air without cooling or heating. Temperature cannot be adjusted.
Error Codes:
The unit provides error codes (E1, E2, E4, P1) to indicate specific issues, such as sensor errors or a full bottom tray, guiding users to troubleshoot or seek service.
Installation Instructions
The air conditioner requires proper placement on a firm, level surface, at least 1 ft (30 cm) from walls, furniture, and curtains, to ensure efficient airflow and minimize noise. It features casters for easy movement on smooth surfaces.
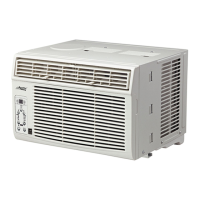
Window Slider Kit Installation:
The kit is designed for most standard vertical and horizontal windows. It may require modification for certain window types.
- Foam Seal Application: Adhesive foam seals are cut to length and applied to the window stool and the top of the window kit to ensure a tight seal.
- Window Slider Kit Placement: The window slider kit is adjusted to the window's width and placed on the foam seal. For narrower windows (less than 27 inches), the adjustable part of the kit may need to be shortened.
- Secure Closing: The window sash is closed securely against the kit, and any remaining gaps are sealed with foam.
Exhaust Hose Installation:
The exhaust hose and adaptors are crucial for expelling hot air in COOL mode and should be removed for FAN or DEHUMIDIFY modes.
- Adaptor Attachment: The window exhaust adaptor B is attached to the exhaust hose.
- Hose Connection: The exhaust hose is pushed into the air outlet opening of the unit.
- Wall Installation (Optional): For permanent installation, a wall exhaust adaptor A can be secured to a prepared hole in the wall using expansion plugs and wooden screws, then the exhaust hose is attached to it. The hole should be covered with an adaptor cap when not in use.
- Important Note: The duct can be compressed or extended but should be kept as short as possible and never over-bent to maintain efficiency.
Water Drainage:
- Dehumidifying Mode: For continuous drainage during dehumidifying, the drain plug is removed from the back of the unit, and a drain hose (5/8" universal female mender with 3/4" hose, locally purchased) is attached, leading to a drain area.
- Bottom Tray Full (P1 Error): If the bottom tray fills, the unit will beep 8 times, display "P1," and stop air conditioning/dehumidification. The fan motor will continue to operate. The unit should be moved to a drain location, the bottom drain plug removed, and the water drained. The unit can be restarted once the "P1" symbol disappears.
Maintenance Features
Regular maintenance is essential for the air conditioner's longevity and efficient operation.
-
Air Filter Cleaning:
- Frequency: Clean the air filter at least once every two weeks to prevent dust buildup and maintain fan operation.
- Removal: The unit has two filters. The upper filter is removed by grasping its tab and pulling it out. The lower filter requires loosening screws before removal.
- Cleaning: Wash the air filter gently in warm water (around 40°C/104°F) with a neutral detergent, rinse, and dry in a shady place.
- Mounting: Reinstall the upper filter, then the lower filter by securing it with screws.
- Note: The grill and air filter are connected and cannot be separated.
-
Unit Enclosure Cleaning:
- Use a lint-free cloth dampened with neutral detergent to clean the unit's exterior, then wipe dry with a clean cloth.
-
Long-Term Storage:
- Drainage: Remove the rubber plug and attach a hose to the drain outlet to completely drain all water from the bottom tray.
- Drying: Run the appliance in FAN mode for half a day in a warm room to dry the interior and prevent mold.
- Preparation for Storage: Turn off and unplug the unit, wrap the power cord, remove batteries from the remote controller, clean and reinstall the air filter, disconnect and store the exhaust hose, and cover the window/wall hole with the adaptor cap.
Safety Precautions:
The manual emphasizes several safety rules, including:
- Protecting the unit from moisture and liquids.
- Transporting and operating the unit in a vertical position on a stable, level surface.
- Unplugging the unit when not in use or if it comes into contact with liquids.
- Contacting qualified personnel for repairs.
- Maintaining a 1 ft (30cm) air path around the unit.
- Not operating the unit in wet rooms or with wet hands.
- Avoiding pressing control panel buttons with anything other than fingers.
- Never removing fixed covers or using the appliance if it's damaged.
- Using the control panel switch to start/stop the unit, not the plug.
- Not covering or obstructing grilles.
- Avoiding hazardous chemicals for cleaning or contact.
- Not using the unit in the presence of flammable substances.
- Supervising children when operating the unit.
- Using the product only for its intended functions.
- Ensure adequate electrical service for the model.
- The air conditioner must be properly grounded with a three-prong grounding plug.
- Use a properly grounded wall receptacle; if not available, have a qualified electrician install one.
- Ensure the receptacle remains accessible after installation.
- Do not use extension cords or adapter plugs.
This comprehensive overview highlights the Uberhaus Portable Air Conditioner's capabilities, user-friendly controls, straightforward installation, and essential maintenance steps, all designed to provide effective and safe climate control.