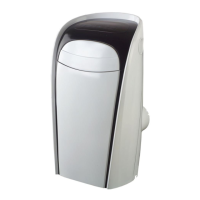
This document describes the UBERHAUS Portable Air Conditioner, model number MPM4-14HRN1-BH9, which comes with a 3-year warranty. For questions, customers can call 1-866-206-0888.
Function Description
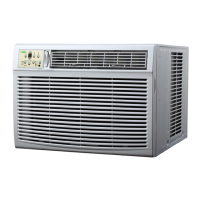
The UBERHAUS Portable Air Conditioner is a versatile unit designed for cooling, dehumidifying, heating (on some models), and fan-only operation in various indoor environments. It offers multiple operating modes and features to enhance user comfort and energy efficiency. The unit can be controlled via an on-board operation panel (available in touch-type Model A or push-type Model B) or a remote controller.
Important Technical Specifications
Operating Conditions:
- Cool Mode: 17°C ~ 35°C (62°F ~ 95°F)
- Dehumidification Mode: 13°C ~ 35°C (54°F ~ 95°F)
- Heat Mode: 5°C ~ 30°C (41°F ~ 88°F)
Accessories (some optional):
- Exhaust hose with adapters (1 set)
- Wall Exhaust Adaptor A (1 pc)
- Window Exhaust Adaptor B (flat mouth) (1 pc)
- Expansion Plug and wooden screw (4/pc)
- Band (for bundling power cord) (1 pc)
- Drain Hose (for continuous drainage) (1 pc)
- Window Slider Kit (1 set)
- Foam seal (3/pc)
Remote Controller Specifications:
- Compatible Models: R5115/BG(C)E, R5116/BG(C)E, R5117/BG(C)E, R5118/BG(C)E, R5119/BG(C)E; R51110/BG(C)E, R51111/BG(C)E, R51112/BG(C)E
- Rated Voltage: 3.0V (Dry batteries AAA X 2)
- Lowest Voltage of CPU Emitting Signal: 2.0V
- Signal Receiving Range: 8m (when using 3.0 voltage, it gets 11m)
- Environment: -5°C ~ 60°C (-41°F ~ 140°F)
- Indoor Setting Temperature Range: 17°C ~ 30°C (62°F ~ 88°F)
- Display: Full function LCD (Liquid Crystal Display) screen with backlight.
- Temperature Setting Display: Celsius scale (°C) for R5115-R5118/BG(C)E models; Fahrenheit scale (°F) for R5119-R51112/BG(C)E models.
Usage Features
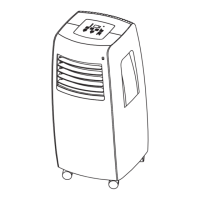
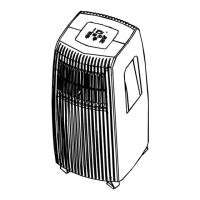
Operation Panel (Model A: Touch Type, Model B: Push Type):
- MODE Button: Selects operating mode (AUTO, COOL, DRY, FAN, HEAT). HEAT mode is for cooling & heating models only.
- UP/DOWN Buttons (+/-): Adjusts temperature settings (1°C/2°F increments) from 17°C (62°F) to 30°C (88°F). Also used for Auto-timer settings (0.5-hour increments up to 10 hours, then 1-hour increments up to 24 hours). Pressing both for 3 seconds converts temperature display between °C and °F.
- FAN/TURBO Button: Selects desired fan speed (LOW, MED, HI, TURBO, AUTO). TURBO feature sets the strongest fan speed for fastest temperature reach (COOL mode only).
- TIMER Button: Initiates AUTO ON start time or AUTO OFF stop time program.
- SWING Button: Controls the top horizontal louver grilles to oscillate forward and backward. Each press changes the swing angle by 6°. Holding for 2 seconds enables automatic oscillation.
- SLEEP Button: Activates Sleep mode, which gradually increases (cooling) or decreases (heating) the selected temperature by 1°C/2°F over 30 minutes, then another 1°C/2°F after 30 minutes, maintaining the new temperature for 7 hours before returning to original settings. Not available in FAN or DRY mode.
- POWER Button: Powers the unit on/off.
Remote Controller Features:
- TEMP UP/DOWN Buttons: Increase/decrease indoor temperature setting.
- MODE Button: Cycles through AUTO, COOL, DRY, HEAT, FAN modes.
- SWING Button: Stops/starts louver movement and sets airflow direction.
- FOLLOW ME Button (Optional): Activates the Follow Me function, turning the remote into a remote thermostat. The remote sends temperature signals to the AC every 3 minutes.
- RESET Button: Cancels current settings and returns to initial settings.
- ON/OFF Button: Starts/stops operation.
- FAN SPEED Button: Selects fan speed (Auto, Low, Med, High).
- TIMER ON Button: Activates Auto-on time setting.
- ECONOMY Button: Maintains comfortable temperature and saves energy during sleep. Available in COOL, HEAT, or AUTO modes.
- TIMER OFF Button: Activates Auto-off time setting.
- LOCK Button: Locks all current settings on the remote controller to prevent accidental changes.
- TURBO Button: Starts/stops speed cooling/heating (super high fan speed).
- LED Display Button: Clears/lights the display on the indoor unit.
Installation Instructions:
- Location: Place on a firm, level surface, at least 1 ft (30 cm) from walls, furniture, and curtains. Unit has casters for transport on smooth surfaces. Must be within reach of a properly rated grounded socket.
- Window Kit Installation: Designed for standard vertical and horizontal windows. May require modification for specific window types. The window slider kit can be shortened if the window opening is less than the minimum length.
- Double-hung sash window: Attach foam seal to window stool, then window slider kit. Adjust length, close sash, and seal open gaps.
- Sliding sash window: Attach foam seal to window frame, then window slider kit. Adjust length, close sash, and seal open gaps.
- Exhaust Hose Installation:
- COOL mode: Install flexible exhaust hose with window exhaust adaptor B (flat mouth) to a window.
- FAN, HEAT, or DEHUMIDIFY mode: Remove exhaust hose.
- Wall Installation (optional): Prepare a hole in the wall, install wall exhaust adaptor A (outside) with expansion plugs and screws, then attach the exhaust hose. Cover hole with adaptor cap when not in use.
- Important: Keep duct length to a minimum and avoid over-bending.
Water Drainage:
- Dehumidifying Mode: Remove drain plug A, install drain connector (5/8 universal female mender) with 3/4 hose (sold separately).
- Heating Mode: Remove drain plug B, install drain connector (5/8 universal female mender) with 3/4 hose (sold separately). Ensure drain outlet A is plugged.
- Models without drain connector: Attach drain hose directly to the hole and place the open end over a drain area.
- "P1" Error: If the bottom tray is full, the unit beeps 8 times, displays "P1", and stops. Move the unit to a drain location, remove the bottom drain plug, and drain water. Restart the machine.
- Note: Water drainage is generally not needed during cooling if relative humidity is less than 80%. Performing drainage during cooling may reduce efficiency.
Maintenance Features
Important Safety Precautions:
- Unplug the unit before cleaning or servicing.
- Do not use gasoline, thinner, or other chemicals.
- Do not wash directly with a tap or hose.
- If the power cord is damaged, it must be repaired by the manufacturer or agent.
1. Air Filter:
- Cleaning: Clean at least every two weeks to prevent dust buildup. Remove the filter by grasping the tab and pulling it out/up. For some models, remove a screw on the side air intake grille. Wash gently in warm water (approx. 40°C/104°F) with neutral detergent, rinse, and dry in a cool, dry place.
- Mounting: Replace the air filters. Replacement filters are available from Customer Service.
- Caution: Never operate the unit without the air filter in place, as this may cause damage.
2. Unit Enclosure:
- Clean with a lint-free cloth soaked in neutral detergent, then wipe dry with a clean cloth.
3. Long-Term Storage:
- Drainage: Remove the bottom rubber plug and attach a continuous drain hose to fully drain water from the bottom tray.
- Drying: Run the appliance in FAN mode for half a day in a warm room to dry the interior and prevent mold.
- Storage: Stop the appliance, unplug it, wrap the power cord, remove batteries from the remote controller, clean and reinstall the air filter, disconnect and safely store the exhaust hose, and cover the window/wall hole with the adaptor cap.
Troubleshooting Tips:
The manual provides a comprehensive troubleshooting guide for common issues such such as:
- Unit not starting (water full, incorrect temperature setting).
- Insufficient cooling (open windows/doors, heat sources, blocked exhaust duct, high temperature setting, blocked air filter).
- Power shut off in Heating mode (automatic overheat protection).
- Noise or vibration (uneven ground, normal refrigerant flow).
- Compressor not working and "P1" displayed (bottom tray full).
- Error codes E1, E2, E3 (room, evaporator, or condenser temperature sensor issues).