10
7.2 Checking
7.3 Calibration Instruction
2. Install the battery to the mounted box in the drone and then power on the
drone. (Picture 7)
3. Put the drone on the at surface, the drone body lights turn from ashing to
solid bright, which indicates successful frequency pairing.
4. Push up the Left Stick slowly to y up the drone,
and pull down the Left Stick slowly to the lowest
end, then the drone will land on the ground slowly.
3. Move the Left Stick and Right Stick as Picture 8 shown to start the motor and
then release. Then push up the Left Stick to y up
the drone to certain altitude and then release.
5. It’s recommend to repeat Steps 4 above to practice.
1. The camera is the drone front. Keep the drone front away from you.
2. Power on the drone and check the direction of the rotating propellers. The left
front and right rear A propellers rotating clockwise while the right front and left
rear B propellers rotating counterclockwise.
6. Adjust relative transmitter Trimmer button to adjust the rudder if the drone tilts
to one side when ying.
Please follow below steps to calibrate the drone if the drone becomes imbalance
after crashing during the ight, and can not be adjusted by trimmer button and
cause dicult operation.
1. Power o the drone, then turn o the transmitter switch.
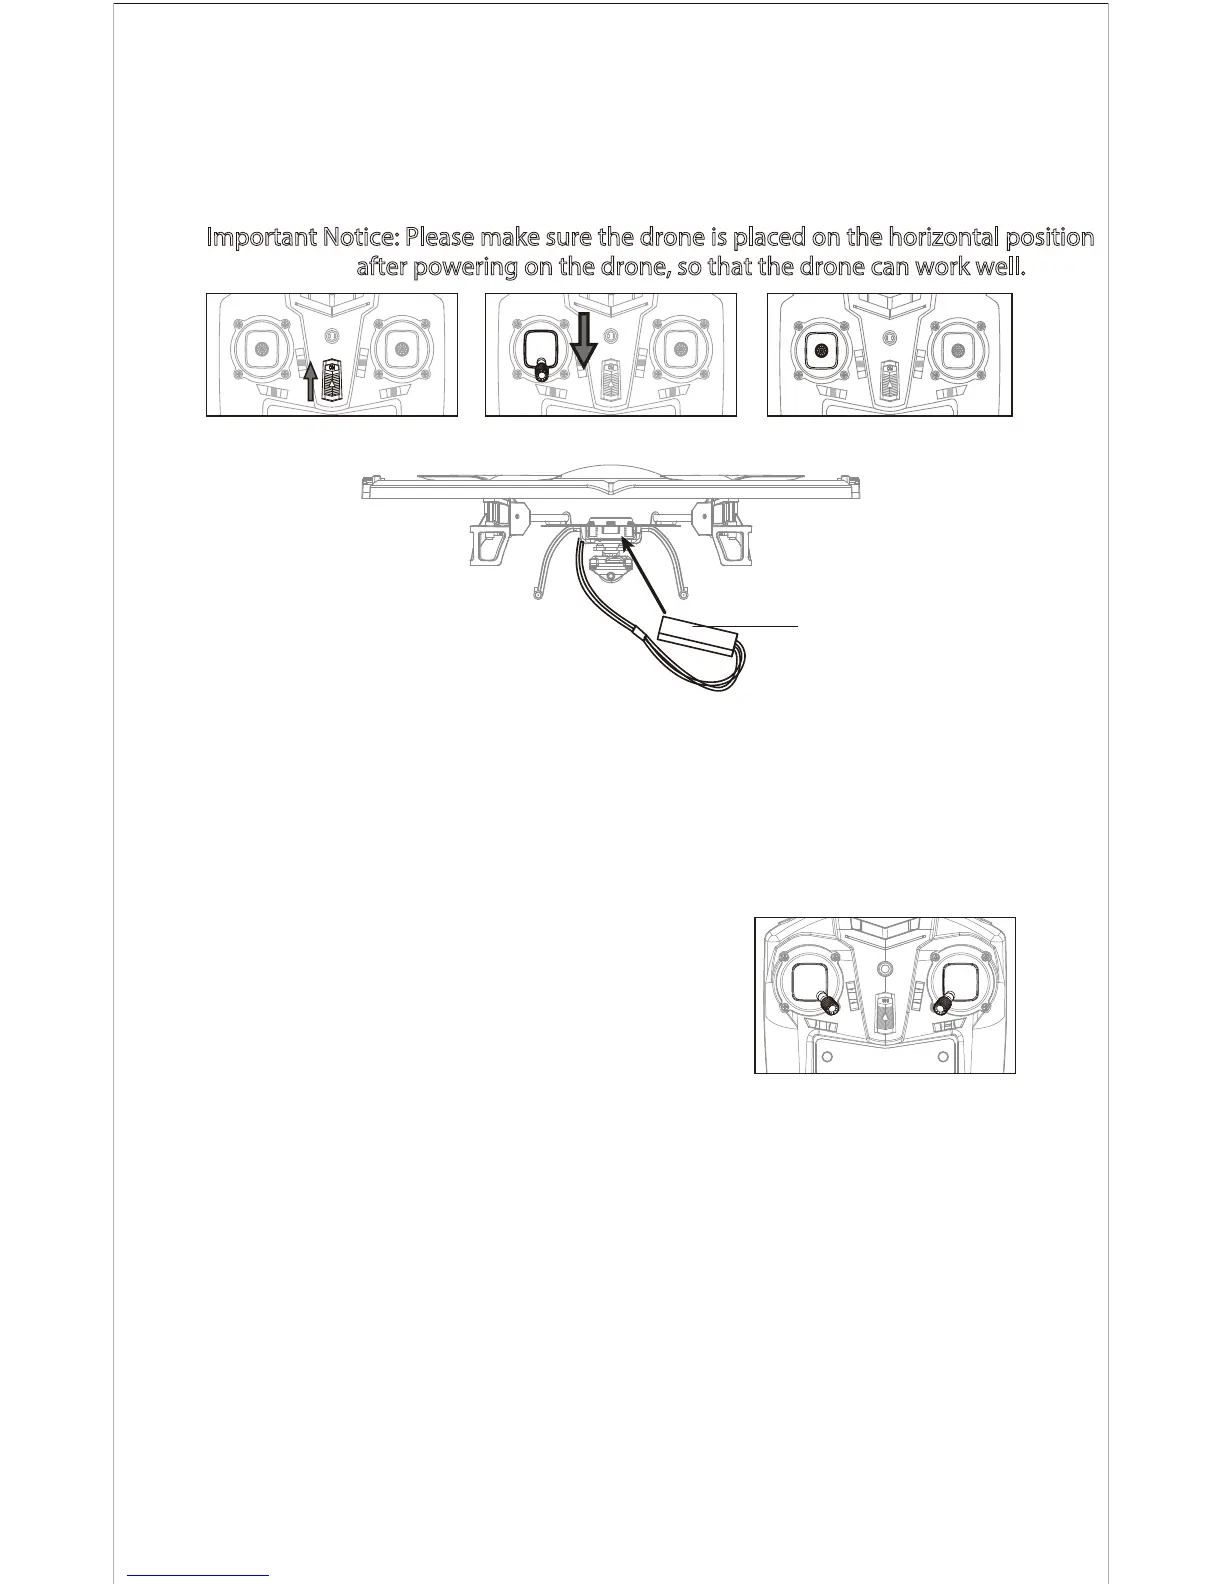
2. Turn on the transmitter switch, push the Left Stick all the way down to the
lowest position (Picture 9) and then release. The Left Stick will back to the
middle position automatically (Picture 10). The transmitter is ready for
frequency pairing mode.
Important Notice: Please make sure the drone is placed on the horizontal position
after powering on the drone, so that the drone can work well.
Picture 5Picture 4
Picture 8
Picture 6
Picture 7
Drone Battery
 Loading...