11
3. Power on the drone and put it on a at surface in a horizontal position. The
drone body lights change from ashing to solid bright, which indicates
successful frequency pairing.
7.4 Flying Control
4. Do not move the Left Stick before successful
calibration. Push the Right Stick as Picture 11
and then release. The drone body lights ash,
which indicates that the drone is calibrating.
When the drone body lights remain solid,
which indicates successful calibration.
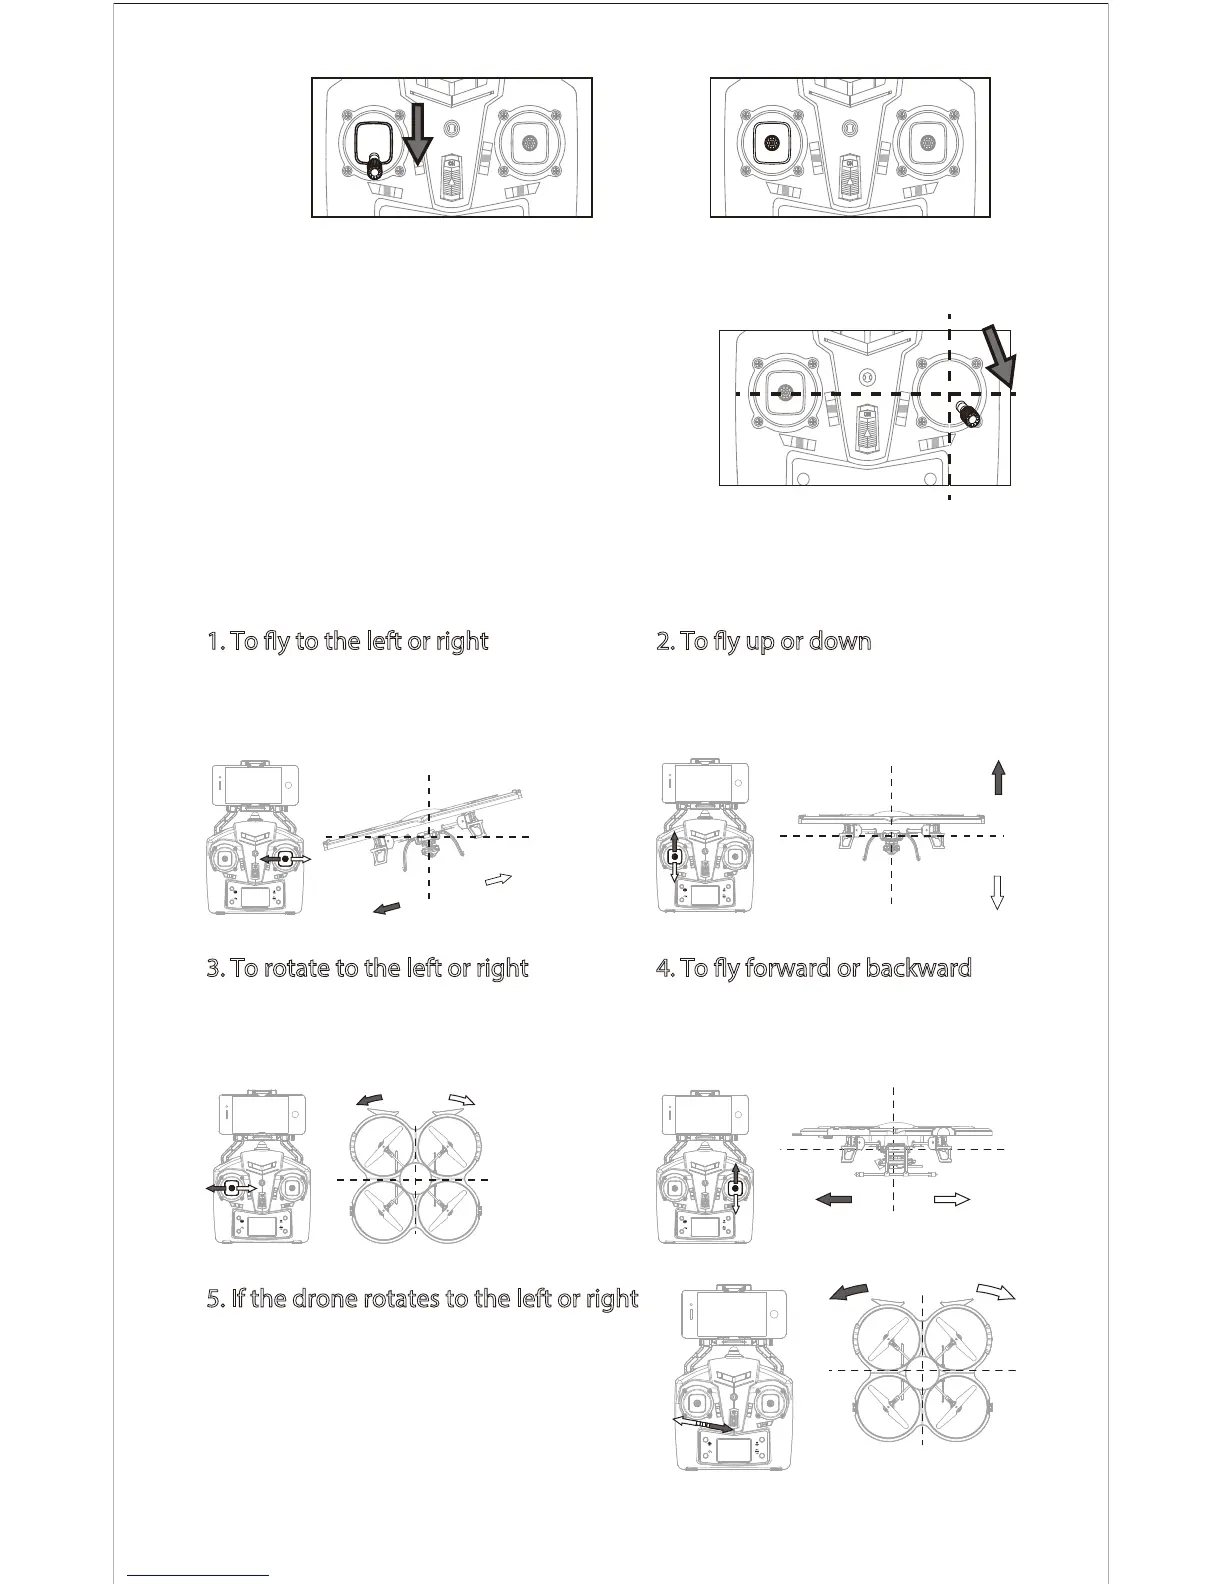
Push the Left Stick up to y the
drone up, and pull the Left Stick
down to y the drone down.
Move the Right Stick to the left to y the
drone to the left, and move the Right Stick
to the right to y the drone to the right.
1. To y to the left or right
2. To y up or down
4. To y forward or backward3. To rotate to the left or right
Move the Left Stick to the left to rotate the
drone to the left, and move the Left Stick
to the right to rotate the drone to the right.
5. If the drone rotates to the left or right
Move the Left / Right Rudder Trimmer to
the right till balance if the drone rotates to
the left, and move the Left / Right Rudder
Trimmer to the left till balance if the the
drone rotates to the right.
Push the Right Stick up to y the
drone forward, and pull the Right
Stick down to y the drone backward.
Forward Backward
Picture 11
Picture 9 Picture 10
Rotate left Rotate right
 Loading...